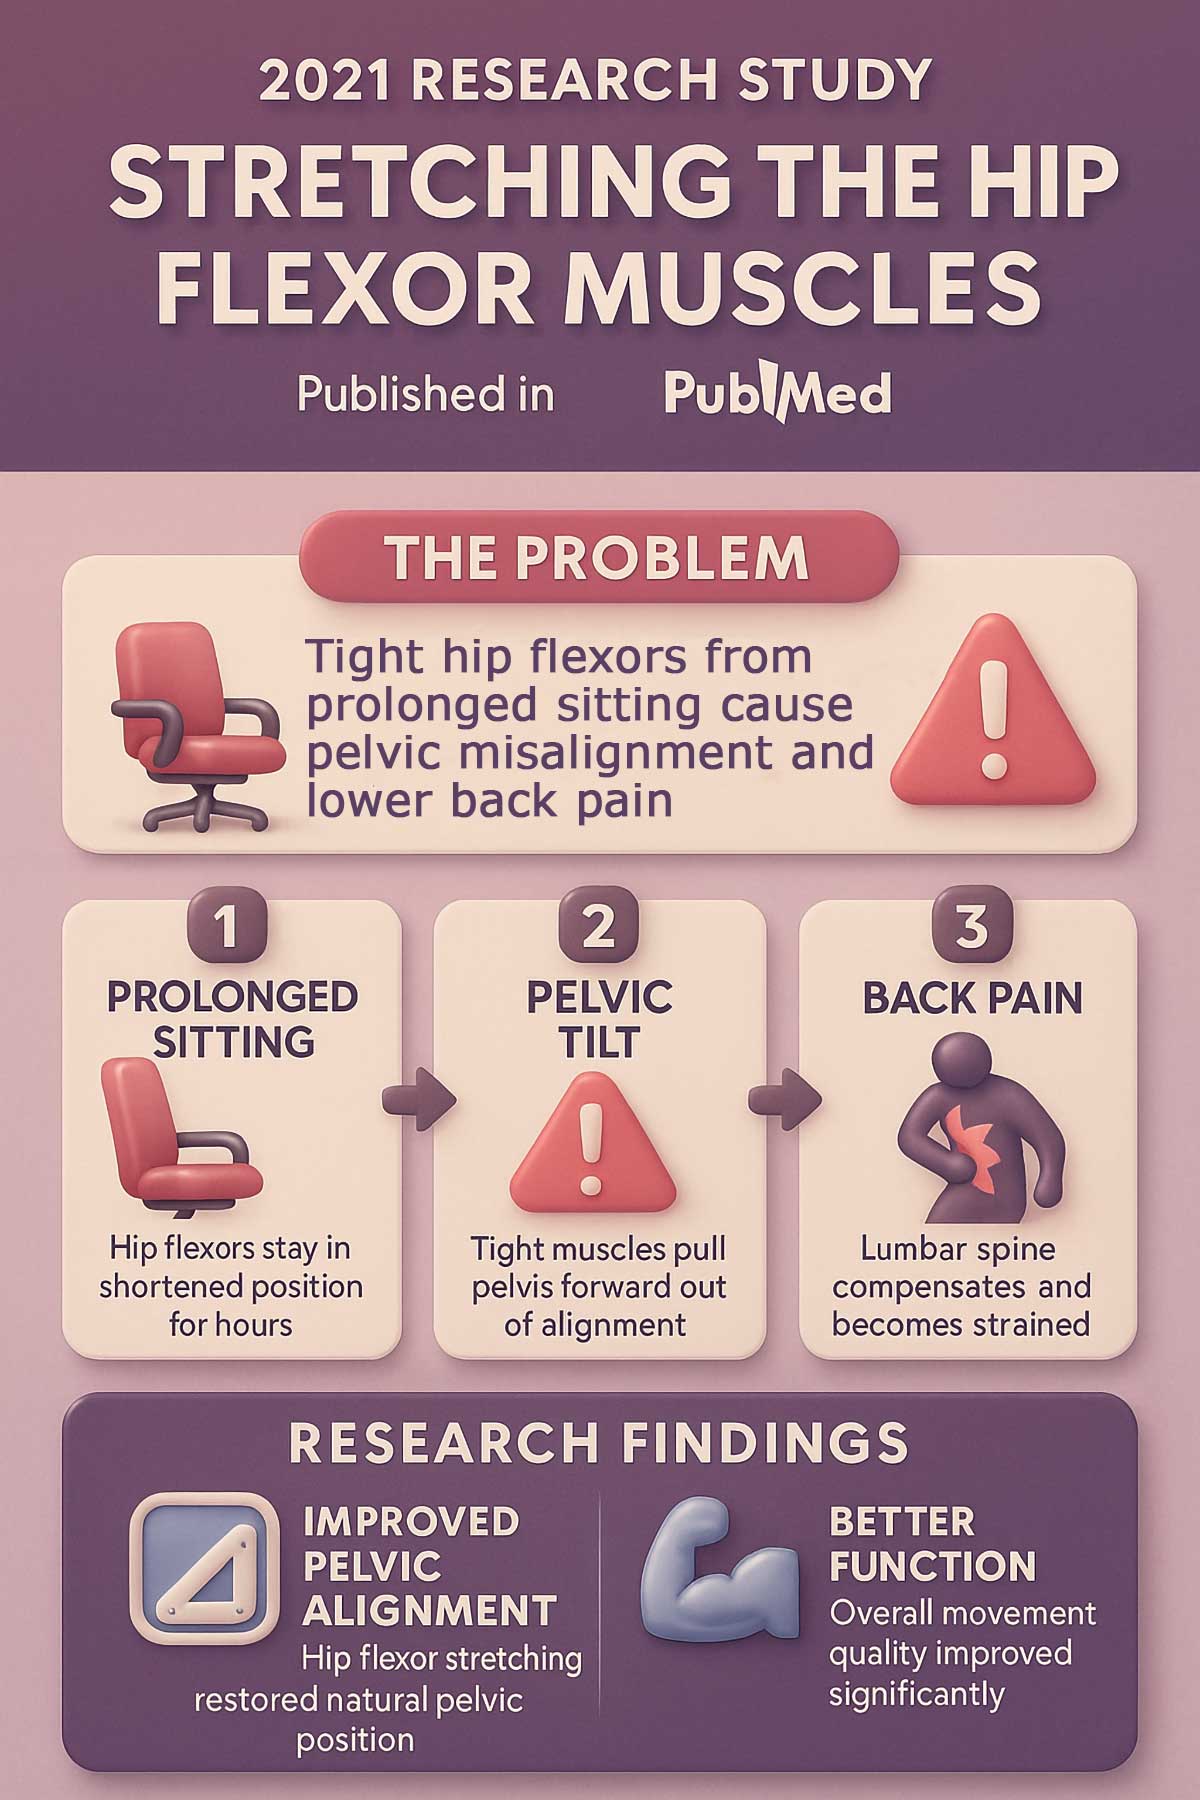
Here’s what’s happening inside your body when you sit at your desk for hours. Your hip flexors—the muscles at the front of your hips—stay in a shortened position. The main culprit is a muscle called the iliopsoas. It runs from your lower spine through your pelvis to your thigh bone. After hours of sitting, this muscle tightens up and pulls your pelvis forward. This creates something called an anterior pelvic tilt, which means your pelvis tips forward and makes your lower back arch too much.
That forward tilt puts stress on your lower spine. Your back muscles have to work overtime to keep you upright. The result? Pain, stiffness, and a body that feels like it’s fighting against itself.
The numbers tell a sobering story. Office workers sit an average of 10 to 12 hours per day when you factor in commute time and evening relaxation. That’s more than half your waking hours in a position that shortens and weakens your hip flexors.
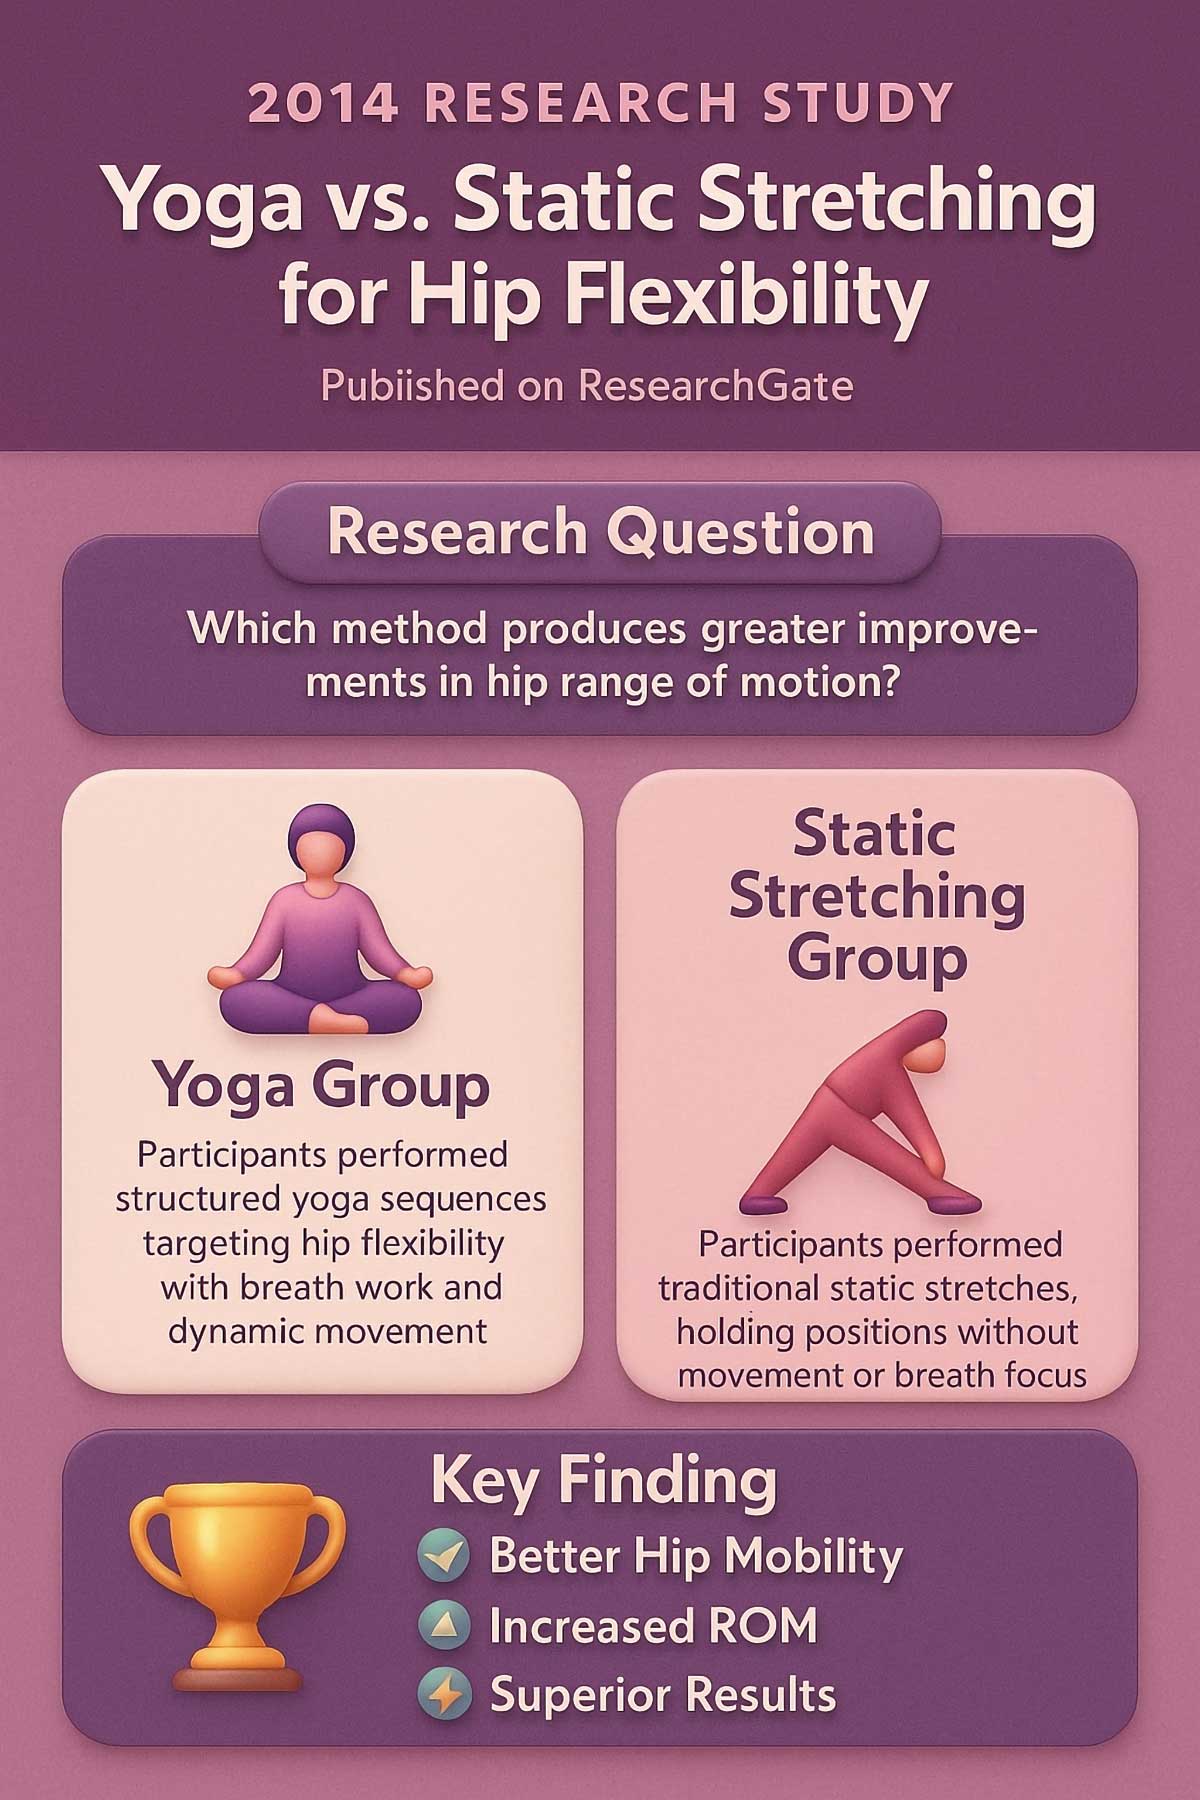
The good news is that a short, targeted yoga routine can reverse this damage. A 2014 study published on ResearchGate compared yoga to static stretching for hip flexibility. The researchers found that yoga produced greater gains in hip range of motion than basic static stretching alone.
I’m going to share a 12-minute, 7-pose sequence. It’s designed to unlock tight hips and take the pressure off your lower back. You don’t need any fancy equipment. Just a yoga mat and 12 minutes of your day.
What Are Hip Flexors? A Simple Anatomy Lesson
Before we get into the poses, let’s talk about what hip flexors actually are. Understanding this will help you get more from each stretch.
Your hip flexors are a group of muscles that bring your knee toward your chest. Think of them like rubber bands connecting your spine and pelvis to your thigh bones. The three main players are:
The Iliopsoas: This is the strongest hip flexor. It has two parts—the psoas major and the iliacus. The psoas starts at your lower spine, and the iliacus starts at your pelvis. They join together and attach to your inner thigh bone. When these muscles are working properly, they help you walk, run, and climb stairs. When they’re tight, they pull your pelvis out of alignment.
The Rectus Femoris: This muscle is part of your quadriceps group on the front of your thigh. It crosses both your hip and knee joints. That means it helps flex your hip and extend your knee. Because it crosses two joints, it gets especially tight from prolonged sitting.
The Tensor Fasciae Latae (TFL): This small muscle sits on the outer part of your hip. It helps stabilize your pelvis when you walk. When your hip flexors are tight, the TFL often compensates and becomes overworked.
When these muscles work correctly, they create smooth, pain-free movement. When they’re stuck in a shortened position from sitting, they create a chain reaction. Your pelvis tilts forward. Your lower back arches too much. Your glutes can’t fire properly because the tight hip flexors inhibit them. Your back muscles strain to hold you upright. The end result is pain and dysfunction.
Why a 12-Minute Yoga Routine Works: The Science of Releasing Your Hips
You might wonder if 12 minutes can really make a difference. The answer is yes, but only if you do it daily.
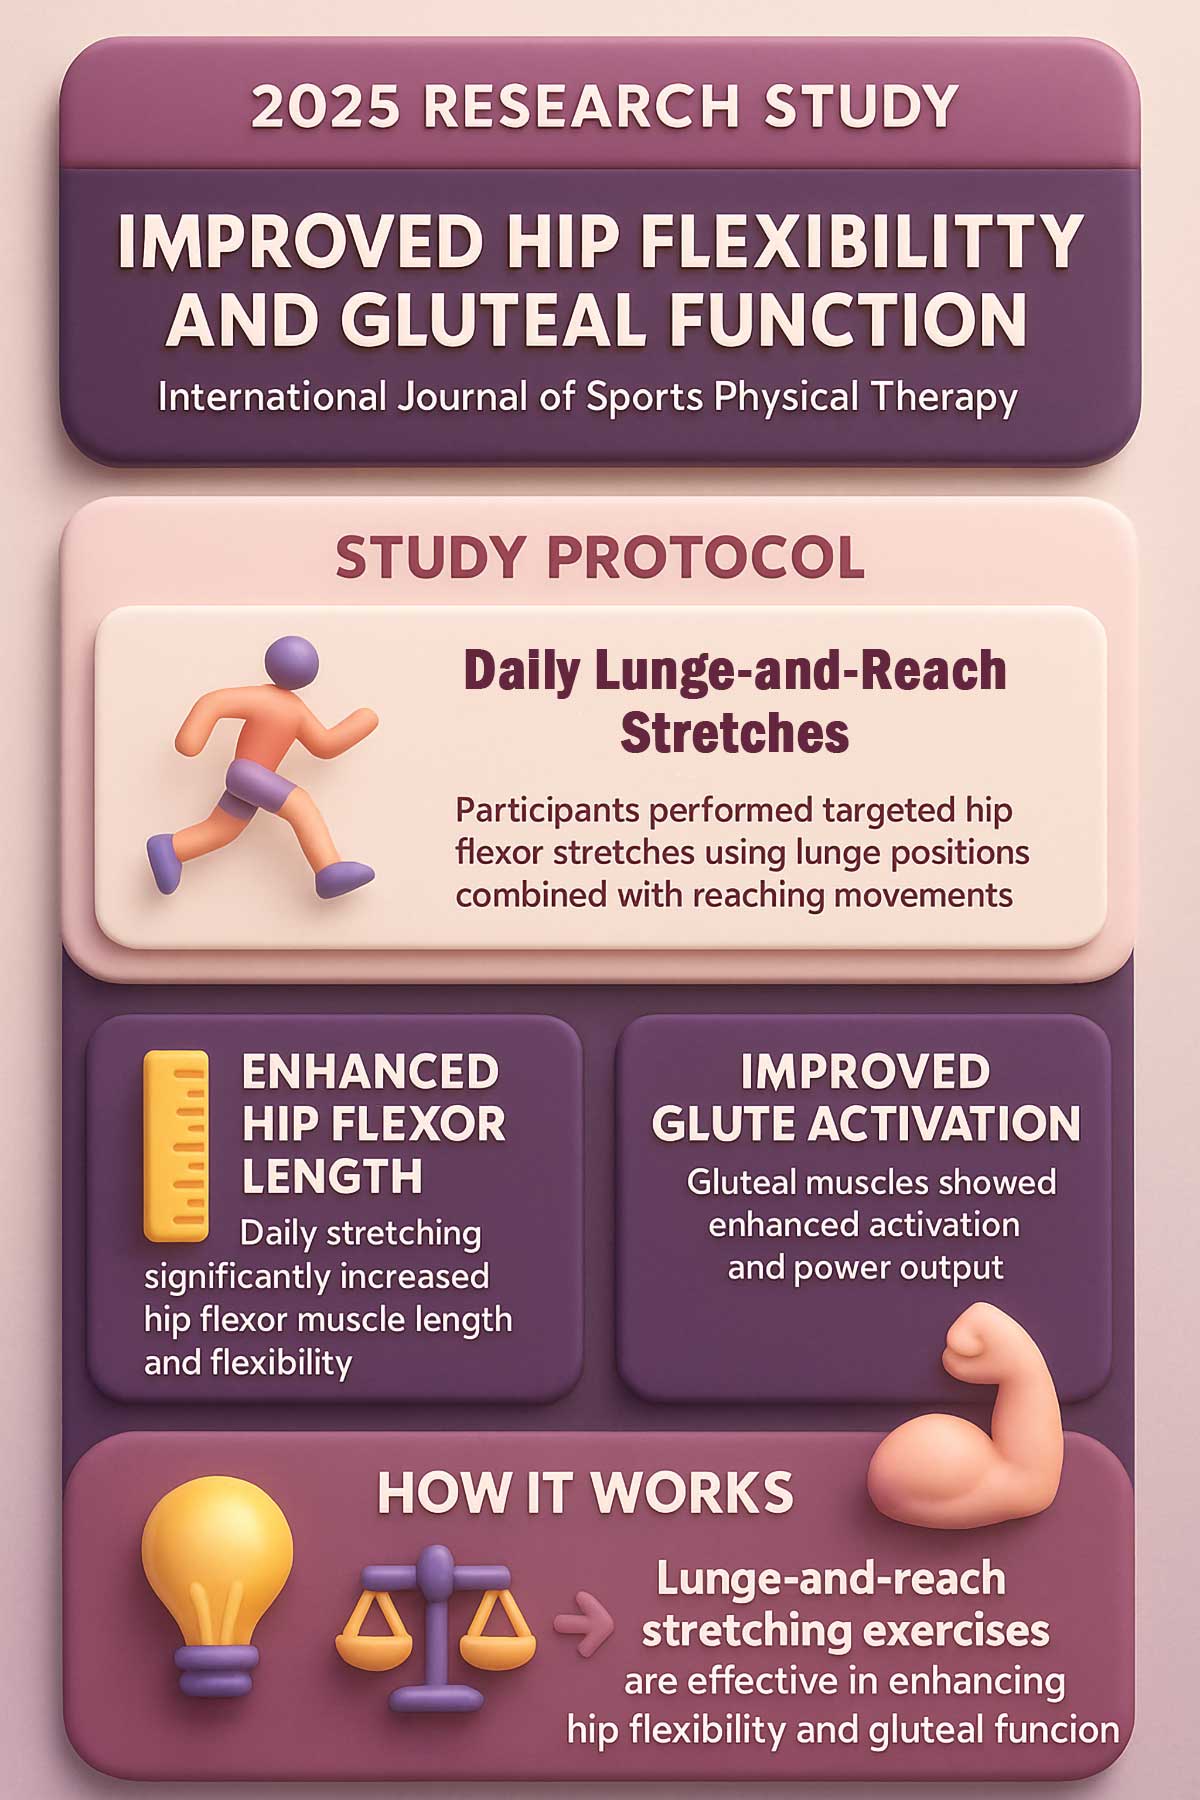
A 2025 study published in the International Journal of Sports Physical Therapy examined daily lunge-and-reach stretches for office workers. The results were clear. Participants who performed daily hip flexor stretches showed enhanced hip flexor length and improved glute activation. That last part is huge. When your hip flexors are tight, your glutes can’t fire properly. They’re the muscles that power your hips and support your pelvis. If they’re weak or shut off, your back takes the hit.
This happens because of something called reciprocal inhibition. When one muscle group is tight and overactive, the opposite muscle group becomes weak and underactive. Tight hip flexors inhibit your glutes. Weak glutes force your lower back muscles to work harder during every activity—walking, standing, even just maintaining your posture.
Short, consistent sessions work better than long, sporadic ones. Your muscles adapt to what you do every day. If you sit for eight hours, they learn to stay short. If you stretch for 12 minutes, they learn to lengthen and relax.
Here’s why holding each pose for 60 to 90 seconds matters. Your muscles have something called a stretch reflex. When you first stretch a muscle, it contracts to protect itself from injury. After about 20 to 30 seconds, this reflex relaxes. That’s when the real lengthening happens. Holding poses for 60 seconds or more allows your nervous system to register the new length as safe. Over time, your baseline flexibility improves.
This routine does more than just stretch. It also wakes up your glutes. That combo—releasing the front and strengthening the back—is what creates lasting change. Your posture improves. Your back pain fades. Your body starts to feel normal again.
Signs Your Hip Flexors Are Too Tight
Not sure if tight hip flexors are your problem? Take this quick self assessment quiz.
Props You’ll Need (and Budget-Friendly Alternatives)
You don’t need to spend money on fancy yoga gear. Here’s what helps, along with what you can use if you don’t want to buy anything.
| Recommended Prop | Purpose | Budget Alternative |
|---|---|---|
| Yoga mat | Cushioning and grip for your knees and hands | Thick towel, carpet, or folded blanket |
| Yoga block | Support in bridge pose and modifications | Stack of hardcover books or firm pillow |
| Bolster | Support in reclined hero pose | Two or three rolled blankets or couch cushions |
| Yoga strap | Assistance in happy baby pose | Belt, bathrobe tie, or resistance band |
| Blanket | Padding under your knee in lunges | Any folded towel or extra yoga mat |
Start with what you have. You can always add props later if you want them.
Your 12-Minute Hip & Back Relief Routine
Here’s how to do this routine. Perform each pose for the time listed. Move slowly from one pose to the next. Don’t rush. The whole sequence takes about 12 minutes.
Before you start, do two to three minutes of gentle movement. Try cat-cow stretches on all fours, or stand and make slow circles with your hips. This warms up your joints and prepares your muscles for deeper stretching.
During each pose, focus on your breath. Breathe in slowly through your nose for four counts. Breathe out through your nose for six counts. This longer exhale signals your nervous system to relax. Your muscles will release more easily.
Grab your yoga mat and any props you’re using. Let’s get started.
The 7 Essential Yoga Poses
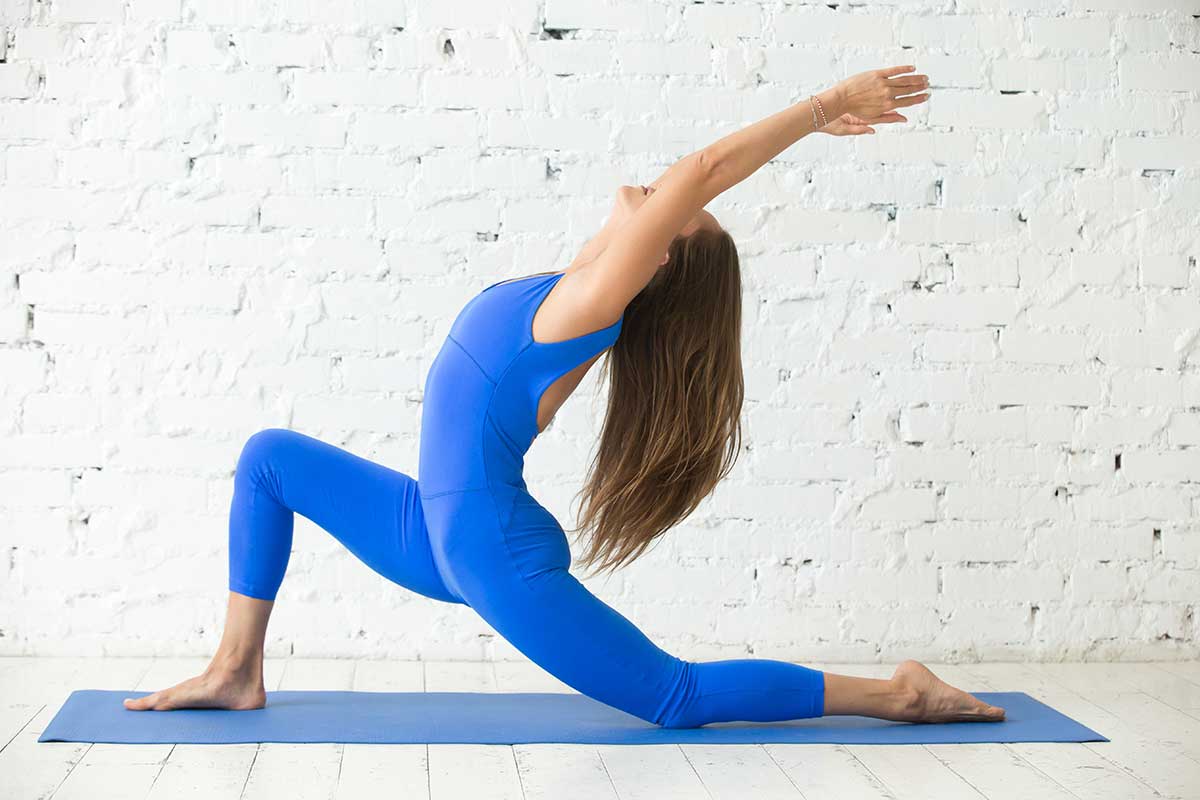
Pose 1: Low Lunge (Anjaneyasana)
Time: 60 seconds per side
What You’ll Feel: A deep stretch in the front of your hip and thigh on your back leg. You might also feel your hip flexors releasing as you hold the pose.
Why It’s in This Routine: This is the foundation. Low Lunge directly stretches the psoas, the main hip flexor that gets short and tight from sitting. This pose addresses the root cause of sitting-related back pain.
How to Do It:
- Start on all fours with your hands under your shoulders.
- Step your right foot forward between your hands.
- Lower your left knee to the mat.
- Slide your left knee back until you feel a stretch in the front of your left hip.
- Keep your right knee over your right ankle, not pushing past it.
- Lift your chest and bring your hands to your front thigh.
- Gently press your hips forward to deepen the stretch.
- Keep your core engaged to protect your lower back.
- Hold for 60 seconds, breathing deeply.
- Switch sides and repeat.
Make It Easier: Place a folded blanket under your back knee if it feels uncomfortable on the mat. Keep your hands on the floor for better balance.
Make It Harder: Raise your arms overhead and lean back slightly. This increases the stretch in your hip flexor and adds a gentle backbend.
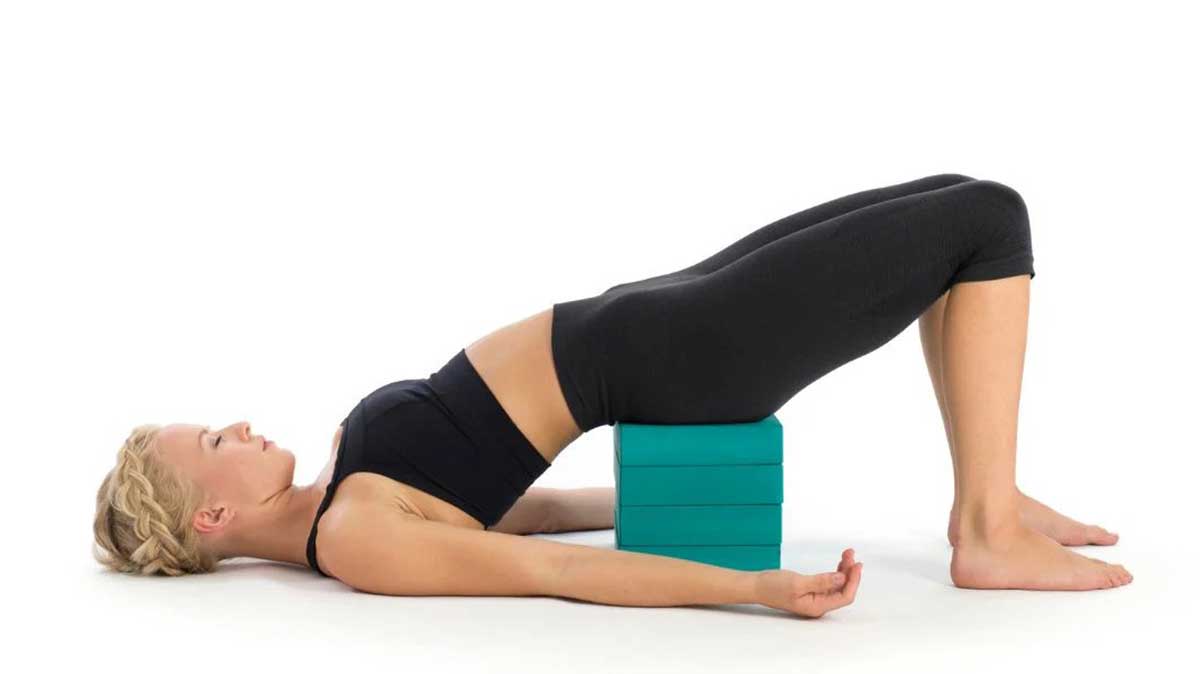
Pose 2: Supported Bridge Pose (Setu Bandhasana with Block)
Time: 90 seconds
What You’ll Feel: A gentle opening in the front of your hips and a pleasant engagement in your glutes. Your lower back should feel supported, not strained.
Why It’s in This Routine: Bridge Pose opens your hips while turning on your glutes. This helps fix that forward pelvic tilt caused by sitting. Using a block lets you hold the pose longer without straining. The passive nature of this supported version allows your hip flexors to release while your glutes learn to activate properly.
How to Do It:
- Lie on your back with your knees bent and feet flat on the mat, hip-width apart.
- Place your arms by your sides, palms down.
- Press through your feet and lift your hips toward the ceiling.
- Slide a yoga block under your sacrum (the flat bone at the base of your spine, just above your tailbone).
- Rest your hips on the block and let it support your weight.
- Relax your arms and breathe deeply.
- Focus on letting your hip flexors release while your glutes stay gently engaged.
- Hold for 90 seconds.
- To come out, press into your feet, lift your hips slightly, remove the block, and lower down slowly.
Make It Easier: Start with the block on its lowest height. Let your body fully relax onto the block.
Make It Harder: Try the medium or highest setting on your block. You can also try lifting one leg at a time, extending it toward the ceiling while keeping your hips level on the block.
Pose 3: Reclined Hero Pose (Supta Virasana) – Modified
Time: 90 seconds
What You’ll Feel: An intense stretch in your quadriceps and the front of your hips. This might be the strongest sensation in the whole routine.
Why It’s in This Routine: This gives an intense stretch to your quadriceps, especially the rectus femoris. That muscle is both a knee flexor and a hip flexor. It gets incredibly tight from hours of sitting with your knees bent. Releasing this muscle takes pressure off your kneecaps and helps your hips extend more freely.
How to Do It:
- Kneel on your mat with your knees together and your feet slightly wider than hip-width.
- Point your toes straight back.
- Sit down between your feet. (If this is too much, sit on a block or folded blanket.)
- Once you’re comfortable sitting, slowly lower yourself back onto your elbows.
- If comfortable and your knees don’t hurt, lower all the way down to your back.
- Let your arms rest by your sides or overhead.
- Keep breathing deeply. Don’t hold your breath even though the stretch is intense.
- Hold for 90 seconds.
- To come out, press up onto your elbows first, then sit up slowly. Extend your legs and shake them out.
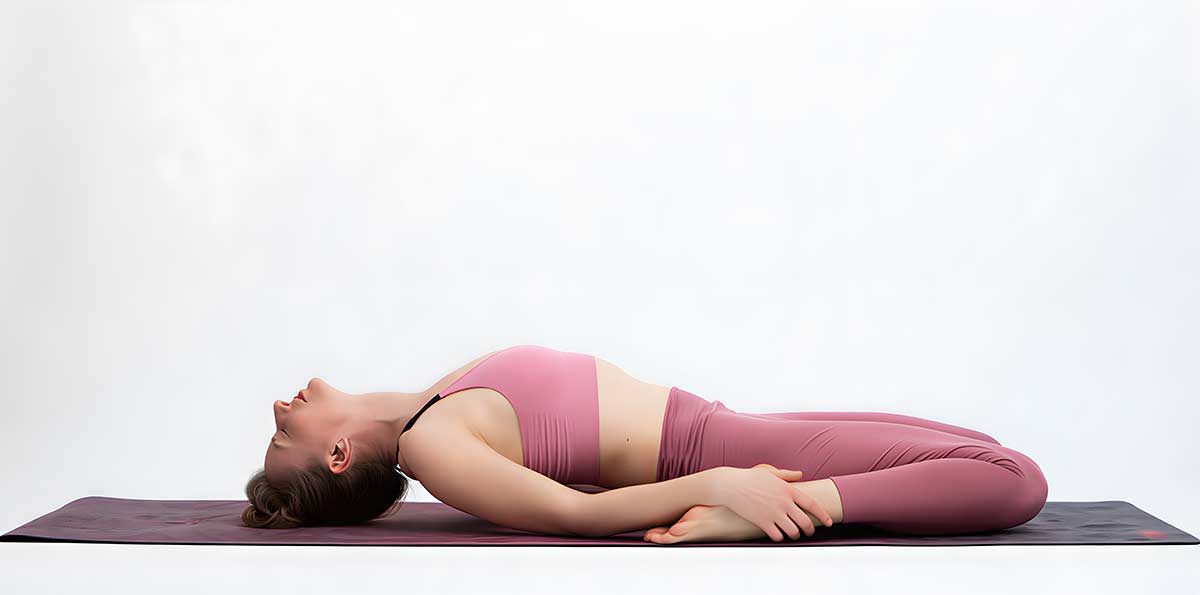
Make It Easier: If lying all the way back is too intense, stack pillows or bolsters behind you and recline onto them instead. You’ll still get a solid stretch without overdoing it. You can also do one leg at a time, keeping the other leg extended in front of you.
Make It Harder: Try the full expression of the pose with no props. You can also bring your arms overhead and clasp opposite elbows.
Pose 4: Pigeon Pose (Eka Pada Rajakapotasana)
Time: 60 seconds per side
What You’ll Feel: A deep stretch in your outer hip and glute area. You might feel this near your hip joint or deeper in your buttock.
Why It’s in This Routine: Pigeon targets the deep hip rotators like the piriformis. These muscles can get tight and press on your sciatic nerve. That causes pain that shoots down your leg. Sitting makes it worse because these muscles stay contracted to stabilize your pelvis on the chair. Releasing them often provides immediate relief from sciatic-type pain.
How to Do It:
- Start on all fours.
- Bring your right knee forward toward your right wrist.
- Slide your right foot toward your left wrist, so your shin is at an angle (anywhere from 45 degrees to parallel to the front of your mat).
- Extend your left leg straight back behind you. Your left hip points down toward the mat.
- Square your hips toward the front of the mat as much as possible.
- Walk your hands forward and lower your chest toward the mat.
- Rest on your forearms or fold all the way forward, resting your forehead on your hands or the mat.
- Hold for 60 seconds, breathing deeply into the tight spots.
- Walk your hands back, lift your torso, and switch sides.
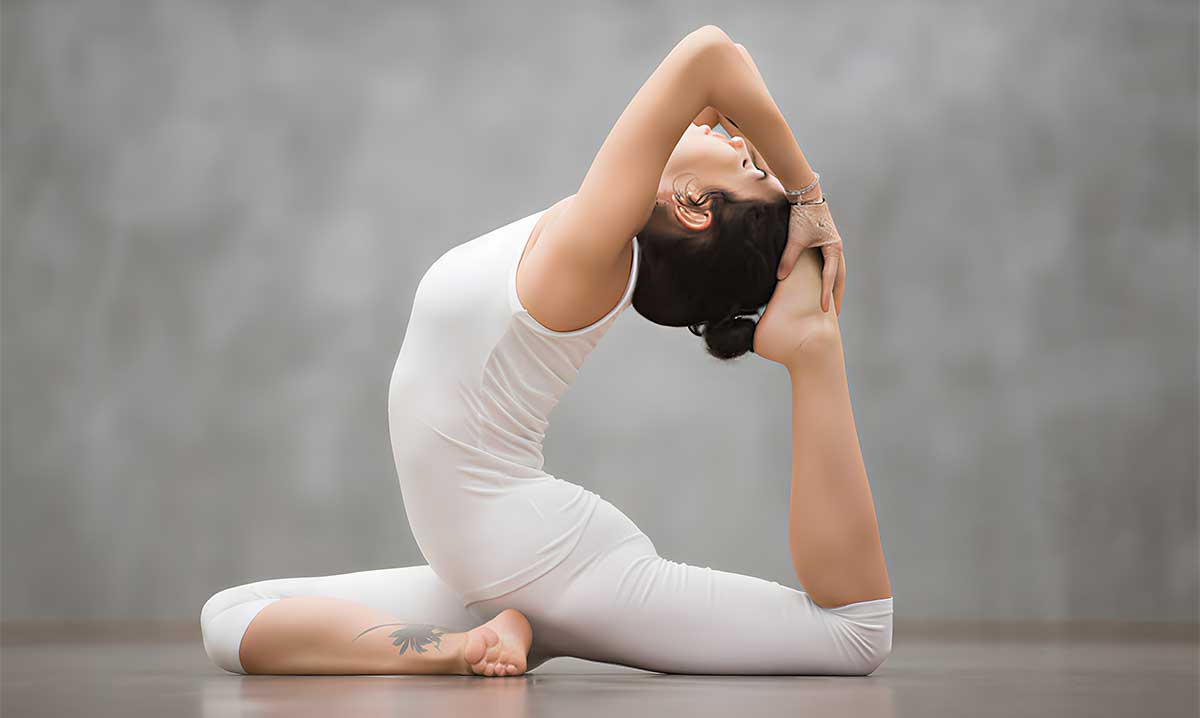
Make It Easier: If your right hip doesn’t reach the mat, place a folded blanket or block under it. This keeps your hips level and prevents strain on your knee. You can also keep your torso more upright instead of folding forward.
Make It Harder: Bring your front shin more parallel to the front edge of your mat. Fold deeper, walking your hands farther forward.
Pose 5: Lizard Pose (Utthan Pristhasana)
Time: 60 seconds per side
What You’ll Feel: A deeper stretch than Low Lunge, hitting your hip flexor and inner groin from a new angle.
Why It’s in This Routine: Lizard is a deeper lunge variation. It opens your hip flexors and inner groin from a different angle than Low Lunge. This targets areas that the standard lunge doesn’t fully reach, particularly the adductor muscles on your inner thigh. When these muscles are tight, they restrict hip mobility and contribute to poor movement patterns.
How to Do It:
- Start in Low Lunge with your right foot forward.
- Walk your right foot to the right side of the mat, outside your right hand.
- Lower down onto your forearms. (If that’s too intense, stay on your hands.)
- You can keep your left knee on the mat or lift it for more intensity.
- Press your right knee gently out to the side with your right elbow.
- Keep your back straight and your chest open.
- Hold for 60 seconds, breathing deeply.
- Come back up to your hands, step back, and switch sides.
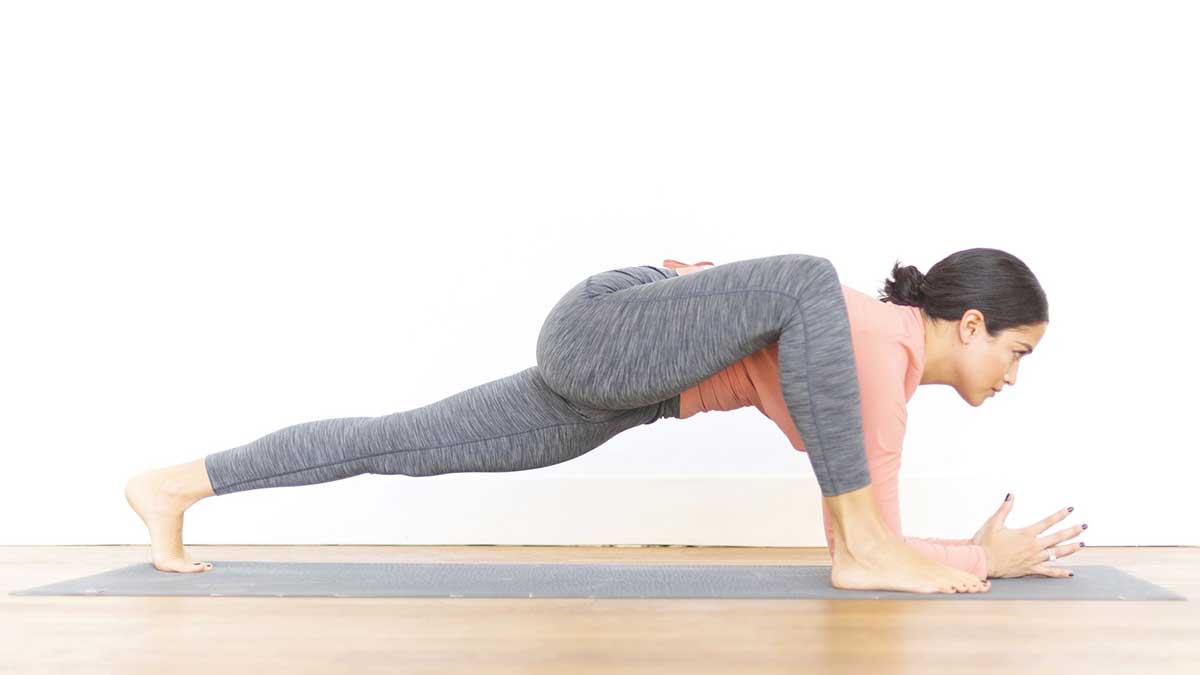
Make It Easier: Stay on your hands instead of lowering to your forearms. Keep your back knee down on a folded blanket.
Make It Harder: Lift your back knee off the mat and press back through your heel. You can also try the full expression by opening into a twist, bringing one hand to the inside of your front foot.
Pose 6: Happy Baby Pose (Ananda Balasana)
Time: 60 seconds
What You’ll Feel: A gentle opening in your inner thighs and groin, along with a release in your lower back and hips.
Why It’s in This Routine: Happy Baby opens your inner thighs and groin while gently releasing your lower back. It feels great after all those lunges and gives your spine a chance to decompress. This pose also creates traction in your hip joints, which can provide relief if your hips feel compressed from sitting.
How to Do It:
- Lie on your back.
- Bend your knees into your chest.
- Grab the outsides of your feet with your hands. (If you can’t reach, hold the backs of your thighs or loop a strap around your feet.)
- Pull your knees down toward your armpits, not toward your chest.
- Keep your lower back pressed into the mat.
- Flex your feet and press them up into your hands to create resistance.
- Rock gently side to side if that feels good. This massages your lower back.
- Hold for 60 seconds.
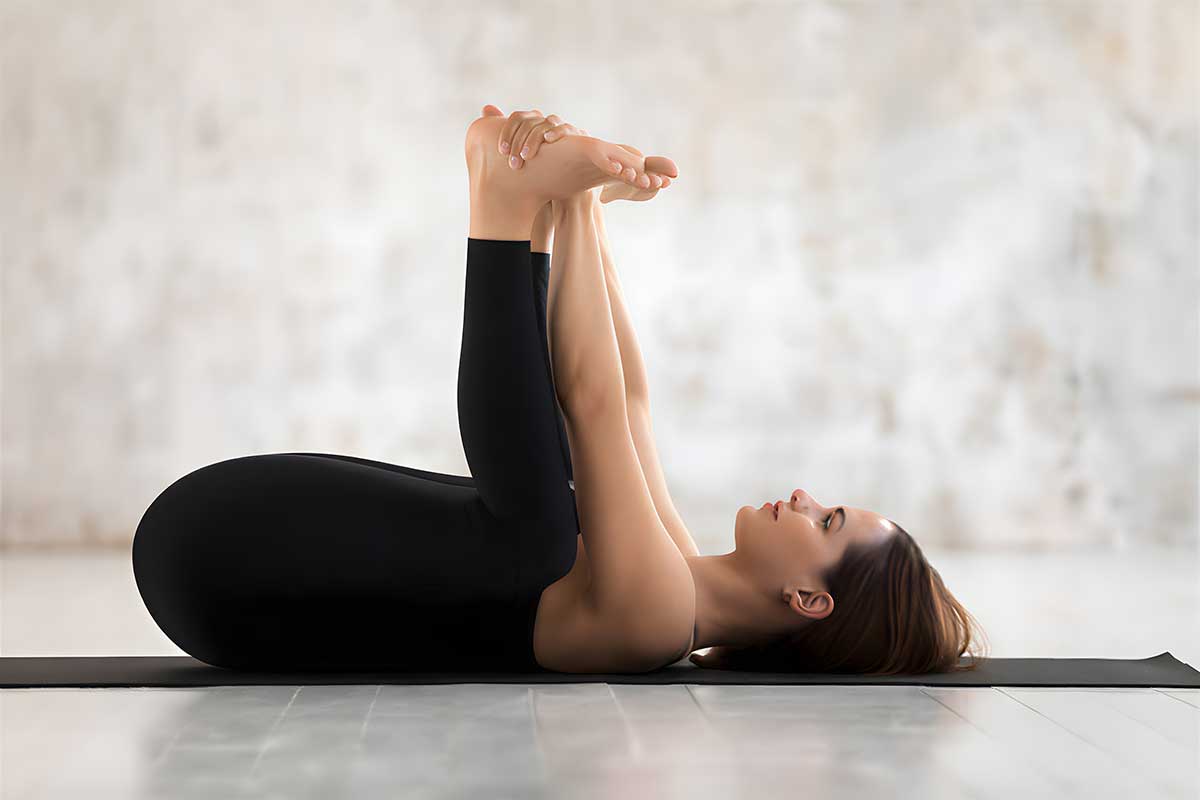
Make It Easier: Hold behind your thighs instead of your feet. You can also do one leg at a time, keeping the other foot on the floor.
Make It Harder: Try to straighten your legs more, moving toward a split-like position while still holding your feet.
Pose 7: Reclined Knee-to-Chest Wind-Relieving Pose (Apanasana)
Time: 60 seconds
What You’ll Feel: A gentle compression in your lower belly and a soft release in your lower back.
Why It’s in This Routine: This is the perfect way to finish. It neutralizes your spine after all the backbends and hip openers. It gently massages your abdominal organs and releases any leftover tension in your lower back. This pose allows your pelvis to return to a neutral position and helps integrate all the work you just did.
How to Do It:
- Lie on your back.
- Hug both knees into your chest.
- Wrap your arms around your shins, or interlace your fingers on top of your shins.
- Gently pull your knees closer to your chest with each exhale.
- Rock slowly side to side or stay still.
- Let your shoulders relax away from your ears.
- Hold for 60 seconds, taking slow, deep breaths.
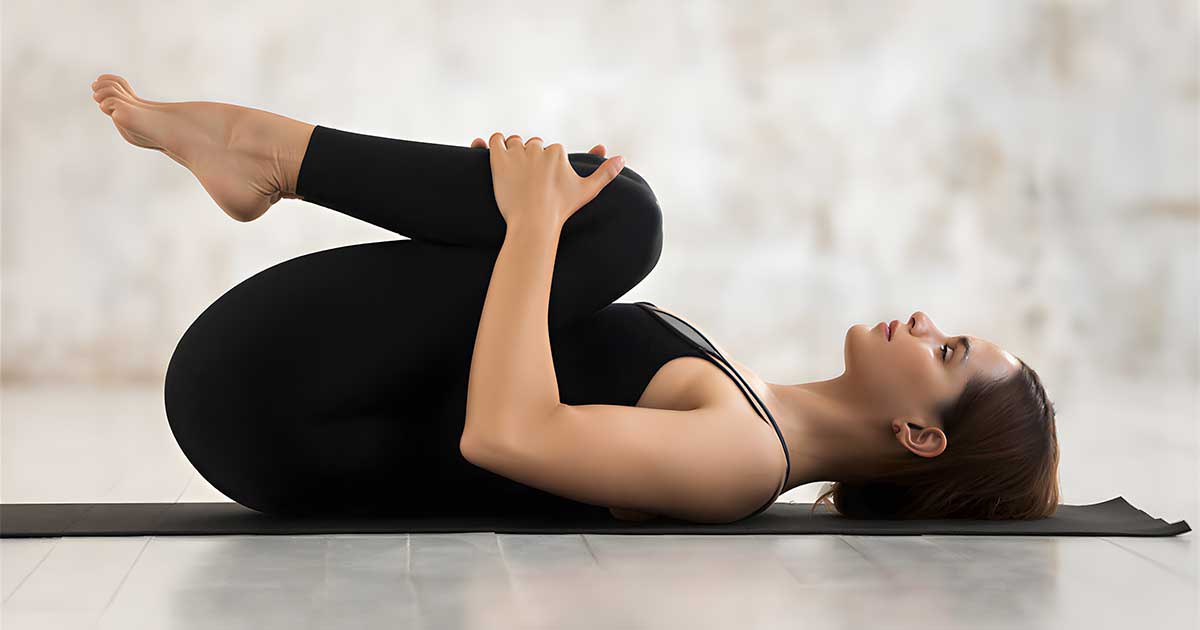
Make It Easier: Keep your head on the mat if lifting it strains your neck.
Make It Harder: Lift your head and bring your nose toward your knees. This engages your core and increases the stretch in your lower back.
At-a-Glance Routine Summary
Here’s the complete routine in one quick reference table. Save this or screenshot it for easy access.
| Pose | Target Area | Duration | Difficulty |
|---|---|---|---|
| Low Lunge | Hip flexors, psoas | 60 sec/side | Beginner |
| Supported Bridge | Glutes, front hips | 90 seconds | Beginner |
| Reclined Hero | Quadriceps, hip flexors | 90 seconds | Intermediate |
| Pigeon | Hip rotators, piriformis | 60 sec/side | Intermediate |
| Lizard | Deep hip flexors, groin | 60 sec/side | Intermediate |
| Happy Baby | Inner thighs, lower back | 60 seconds | Beginner |
| Knee-to-Chest | Lower back, spine | 60 seconds | Beginner |
| TOTAL | Full hip & back relief | 12 minutes | All levels |
Common Mistakes to Avoid
Even simple poses can cause problems if done incorrectly. Watch out for these common errors.
| Mistake | Why It’s Bad | Do This Instead |
|---|---|---|
| Forcing a stretch too quickly | Can cause muscle strains or tears | Ease into each pose gradually. Use props to support yourself. |
| Holding your breath | Tenses your muscles and prevents them from releasing | Breathe slowly and deeply. Count your breaths if it helps you focus. |
| Skipping the warm-up | Cold muscles don’t stretch well and are more prone to injury | Always do 2-3 minutes of gentle movement first. |
| Practicing on a full stomach | Can cause nausea and restricts your breathing | Wait at least 90 minutes after a large meal. A light snack 30 minutes before is fine. |
| Comparing yourself to others | Creates frustration and can push you to go too deep too fast | Focus on how your body feels, not how the pose looks. |
| Giving up after one week | Your body needs time to adapt. Changes don’t happen overnight. | Commit to 30 days before deciding if it’s working. Track your progress. |
| Bouncing in stretches | Can trigger the stretch reflex and cause injury | Hold each position still. Let gravity do the work. |
| Ignoring pain | Sharp pain is your body’s warning signal | Back off immediately if you feel sharp or shooting pain. Mild discomfort is okay. |
When Will I Feel Results?
Everyone’s body responds differently, but here’s a general timeline based on consistent daily practice.
| Timeframe | What to Expect |
|---|---|
| After 1 session | Immediate relief and reduced stiffness. You’ll stand up straighter. |
| After 3 days | Easier to get into poses. Less morning stiffness when you first wake up. |
| After 1 week | Noticeable improvement in back pain. You’ll stop reaching for your lower back. |
| After 2 weeks | Better posture throughout the day. Increased hip mobility in daily activities. |
| After 1 month | Significant reduction in sitting-related pain. You can sit longer without discomfort. |
| After 3 months | Long-term flexibility gains. Stronger glutes. Your body feels balanced and aligned. |
Keep in mind that these are averages. If you’re very tight, progress might be slower at first. If you’re already somewhat active, you might see results faster. The key is consistency. Research from 2021 examining hip flexor stretching programs showed that consistent stretching improved pelvic alignment and enhanced lumbar stability.
4 Micro-Habits to Keep Your Hips Happy at Work
Your 12-minute yoga routine will make a big difference. But you can do even more by changing a few habits during your workday. These take almost no time and provide immediate relief.
The 30-Minute Rule
Stand up and move every 30 minutes. Walk to the bathroom. Grab some water. Do anything that gets you out of your chair for at least 60 seconds. This breaks up the constant hip flexion that causes tightness.
Set a timer on your phone or use an app that reminds you to move. Your body needs these breaks more than your mind does. Even if you’re in the middle of something, stand up and walk in place for a minute. Your productivity will actually improve when you give your body regular movement breaks.
The Desk Stretch
You can stretch your hip flexors right at your desk. Stand up. Step your right foot back into a lunge position. Keep your back heel off the ground. Press your hips forward gently while keeping your core engaged. Hold for 20 seconds, then switch sides. Do this two or three times throughout the day.
This mini-stretch takes less than a minute but reminds your hip flexors not to lock up in a shortened position.
Standing Figure-4 Stretch
This is a desk-friendly version of Pigeon Pose. Stand facing your desk. Place your right ankle on your left thigh, just above your knee. Your right knee points out to the side. Bend your standing leg slightly and push your hips back like you’re sitting in a chair. Hold for 30 seconds, then switch sides.
This targets those deep hip rotators without needing to get on the floor.
Better Sitting Posture
Try to sit with your hips slightly higher than your knees. This keeps your pelvis in a more neutral position. If your chair adjusts, raise it up a bit. If not, try a small cushion on your seat.
Don’t cross your legs. It twists your pelvis and puts extra stress on one side of your back. Keep both feet flat on the floor. If your feet don’t reach, use a footrest or a stack of books.
Every 10 minutes, do a quick posture check. Sit bones on the chair. Spine long. Shoulders relaxed. This takes five seconds but makes a huge difference over the course of a day.
Conclusion
Here’s the truth. One session of this routine will feel good. But lasting change comes from doing it every day.
Think of it like brushing your teeth. You do that for two minutes twice a day to prevent problems. This routine is 12 minutes once a day to prevent back pain. It’s a small investment that pays off big.
Your hip flexors didn’t get tight overnight. They won’t loosen up overnight either. But if you stick with this routine for two weeks, you’ll notice a difference. Your back will feel less achy. You’ll stand up from your desk without wincing. Your body will move more freely.
The research backs this up. Studies consistently show that daily stretching programs produce better results than programs done just a few times per week. Your body adapts to what you do most often. Make hip mobility a daily priority, and your body will respond.
Here’s your action plan. Pick a time that works for you. Maybe it’s first thing in the morning before your shower. Maybe it’s right after work before dinner. Maybe it’s before bed to help you sleep better. Choose a time and protect it. Put it in your calendar. Set a reminder. Treat it like any other important appointment.
Medical Disclaimer: This article is for informational purposes only and does not replace professional medical advice. If you experience persistent or severe back pain, consult a healthcare provider before starting any new exercise routine.
FAQs
How long does it take to loosen tight hip flexors?
With daily practice, most people notice improvement within one to two weeks. You’ll feel less stiff when you stand up from sitting. Significant flexibility gains typically occur after four to six weeks of consistent stretching. Your nervous system needs time to accept the new muscle length as safe and normal.
Can tight hip flexors cause knee pain?
Yes, absolutely. Tight hip flexors alter your walking pattern and put extra stress on your knees. When your hips can’t extend properly, your knees have to compensate. This creates abnormal forces on your kneecaps and can lead to pain. Addressing hip tightness often reduces knee discomfort within a few weeks.
Should I do this routine before or after work?
Both work well, and you can choose based on your schedule. Morning practice prepares your body for the day ahead. It counteracts the stiffness from sleeping and sets you up for better posture. Evening practice releases accumulated tension from sitting all day. Many people find evening practice helps them sleep better because their bodies are more relaxed. Try both and see what feels better for you.
Is it normal to feel sore after these stretches?
Mild soreness is normal for the first few days as your muscles adapt to the new stimulus. You might feel it most in your hip flexors and inner thighs. This should feel like a dull ache, not sharp pain. Sharp pain is not normal. If you experience sharp, shooting, or intense pain, ease up on the intensity of your stretches. Use more props and don’t push as deep.
Can I do this routine if I have sciatica?
Many of these poses help with sciatic pain, especially Pigeon Pose and the lunges. But you should consult your doctor first, particularly if your sciatica is severe. Avoid poses that cause sharp shooting pain down your leg. If a pose makes your symptoms worse, skip it and focus on the others. Some people find that modifying Pigeon Pose by doing the Figure-4 stretch on their back is more comfortable.
Do I need to be flexible to start yoga for hip flexors?
No, absolutely not. These poses are specifically designed for tight hips. That’s the whole point. If you were already flexible, you wouldn’t need this routine. Use all the modifications provided. Start with props under your hips and knees. You’ll build flexibility over time. Your flexibility after 30 days will be much better than day one.
What if I can’t hold a pose for the full time?
Start with whatever you can do. If 60 seconds feels too long, start with 30 seconds. Add five to ten seconds each week. Your stretch tolerance will improve. The key is consistency, not perfection. Doing the routine with shorter holds is better than skipping it because the times seem too long.
Can I do this routine every day?
Yes, daily practice is ideal for this type of stretching. These are gentle, passive stretches that don’t create the kind of muscle damage that requires rest days. Your nervous system and connective tissue adapt best to daily input. Think of it like brushing your teeth—you do it every day to prevent problems.


