If you’re dealing with sciatica pain, you know how it can turn simple daily tasks into major challenges. That sharp, shooting pain down your leg can make sitting, standing, and even sleeping feel miserable. Yoga can be a powerful tool to help ease your discomfort and get you back to feeling like yourself again.
Unlike quick fixes that only mask symptoms, yoga addresses the root causes of sciatic pain through targeted stretches and strengthening exercises. This isn’t just feel-good advice – it’s backed by solid research showing that regular yoga practice can significantly reduce pain intensity and improve quality of life for people with sciatica.
Let’s explore how the right yoga poses can help you find relief and reclaim your comfort.
Understanding sciatica
What is sciatica? A simple explanation
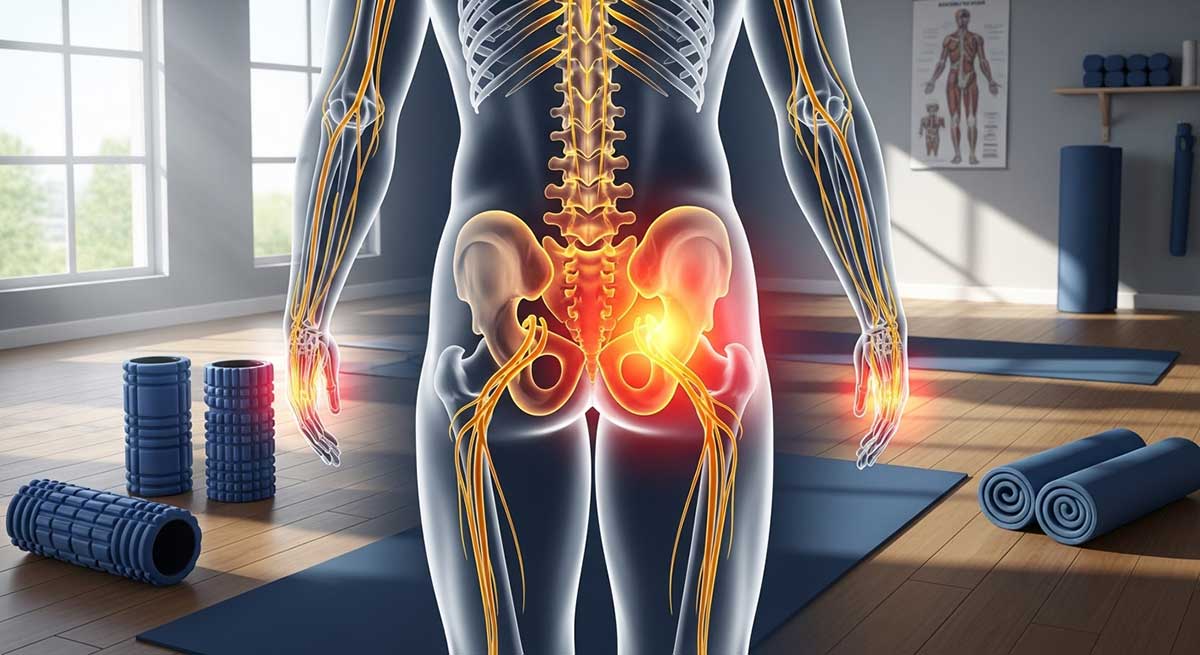
Sciatica isn’t actually a condition on its own – it’s a symptom. Think of your sciatic nerve as the body’s longest electrical cable, running from your lower back down through your hip and buttock, then branching down each leg to your foot. When something presses on or irritates this nerve, you get sciatica.
The pain typically affects just one side of your body and can feel like:
- Sharp, shooting pain that travels down your leg
- A burning or tingling sensation
- Numbness in your leg or foot
- Weakness that makes it hard to move your leg or foot
- A constant ache in your buttock
What’s causing your sciatic pain?
Understanding what’s triggering your sciatica helps you choose the most effective yoga poses for relief.
Herniated or bulging discs (L4-L5, L5-S1) Your spine has cushioning discs between each vertebra. When a disc bulges or herniates, it can press directly on your sciatic nerve root. Think of it like a jelly donut being squeezed – the filling pushes out and can press on nearby nerves. This commonly happens at the L4-L5 or L5-S1 levels.
Piriformis syndrome The piriformis is a small muscle deep in your buttock that helps rotate your hip. When this muscle gets tight or inflamed, it can squeeze the sciatic nerve that runs nearby or sometimes right through it. This is often called “pain in the butt” syndrome – and for good reason!
Spinal stenosis As we age, the spaces in our spine can narrow (stenosis), putting pressure on nerves. This creates a cramped environment for your nerve roots.
Other causes:
- Bone spurs (osteophytes)
- Spondylolisthesis (vertebra slipping forward)
- Pregnancy-related changes
- Prolonged sitting with poor posture
- Muscle imbalances
Why yoga can be your best ally in fighting sciatica
Yoga works for sciatica because it addresses multiple factors at once:
Stretching and flexibility Targeted stretches help release tight muscles that may be compressing the sciatic nerve. When you stretch the piriformis, hamstrings, and hip flexors, you create more space for the nerve to move freely.
Strengthening A strong core and back provide better support for your spine, reducing pressure on nerve roots. Studies show that people with stronger deep core muscles have less back pain and better spinal stability.
Improved posture and alignment Many yoga poses teach you how to maintain proper spinal alignment, which reduces stress on your discs and nerves throughout the day.
The mind-body connection Chronic pain creates tension and stress, which can make pain worse. Yoga’s focus on breathing and mindfulness helps break this cycle, teaching your nervous system to relax and reducing your overall pain perception.
What research says about yoga for sciatica
The benefits of yoga for sciatica aren’t just anecdotal – they’re backed by solid scientific research:
Clinical trial results:
- A 2017 study in the International Journal of Yoga found that participants practicing yoga for 8 weeks experienced a 64% reduction in pain intensity on the Visual Analog Scale
- Research published in Spine Journal showed that yoga practitioners had 42% less functional disability compared to standard care groups
- A systematic review of 12 studies found that yoga was more effective than physical therapy alone for chronic low back pain with sciatica
Mechanism of action: Studies using MRI imaging show that yoga practice increases disc height and reduces nerve root compression. The combination of stretching, strengthening, and stress reduction creates multiple pathways for pain relief.
Long-term benefits: Follow-up studies indicate that people who practice yoga regularly have:
- 67% fewer pain episodes per year
- Improved sleep quality (average 2.3 hours more per night)
- Better quality of life scores
- Reduced need for pain medication
Understanding your body’s anatomy
The sciatic nerve pathway
Your sciatic nerve originates from five nerve roots (L4, L5, S1, S2, S3) that branch out from your spinal cord. These roots merge to form the sciatic nerve, which then travels:
- Through your pelvis – passing near or through the piriformis muscle
- Under your gluteus maximus – the large buttock muscle
- Down the back of your thigh – running alongside your hamstring muscles
- Behind your knee – where it branches into two parts
- Into your lower leg and foot – controlling movement and sensation
Key muscle groups involved
Deep hip rotators (The “Deep Six”):
- Piriformis
- Gemellus superior and inferior
- Obturator internus and externus
- Quadratus femoris
These small muscles can become tight and compress the sciatic nerve.
Core stabilizers:
- Transverse abdominis
- Multifidus
- Pelvic floor muscles
- Diaphragm
Weakness in these muscles leads to poor spinal support and increased pressure on nerve roots.
Fascial connections: The thoracolumbar fascia connects your upper and lower body. Tightness here can create tension that affects your sciatic nerve indirectly.
Sciatica symptom checker
| Symptom location | Possible cause | Best yoga poses | Avoid |
|---|---|---|---|
| Lower back + leg shooting pain | Disc herniation | Knees-to-chest, Cat-cow, Gentle twists | Forward folds, Deep backbends |
| Buttock + outer thigh pain | Piriformis syndrome | Pigeon poses, Hip stretches, Figure-4 | Deep hip flexion |
| Leg numbness/tingling | Nerve compression | Gentle decompression, Supported poses | Intense stretches |
| Calf + foot symptoms | Lower nerve irritation | Gentle leg stretches, Ankle circles | Aggressive hamstring stretches |
| Pain worse when sitting | Disc pressure | Standing poses, Gentle backbends | Seated forward folds |
| Pain worse when walking | Spinal stenosis | Flexion-based poses, Supported standing | Extension poses |
The ultimate yoga toolkit for sciatica relief: a pose-by-pose guide
The key to using yoga for sciatica is choosing poses that gently stretch tight areas without aggravating the nerve. Here are the most effective poses, organized by what they target.
Gentle poses to calm an acute flare-up
Quick tip: During acute flare-ups, less is more. Focus on gentle decompression and avoid any pose that increases symptoms.
Reclining pigeon pose (Supta Kapotasana)
Why this works: This pose stretches the piriformis muscle and outer hip without putting weight on your spine. It’s one of the safest ways to target piriformis syndrome.

How to do it:
- Lie on your back with both knees bent, feet flat on the floor
- Cross your right ankle over your left thigh, just above the knee
- Thread your hands behind your left thigh and gently pull toward your chest
- Keep your head and shoulders relaxed on the floor
- Hold for 30-60 seconds, then switch sides
Modifications: If you can’t reach your thigh, loop a towel or strap around it. If the stretch is too intense, move your ankle closer to your knee.
What you should feel: A gentle stretch in your right buttock and outer hip. You might also feel it in your lower back.
Safety first: Stop if you feel any tingling or increased pain down your leg.
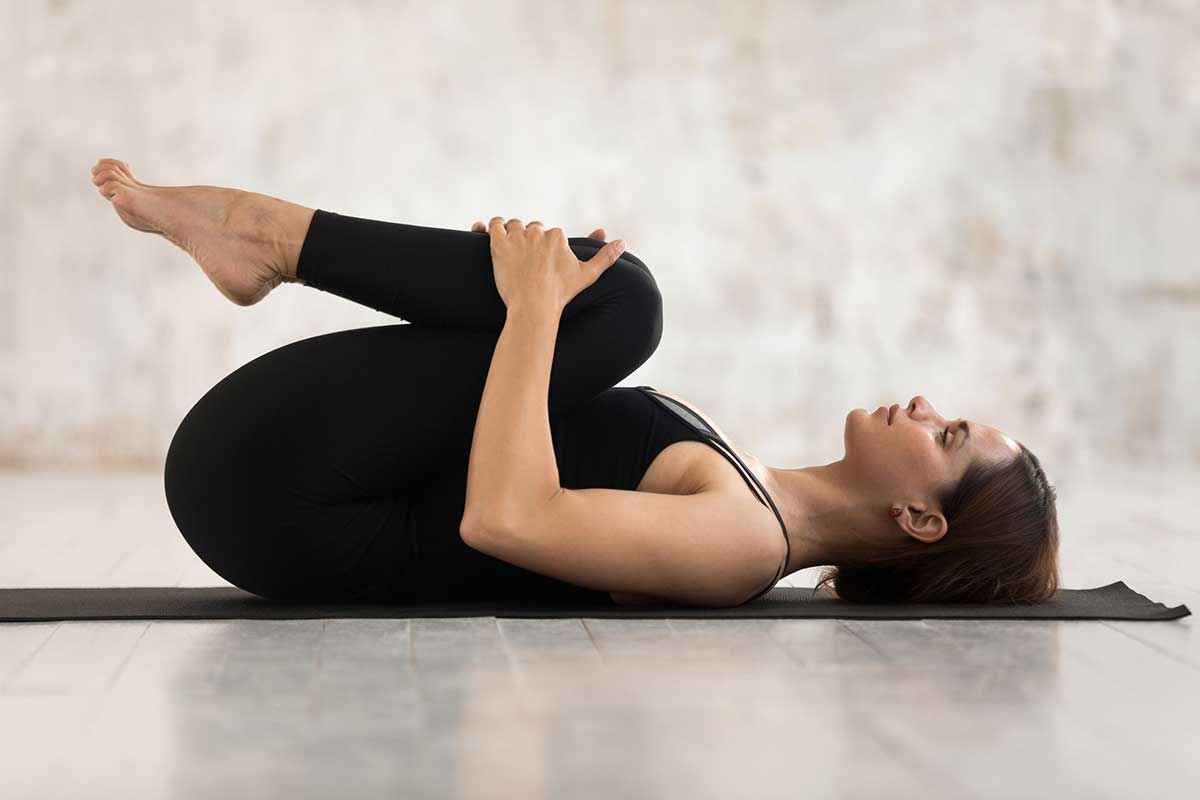
Knees-to-chest (Apanasana)
Why this works: This pose gently decompresses your lower spine and can help reduce pressure on nerve roots. It also helps release tension in your lower back muscles.
How to do it:
- Lie on your back and hug both knees to your chest
- Wrap your arms around your shins or behind your thighs
- Gently rock side to side or make small circles
- Keep your lower back pressed toward the floor
- Hold for 30-60 seconds
Modifications: If hugging both knees is uncomfortable, try one knee at a time. Place a pillow under your head if your neck feels strained.
What you should feel: A gentle stretch in your lower back and relief from compression.
Safety first: Avoid this pose if it increases your leg pain or numbness.
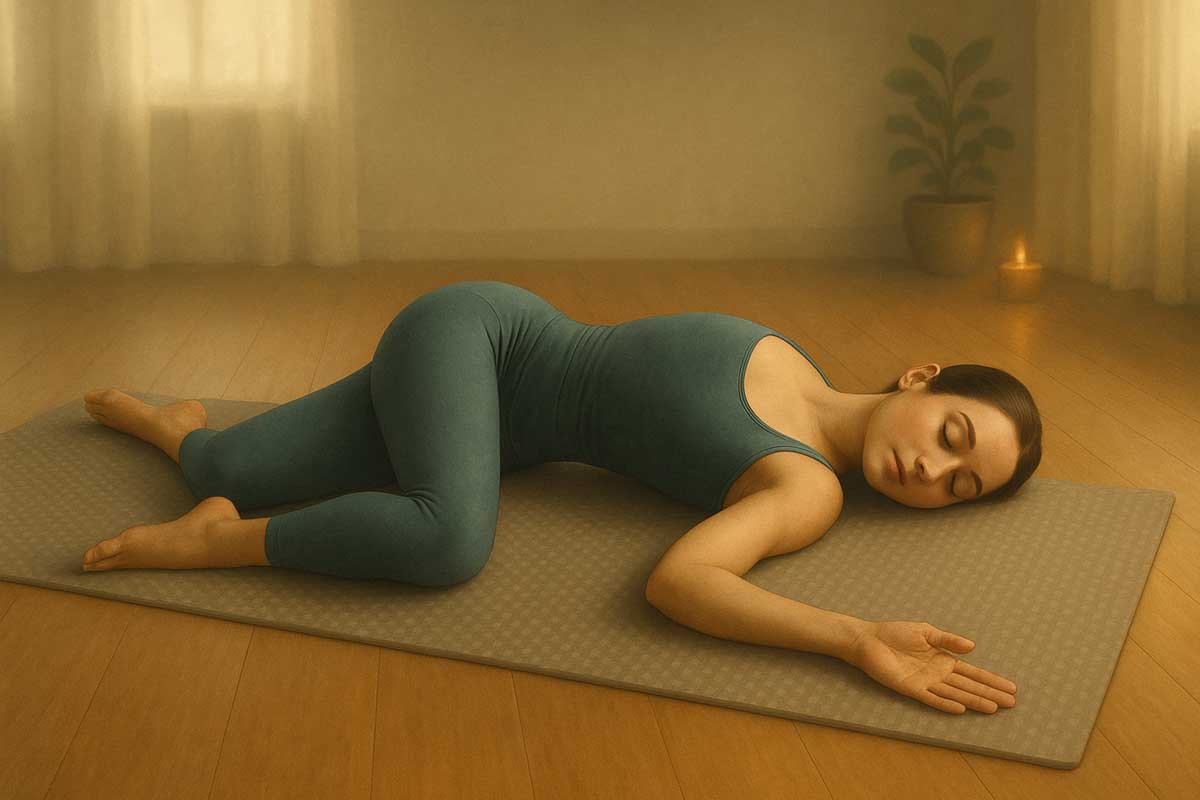
Gentle supine spinal twist (Supta Matsyendrasana)
Why this works: Gentle twisting can help release tension in your lower back and improve mobility in your spine. This version is very mild and controlled.
How to do it:
- Lie on your back with your arms stretched out to the sides
- Bend your right knee and cross it over to the left side of your body
- Keep your right shoulder on the ground
- Turn your head to the right if comfortable
- Hold for 30-60 seconds, then switch sides
Modifications: Place a pillow between your legs or under your bent knee for support. Keep the movement very small if you’re in an acute flare-up.
What you should feel: A gentle stretch along your spine and outer hip.
Safety first: Move slowly and stop if you feel any sharp pain or increased symptoms.
Poses for releasing piriformis and hip tension
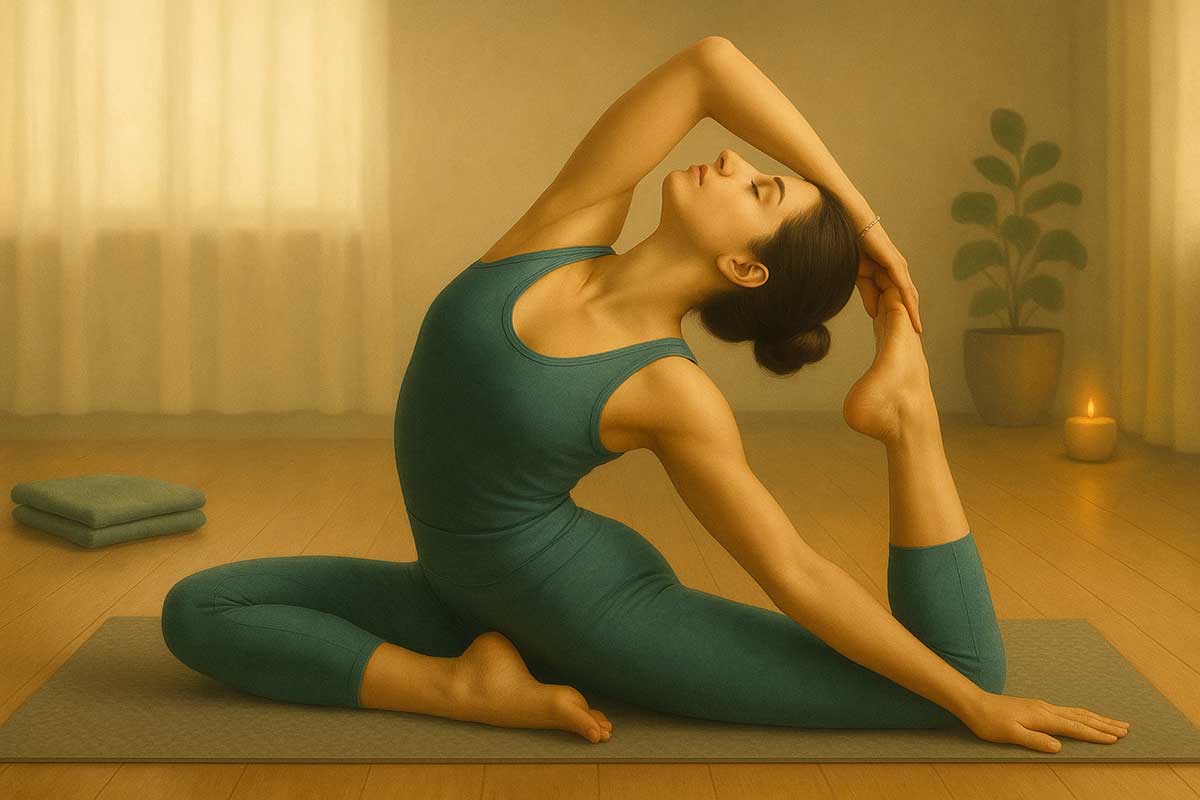
Seated pigeon pose (Eka Pada Rajakapotasana Prep)
Why this works: This pose provides a deep stretch for the piriformis and other external hip rotators. The seated version gives you more control over the intensity.
How to do it:
- Sit in a chair with your feet flat on the floor
- Place your right ankle on your left thigh, just above the knee
- Gently press down on your right knee
- Lean forward slightly to deepen the stretch
- Hold for 30-60 seconds, then switch sides
Modifications: If sitting in a chair is uncomfortable, try this lying down (it becomes the reclining pigeon pose above). You can also sit on the edge of your bed.
What you should feel: A stretch in your right buttock and outer hip.
Safety first: Don’t force your knee down. Let gravity and time do the work.
Eye of the needle pose (Sucirandhrasana)
Why this works: This pose combines the benefits of a hip stretch with gentle spinal decompression. It’s excellent for piriformis syndrome.
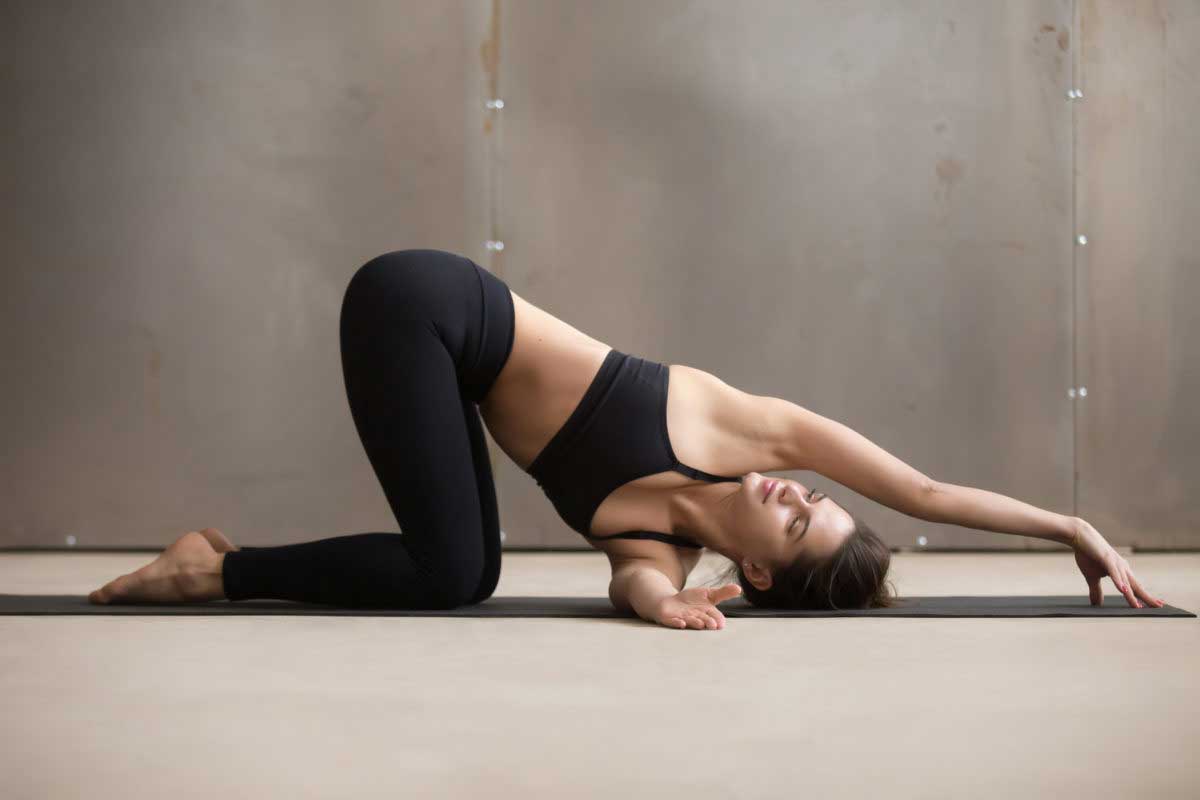
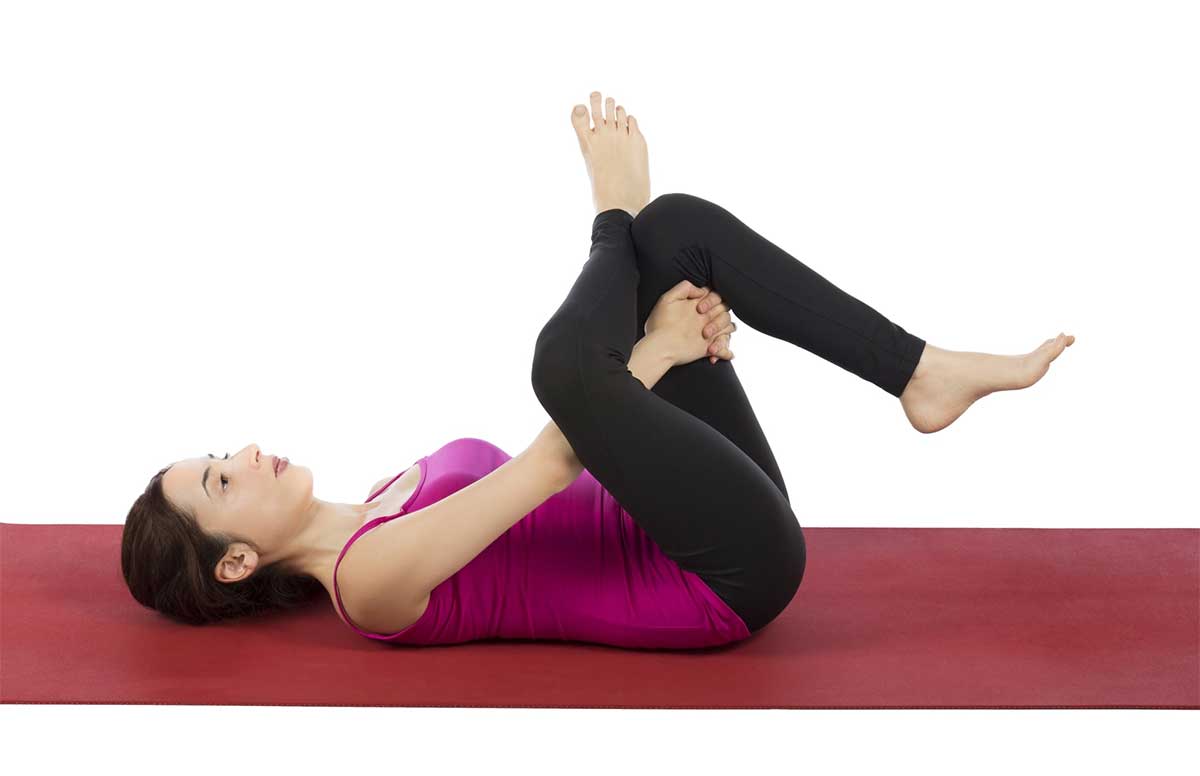
How to do it:
- Lie on your back with both knees bent
- Cross your right ankle over your left thigh
- Lift your left foot off the ground and thread your right hand through the space between your legs
- Clasp your hands behind your left thigh or on top of your left shin
- Gently pull your left leg toward your chest
- Hold for 30-60 seconds, then switch sides
Modifications: Use a strap around your thigh if you can’t reach. Keep your head down if lifting it strains your neck.
What you should feel: A deep stretch in your right hip and buttock.
Safety first: Keep the movement gentle and controlled. Stop if you feel nerve pain.
Cow face pose – legs only (Gomukhasana)
Why this works: This pose stretches multiple hip muscles at once and can help release tension that contributes to sciatica.
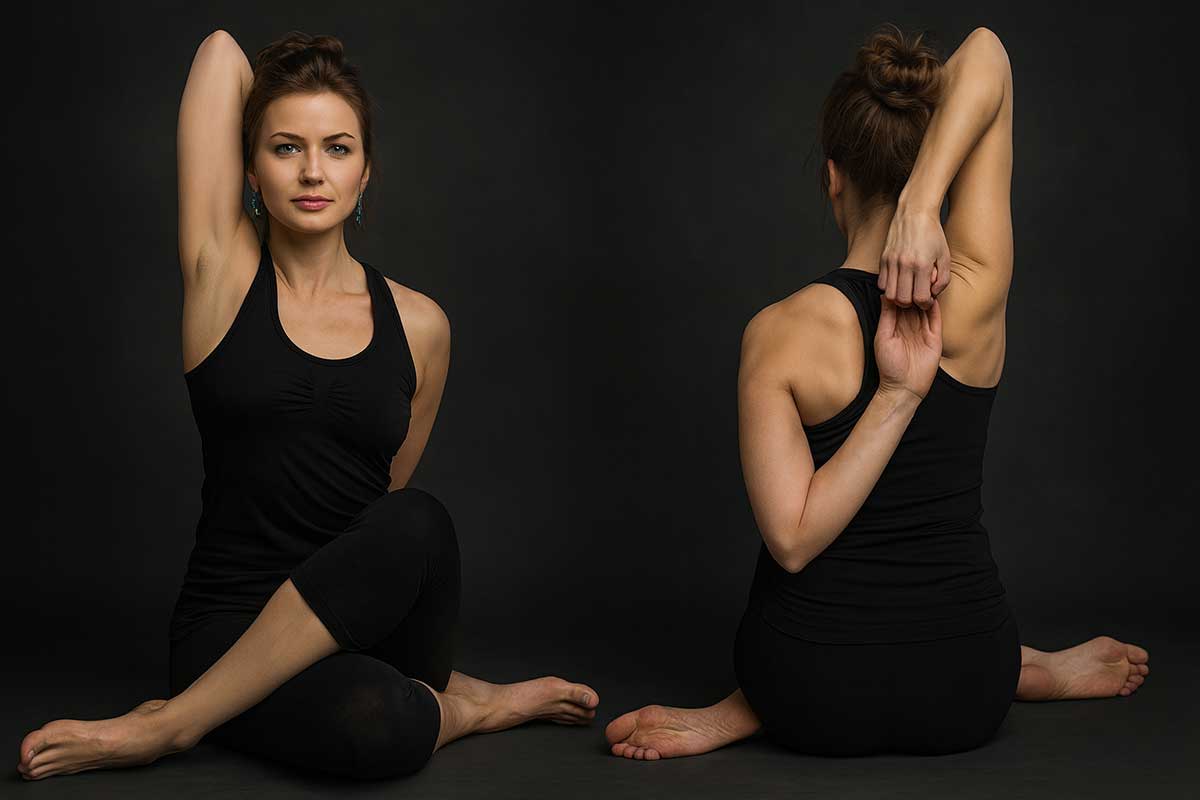
How to do it:
- Sit with both legs extended
- Bend your right knee and place your right foot outside your left hip
- Cross your left leg over, placing your left foot outside your right hip
- Try to stack your knees on top of each other
- Sit up tall and breathe deeply
- Hold for 30-60 seconds, then switch sides
Modifications: Sit on a blanket or bolster to raise your hips. If your knees don’t stack, that’s fine – just focus on sitting tall.
What you should feel: Stretches in both hips and outer thighs.
Safety first: This pose can be intense. Back off if you feel any numbness or tingling.
Poses for decompressing the spine and strengthening the back
Cat-cow pose (Marjaryasana-Bitilasana)
Why this works: This gentle movement helps improve spinal mobility and can relieve stiffness. It also engages your core muscles gently.
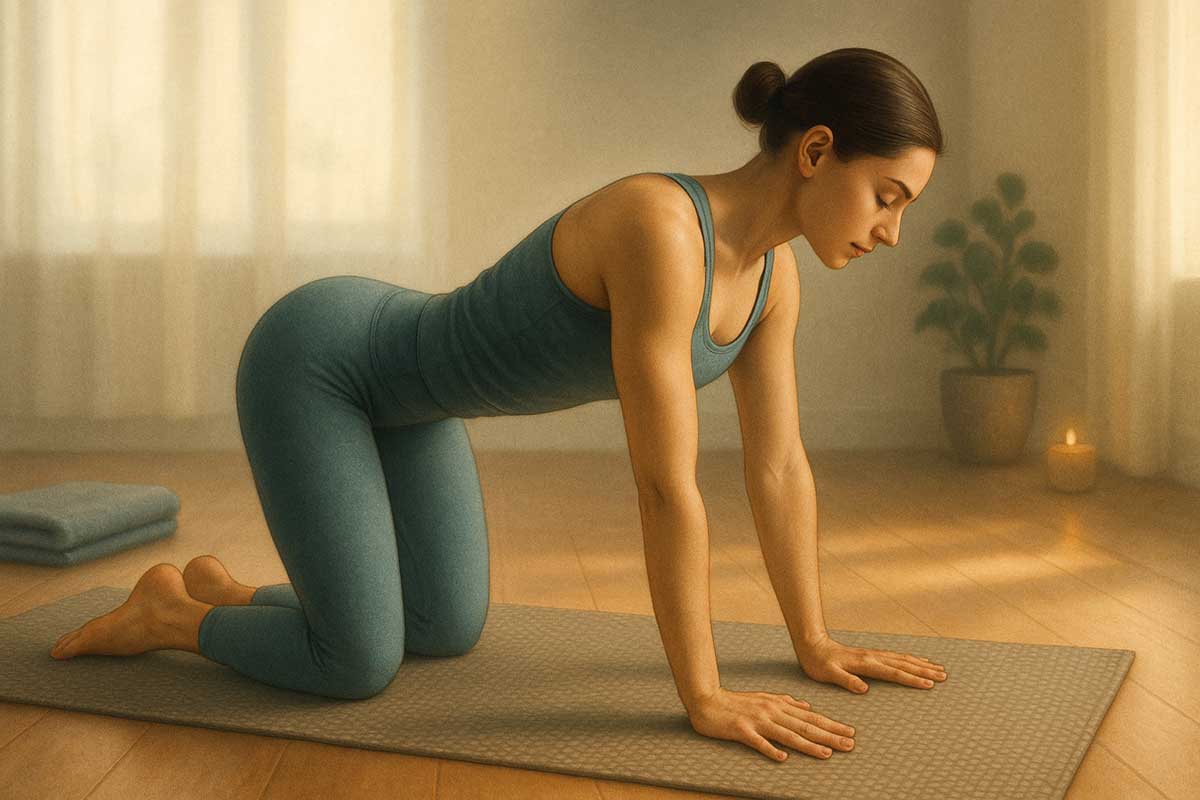
How to do it:
- Start on your hands and knees with your wrists under your shoulders
- For Cow: Drop your belly, lift your chest and tailbone, look up gently
- For Cat: Round your spine toward the ceiling, tuck your chin to chest
- Move slowly between the two positions
- Continue for 30-60 seconds
Modifications: Do this standing with your hands on your thighs if being on the floor is uncomfortable.
What you should feel: Gentle movement and release throughout your spine.
Safety first: Keep movements small and pain-free. Don’t force the positions.
Cobra pose (Bhujangasana) – Modified
Why this works: Gentle backbends can help counteract the forward posture that often contributes to sciatica. This pose also strengthens your back muscles.
How to do it:
- Lie face down with your forehead on the ground
- Place your palms under your shoulders
- Press your pubic bone into the floor and engage your leg muscles
- Slowly lift your head and chest, using mostly your back muscles
- Keep your pelvis on the ground
- Hold for 15-30 seconds
Modifications: Keep the lift very small – even just lifting your forehead counts. You can also do this over a bolster or pillow.
What you should feel: Gentle work in your back muscles and a mild stretch in your front body.
Safety first: Avoid this pose if it increases your leg symptoms. Keep the backbend gentle.
Bridge pose (Setu Bandhasana)
Why this works: Bridge pose strengthens your glutes and hamstrings while gently stretching your hip flexors. Strong glutes are vital for supporting your lower back.
How to do it:
- Lie on your back with knees bent, feet flat on the floor
- Arms by your sides, palms down
- Press your feet down and lift your hips up
- Keep your knees parallel and squeeze your glutes
- Hold for 15-30 seconds
Modifications: Place a block between your thighs to help engage the right muscles. Start with small lifts if you’re new to this pose.
What you should feel: Work in your glutes and back of your thighs.
Safety first: Don’t lift higher than feels comfortable. Keep your neck neutral.
Bird-dog pose (Parsva Balasana)
Why this works: This pose builds core stability and coordination while strengthening your back muscles. It teaches your body how to maintain a neutral spine.
How to do it:
- Start on hands and knees with a neutral spine
- Extend your right arm forward and left leg back
- Keep your hips level and spine straight
- Hold for 15-30 seconds, then switch sides
Modifications: Start by lifting just your arm or just your leg. You can also do this standing against a wall.
What you should feel: Work in your core, glutes, and back muscles.
Safety first: Keep your spine neutral. Don’t let your lower back sag or arch excessively.
Best yoga poses for sciatica nerve pain relief
Supported child’s pose with side stretch
Why this works: This pose gently stretches your lower back and can help reduce pressure on compressed nerve roots.
How to do it:
- Kneel on the floor with a bolster or pillow in front of you
- Sit back on your heels and fold forward over the support
- Turn your head to one side and rest it on the support
- Hold for 2-3 minutes, then turn your head to the other side
Modifications: If kneeling is uncomfortable, do this sitting in a chair and folding forward onto a desk or table.
Wall-assisted hamstring stretch
Why this works: This pose stretches your hamstrings without putting pressure on your spine, making it safer than traditional forward folds.
How to do it:
- Lie on your back near a wall
- Scoot your hips close to the wall
- Extend one leg up the wall while keeping the other bent
- Hold for 1-2 minutes, then switch legs
Modifications: Move farther from the wall to reduce the stretch intensity.
Pose difficulty & progression guide
| Pose name | Difficulty level | Hold time | Progression options | Modifications |
|---|---|---|---|---|
| Knees-to-chest | Beginner | 30-60 sec | Add gentle rocks, circles | One knee at a time, pillow under head |
| Reclining pigeon | Beginner-Intermediate | 1-3 min | Deepen with props, seated version | Use strap, move ankle closer to knee |
| Bridge pose | Intermediate | 15-30 sec | Single leg, add block | Block between thighs, smaller lift |
| Cat-cow | Beginner | 30-60 sec | Add arm movements | Standing version, smaller movements |
| Eye of needle | Intermediate | 1-2 min | Pull leg closer | Use strap, keep head down |
| Seated pigeon | Intermediate | 30-60 sec | Fold forward slightly | Chair version, less knee pressure |
| Bird-dog | Intermediate | 15-30 sec | Hold longer, add movement | Arm or leg only, wall support |
| Cobra | Intermediate | 15-30 sec | Lift higher, add leg lift | Tiny lift, use props |
| Supine twist | Beginner | 30-60 sec | Deeper twist | Pillow support, smaller movement |
| Wall hamstring stretch | Beginner-Intermediate | 1-2 min | Flex foot, add strap | Farther from wall, bent knee |
Yoga poses that can make sciatica worse
Not all yoga poses are good for sciatica. Some can actually make your symptoms worse by increasing pressure on your sciatic nerve or aggravating inflamed tissues.
Why forward folds can be problematic
Forward folds might seem like they’d help stretch tight hamstrings and back muscles, but they can be risky for sciatica. When you round your spine forward, you increase pressure on your spinal discs, which can worsen nerve compression. The combination of spinal flexion and hamstring stretching can also put additional stress on your sciatic nerve.
Poses to approach with caution or avoid completely
Standing forward fold (Uttanasana) This pose puts significant pressure on your lower back discs and can stretch your sciatic nerve in a way that increases symptoms. The weight of your upper body hanging down adds extra stress.
Seated forward fold (Paschimottanasana) Sitting and rounding forward is a double whammy for sciatica. Sitting already increases disc pressure, and the forward fold makes it worse.
Intense hamstring stretches While gentle hamstring stretching can be helpful, aggressive stretches like Pyramid Pose or deep seated forward folds can irritate your sciatic nerve. The nerve runs right through your hamstring area, so overstretching can cause problems.
Other poses to avoid during flare-ups:
- Plow pose (Halasana)
- Seated spinal twists that involve rounding the back
- Any pose that causes tingling, numbness, or increased pain
- Deep backbends that compress the lower back
- Poses that require you to sit for extended periods
The golden rule: If it hurts, don’t do it!
Your body is the best guide for what’s helpful and what’s not. If a pose increases your pain, causes tingling or numbness, or just doesn’t feel right, skip it. There are plenty of other options that can help without causing harm.
Pain is different from the mild discomfort of a good stretch. Sharp, shooting, or electrical sensations are warning signs to back off immediately.
Warning signs to stop immediately:
- Sharp, shooting pain down your leg
- Numbness or tingling that increases
- Weakness in your leg or foot
- Loss of bowel or bladder control (seek immediate medical attention)
- Pain that gets progressively worse during the pose
Daily routine planner
| Time of day | Pain level | Recommended sequence | Duration | Key benefits |
|---|---|---|---|---|
| Morning | Mild stiffness | Gentle mobility flow | 10 min | Prepare spine for daily activities |
| Midday | Sitting tension | Hip opener series | 5 min | Counter desk work effects |
| Evening | Moderate pain | Restorative sequence | 20 min | Deep relaxation and healing |
| Acute flare-up | Severe pain | Gentle decompression only | 15 min | Calm inflammation, reduce spasms |
| Pre-workout | Mild discomfort | Dynamic warm-up | 8 min | Prepare body for exercise |
| Post-workout | Muscle tension | Cool-down stretches | 12 min | Prevent stiffness, maintain flexibility |
10-minute morning routine to ease stiffness
Start your day by gently waking up your spine and hips with this sequence:
- Knees-to-chest (1 minute)
- Lie on your back and gently hug your knees
- Rock side to side to massage your lower back
- Gentle supine spinal twist (2 minutes, 1 minute each side)
- Keep movements small and controlled
- Focus on breathing deeply
- Reclining pigeon pose (4 minutes, 2 minutes each side)
- This is your main hip opener for the morning
- Use props if needed for comfort
- Cat-cow pose (2 minutes)
- Move slowly and mindfully
- Let your spine wake up gradually
- Bridge pose (1 minute)
- Do 3-5 gentle lifts
- Focus on engaging your glutes
This routine is perfect for when you wake up stiff or before a long day of sitting.
20-minute restorative practice for evening pain relief
Wind down your day and ease tension with this longer, more thorough sequence:
- Knees-to-chest with gentle rocking (2 minutes)
- Eye of the needle pose (6 minutes, 3 minutes each side)
- Gentle supine spinal twist (4 minutes, 2 minutes each side)
- Cat-cow pose (3 minutes)
- Bird-dog pose (3 minutes, holding each side for 30 seconds)
- Reclining pigeon pose (2 minutes, 1 minute each side)
End with a few minutes of deep breathing while lying on your back with your knees bent.
This routine is ideal for evening practice or whenever you need deeper relief from tension and pain.
5-minute midday hip opener series
Perfect for office workers or anyone who sits for long periods:
- Seated pigeon pose (2 minutes, 1 minute each side)
- Seated spinal twist (1 minute, 30 seconds each side)
- Standing hip circles (1 minute)
- Wall-assisted calf stretch (1 minute, 30 seconds each leg)
15-minute acute flare-up relief
When pain is severe, use only these gentle poses:
- Knees-to-chest (3 minutes)
- Gentle supine twist with support (4 minutes, 2 minutes each side)
- Supported child’s pose (5 minutes)
- Deep breathing in comfortable position (3 minutes)
Props and equipment guide
| Prop | Purpose | Recommended poses | Budget alternative |
|---|---|---|---|
| Yoga strap | Reach assistance, gentle traction | Eye of needle, hamstring stretches | Towel, belt, or resistance band |
| Bolster | Support in poses, reduce strain | Supported child’s pose, restorative twists | Firm pillows, rolled blankets |
| Yoga block | Modify intensity, improve alignment | Seated pigeon, bridge pose | Thick book, sturdy box |
| Wall | Stability support, safe stretching | Wall hamstring stretch, standing poses | Any sturdy wall surface |
| Blanket | Warmth, comfort, support | Covering during relaxation, hip elevation | Any soft blanket |
| Pillow | Neck support, knee cushioning | Between knees, under head | Regular bed pillow |
| Chair | Seated modifications, support | Chair yoga versions | Sturdy dining chair |
| Foam roller | Muscle release, self-massage | Piriformis release, IT band | Tennis ball, lacrosse ball |
How to choose props for your needs
For beginners: Start with just a strap and pillow. These two props will help you modify most poses safely.
For chronic pain: Invest in a bolster and blocks. These provide the support needed for longer holds and deeper relaxation.
For limited mobility: A chair and wall are your best friends. Many poses can be adapted to seated or standing versions.
For travel: A strap and small pillow are portable and allow you to practice anywhere.
A holistic approach to managing sciatica
Yoga poses are just one part of a comprehensive approach to managing sciatica. Let’s explore other tools that can enhance your healing.
The power of breath for pain management
Your breath is one of your most powerful tools for managing pain. When you’re hurting, your breathing often becomes shallow and tense, which can make pain worse.
Diaphragmatic (belly) breathing technique:
- Lie on your back with one hand on your chest, one on your belly
- Breathe in slowly through your nose, letting your belly rise
- Your chest hand should barely move
- Exhale slowly through your mouth, letting your belly fall
- Practice for 5-10 minutes daily
This type of breathing activates your parasympathetic nervous system, which helps your body relax and can reduce pain perception.
4-7-8 breathing for acute pain:
- Exhale completely through your mouth
- Inhale through your nose for 4 counts
- Hold your breath for 7 counts
- Exhale through your mouth for 8 counts
- Repeat 3-4 times
This technique can help calm your nervous system during pain flares.
Mindfulness and meditation for coping with chronic pain
Chronic pain can create a cycle of tension, stress, and more pain. Mindfulness helps break this cycle by changing how you relate to your pain.
Simple 5-minute meditation:
- Sit comfortably or lie down
- Close your eyes and focus on your breath
- When you notice pain, don’t fight it or judge it
- Simply acknowledge it: “I notice pain in my leg”
- Return your attention to your breath
- If your mind wanders, gently come back to breathing
Regular meditation practice can actually change how your brain processes pain signals, leading to genuine relief over time.
Body scan meditation for sciatica:
- Lie down comfortably
- Start at the top of your head
- Slowly move your attention down your body
- Notice areas of tension or pain without trying to change them
- Breathe into each area as you scan
- End by sending appreciation to your body for carrying you through the day
Lifestyle tips for a healthy spine
Your daily habits play a huge role in your sciatica symptoms.
Ergonomics at your desk:
- Keep your feet flat on the floor
- Your screen should be at eye level
- Use a lumbar support cushion
- Take breaks every 30 minutes to stand and move
- Consider a standing desk converter
The best sleeping positions for sciatica:
- Sleep on your back with a pillow under your knees
- If you sleep on your side, put a pillow between your knees
- Avoid sleeping on your stomach, which can strain your back
- Use a supportive mattress that’s not too soft
Movement throughout the day: Even gentle movement is better than staying in one position. Set reminders to stand, stretch, or walk for a few minutes every hour.
Nutrition for inflammation reduction:
- Eat anti-inflammatory foods: leafy greens, fatty fish, berries
- Stay hydrated to keep your discs healthy
- Limit processed foods and excess sugar
- Consider omega-3 supplements (consult your doctor first)
Special considerations
Beginner yoga for sciatica pain
If you’re new to yoga, start slowly and focus on these beginner-friendly poses:
Week 1-2: Foundation building
- Knees-to-chest
- Gentle supine twists
- Cat-cow (standing version if needed)
- Simple breathing exercises
Week 3-4: Adding gentle stretches
- Reclining pigeon pose
- Eye of the needle
- Supported child’s pose
- Wall hamstring stretch
Week 5-6: Building strength
- Bridge pose (small lifts)
- Bird-dog (arm or leg only)
- Gentle cobra
- Seated poses
Chair yoga for sciatica at work
Perfect for office workers who can’t get on the floor:
Seated spinal twist:
- Sit tall in your chair
- Place your right hand on your left knee
- Gently twist to the left, looking over your shoulder
- Hold for 30 seconds, switch sides
Seated figure-4 stretch:
- Sit with feet flat on floor
- Place right ankle on left thigh
- Gently press right knee down
- Lean forward slightly to deepen
- Hold 30 seconds, switch sides
Seated cat-cow:
- Sit at the edge of your chair
- Arch your back gently (cow)
- Round your spine (cat)
- Move slowly between positions
Yoga for sciatica during pregnancy
Pregnancy can trigger sciatica due to weight gain, hormonal changes, and postural shifts. Here are safe modifications:
First trimester:
- Most poses are safe with gentle modifications
- Avoid deep twists and backbends
- Listen to your body’s changing needs
Second trimester:
- Avoid lying flat on your back for extended periods
- Use props for support in all poses
- Focus on hip opening and gentle stretching
Third trimester:
- Avoid all prone (face-down) positions
- Use wall support for standing poses
- Practice mostly seated and side-lying poses
Safe pregnancy poses:
- Side-lying hip stretch
- Supported cat-cow on hands and knees
- Gentle pelvic tilts
- Prenatal child’s pose (knees wide apart)
Sciatica yoga poses for seniors
Older adults need extra care and modifications:
Safety considerations:
- Always warm up before stretching
- Use props liberally for support
- Avoid poses that challenge balance
- Move slowly and deliberately
Recommended modifications:
- Chair versions of most poses
- Wall support for standing poses
- Shorter hold times
- Focus on gentle mobility rather than deep stretching
Conclusion
Sciatica doesn’t have to control your life. With the right approach, you can find significant relief and prevent future flare-ups. The key is consistency, patience, and listening to your body.
Remember these essential points:
- Start gently and progress slowly
- Focus on poses that stretch your hips and strengthen your core
- Avoid poses that increase your symptoms
- Make yoga part of a broader healthy lifestyle approach
- Don’t hesitate to seek professional help when needed
Your journey to relief might not happen overnight, but with consistent practice and the right techniques, you can reclaim your comfort and get back to the activities you love. Every gentle stretch, every mindful breath, and every moment of movement is a step toward feeling better.
Start with just one or two poses that feel good to you, and build from there. Your body has an amazing capacity to heal and adapt – give it the support it needs through gentle, consistent yoga practice, and you’ll be surprised at what’s possible.
FAQs
How often should I do yoga for sciatica?
Daily gentle practice is ideal, even if it’s just 10-15 minutes. Listen to your body – during acute flare-ups, you might need to stick to very gentle poses, while during better periods you can do more.
Can yoga cure my sciatica completely?
Yoga can be incredibly effective for managing sciatica symptoms and addressing underlying causes, but “cure” depends on what’s causing your sciatica. For issues like tight muscles or poor posture, yoga can be tremendously helpful. For structural problems like severe disc herniation, yoga works best as part of a comprehensive treatment plan.
What if I feel pain during a pose?
Stop immediately. There’s a difference between the mild discomfort of a good stretch and pain that signals potential harm. Sharp, shooting, or electrical sensations are warning signs to back off.
When should I see a doctor?
See a healthcare provider if you have:
- Severe pain that doesn’t improve with rest
- Loss of bowel or bladder control
- Significant weakness in your leg
- Pain after an injury or accident
- Symptoms that are getting progressively worse


