That sharp pain shooting down the outside of your knee and thigh is back again. You’ve spent countless hours rolling on that foam roller, gritting your teeth through the agony, hoping it’ll finally fix your IT band syndrome. But here’s the truth: you’re fighting the wrong battle.
Your IT band isn’t actually the problem. This thick band of connective tissue running from your hip to your knee can’t really be stretched. It’s tough as leather and about as flexible. The real troublemakers are the muscles that connect to it – your glutes and the Tensor Fasciae Latae (TFL) muscle at the top of your hip.
When these muscles get tight or weak, they pull on your IT band like puppet strings. No amount of painful rolling will fix weak glutes or tight hip muscles. That’s why this 5-minute routine targets the root cause instead of the symptom. You’ll release tension where it actually lives and build strength where you need it most.
Understanding your IT band
Your IT band is a thick, fibrous strip that runs along the outside of your thigh. It connects your hip muscles to your shinbone just below the knee. Think of it as a support cable that helps stabilize your leg during movement.
Here’s what most people get wrong about IT band syndrome:
| Common Misconception | Reality |
|---|---|
| “I need to stretch my IT band” | The IT band itself can’t be stretched effectively |
| “Rolling harder will fix it” | Aggressive rolling can make inflammation worse |
| “It’s just a running injury” | IT band pain affects cyclists, hikers, and office workers too |
| “Rest alone will cure it” | Without addressing muscle imbalances, pain returns |
| “The IT band is the source of pain” | Tight hip muscles and weak glutes cause the problem |
The pain you feel is usually inflammation where your IT band rubs against the bone near your knee. This happens when the muscles controlling your hip don’t work properly.
Are you at risk? Quick self-assessment
Check off any factors that apply to you:
| Risk Factor | Yes/No | Impact Level |
|---|---|---|
| Run more than 20 miles/week | High | |
| Sudden training increase | High | |
| Hip weakness history | High | |
| Always run same route/surface | Medium | |
| Worn running shoes (>500mi) | Medium | |
| Previous knee injury | Medium | |
| Sit at desk 6+ hours daily | Medium | |
| One leg longer than other | Low |
Scoring: 3+ high-risk factors = Start this routine immediately. 2+ medium-risk factors = Use routine for prevention. Any combination = You’ll benefit from these exercises.
The 5-minute IT band relief routine
This routine takes just five minutes but delivers real results. Each movement serves a specific purpose in your recovery. Do this daily, especially before workouts, and you’ll notice the difference within a week.
Quick start guide
| Exercise | Time | Primary Target | Key Benefit |
|---|---|---|---|
| Lying Piriformis Stretch | 30s each side | Deep glutes | Releases IT band tension |
| Standing Crossover Stretch | 30s each side | TFL muscle | Targets main tension source |
| Clamshells | 15-20 reps each | Gluteus medius | Builds hip stability |
| Side-Lying Leg Raises | 15 reps each | Hip abductors | Improves knee alignment |
| Glute Bridge | 15 reps | Full glute complex | Strengthens pelvic stability |
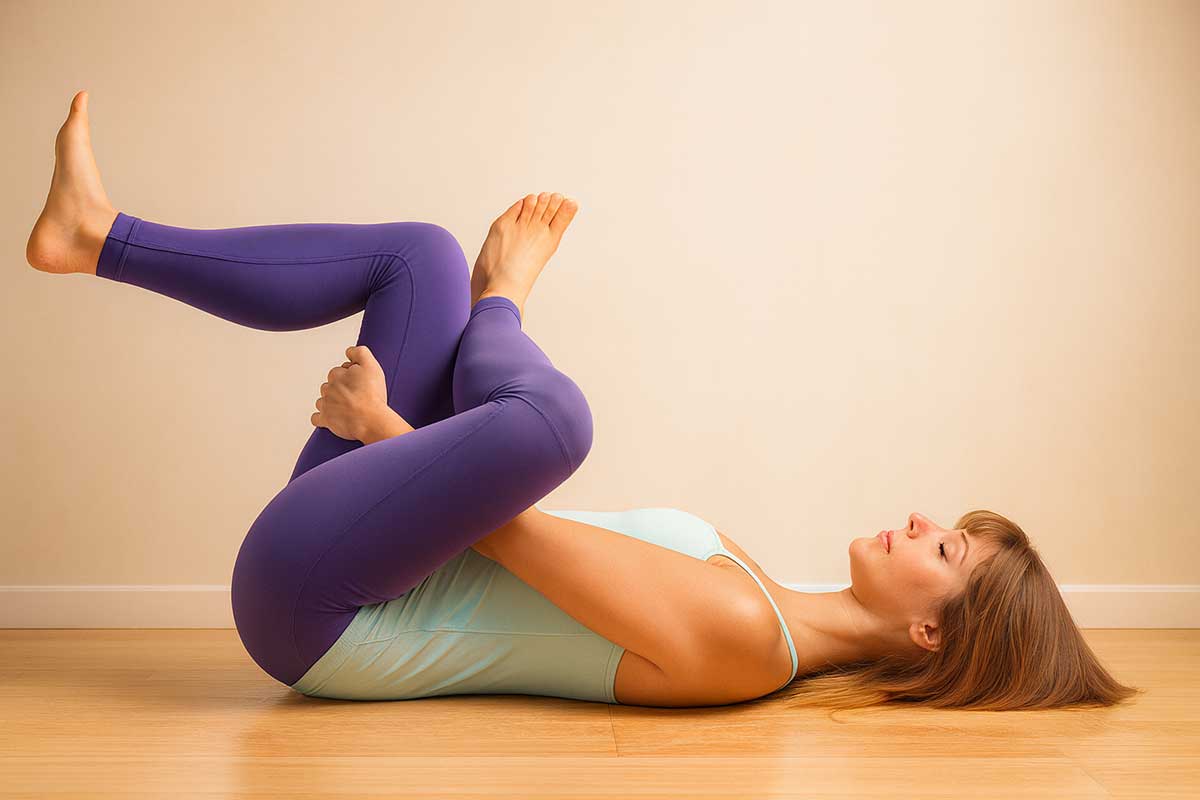
Minute 1: The lying piriformis stretch
Your piriformis and other deep glute muscles often tighten up and pull on your IT band. This stretch releases that tension right at the source.

How to do it:
- Lie on your back with both knees bent
- Cross your affected leg’s ankle over the opposite knee, making a figure-four shape
- Grab the thigh of your bottom leg and gently pull it toward your chest
- You should feel a nice stretch deep in your glute
- Hold for 30 seconds, then switch sides
Focus on breathing deeply. If the stretch feels too intense, scoot further away from your leg as you pull it toward you.
Minute 2: The standing crossover stretch
This classic move targets your TFL muscle – the main culprit behind IT band tightness. Most people skip this stretch, but it’s gold for releasing hip tension.

How to do it:
- Stand tall and cross your affected leg behind the other leg
- Lean your hips directly to the side of the affected leg
- Reach the arm on your affected side up and over your head, creating a nice side bend
- You’ll feel the stretch along the outside of your hip and thigh
- Hold for 30 seconds, then repeat on the other side
Keep your movements slow and controlled. You’re not trying to win a flexibility contest here.
Minute 3: Clamshells for glute activation
Here’s where we shift from stretching to strengthening. Your gluteus medius muscle keeps your hip stable. When it’s weak, your hip drops with each step, straining your IT band.
How to do it:
- Lie on your side with hips and knees bent at 45 degrees
- Keep your affected leg on top, feet touching
- Lift your top knee as high as you can without rocking your hips back
- Squeeze your glute at the top, then slowly lower
- Do 15-20 slow reps, then switch sides
Think quality over speed. Each rep should feel controlled and deliberate.
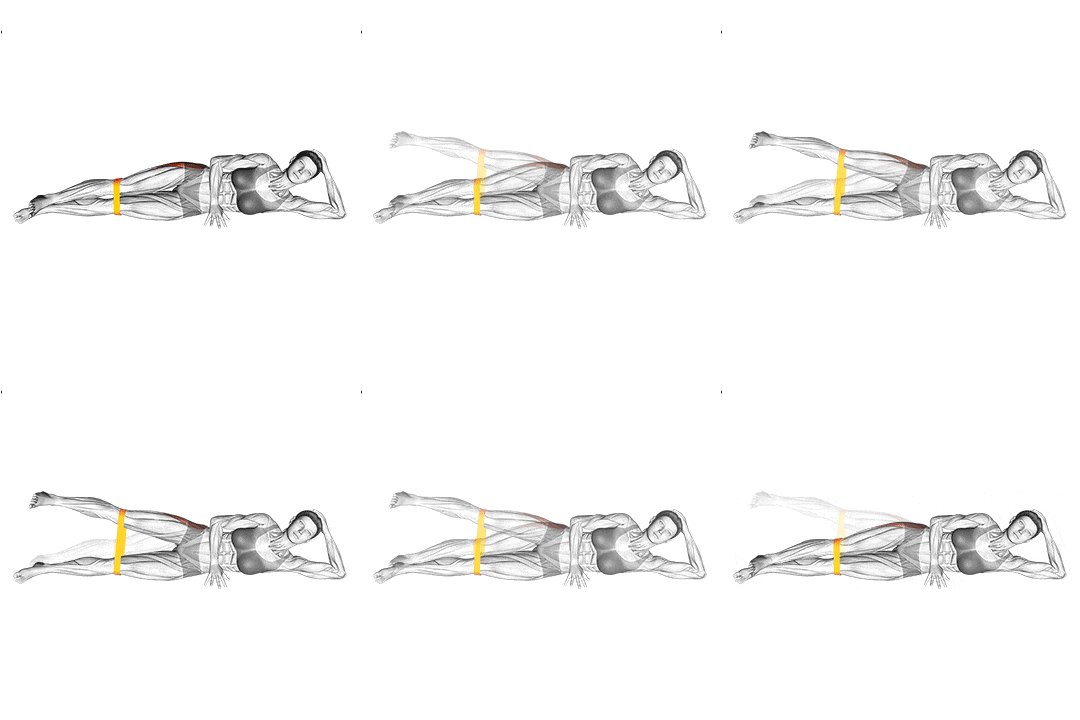
Minute 4: Side-lying leg raises
This exercise continues building your hip stability. Strong hip muscles mean better knee alignment and less IT band stress during daily activities.

How to do it:
- Lie on your side with legs straight and stacked
- Slowly raise your top leg about 12-18 inches
- Hold for 2 seconds at the top
- Lower slowly with control
- Complete 15 reps, then switch sides
- Use a band if you like
Keep your body in a straight line. Don’t let your top hip roll forward or backward.
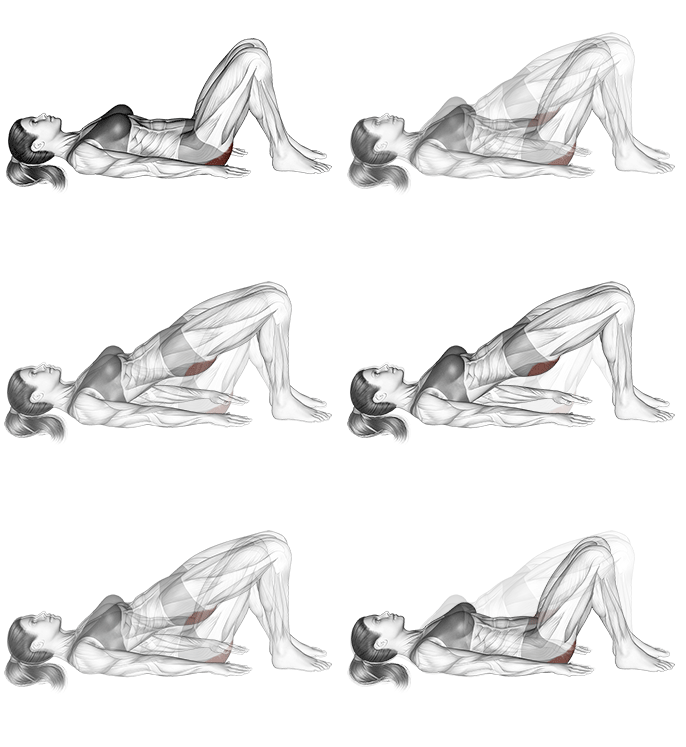
Minute 5: The glute bridge
We’re finishing strong with a move that fires up your entire glute complex. Strong glutes take pressure off your IT band during walking, running, and climbing stairs.

How to do it:
- Lie on your back with knees bent, feet flat and hip-width apart
- Squeeze your glutes and lift your hips until your body forms a straight line
- Hold for 2-3 seconds at the top
- Slowly lower back down
- Complete 15 reps
Focus on squeezing your glutes, not just pushing your hips up. You should feel this working in your butt, not your back.
Common form mistakes to avoid
Even simple exercises can lose their effectiveness with poor form. Here’s how to get each movement right:
| Exercise | Common Mistake | Correct Form Cue |
|---|---|---|
| Piriformis Stretch | Pulling too hard on leg | Gentle pressure, breathe deeply |
| Crossover Stretch | Leaning forward instead of sideways | Keep torso upright, lean directly to the side |
| Clamshells | Using momentum or speed | Slow, controlled movement with 2-second holds |
| Leg Raises | Lifting leg too high | 12-18 inches maximum, focus on control |
| Glute Bridge | Pushing with lower back | Squeeze glutes first, then lift |
Your weekly progression plan
Consistency beats intensity. Here’s how to build this routine into your life:
| Week | Frequency | Modifications | What to Expect |
|---|---|---|---|
| 1-2 | Daily | Start with holds/reps as listed | Initial tension relief, less morning stiffness |
| 3-4 | 5x/week | Increase holds by 10 seconds | Improved flexibility, less pain during activity |
| 5-8 | 4x/week | Add resistance bands for clamshells | Stronger hips, better movement patterns |
| 9+ | 4x/week maintenance | Vary exercises, challenge balance | Long-term prevention, return to full activity |
Equipment alternatives and upgrades
You don’t need fancy equipment to start, but a few items can make the routine more effective:
| Exercise | No Equipment | With Equipment |
|---|---|---|
| Clamshells | As described | Add light resistance band around thighs |
| Leg Raises | As described | Add 2-5 lb ankle weights after week 4 |
| Glute Bridge | As described | Add resistance band around thighs |
| All stretches | Floor space only | Yoga mat for comfort |
Track your progress
Use this simple tracking system to monitor your improvement:
| Symptom | Week 1 (1-10) | Week 2 (1-10) | Week 3 (1-10) | Week 4 (1-10) | Notes |
|---|---|---|---|---|---|
| Outer knee pain during activity | |||||
| Hip tightness in morning | |||||
| Pain climbing stairs | |||||
| Pain after sitting 1+ hours | |||||
| Overall daily discomfort |
Scoring: 10 = severe pain, 1 = no pain. You should see scores dropping by week 2-3.
Activity modification guidelines
Don’t stop moving completely. Smart modifications help you stay active while healing:
| Activity | Pain Level 1-3 | Pain Level 4-6 | Pain Level 7-10 |
|---|---|---|---|
| Walking | Continue with daily routine | Reduce duration by 50% | Rest until pain drops below 4 |
| Running | Reduce intensity by 25% | Stop until pain below 3 | Stop until pain below 3 |
| Cycling | Continue normally | Reduce duration by 50% | Stop until pain below 4 |
| Stairs | Use handrail for support | Take one step at a time | Use elevator when possible |
| Sitting | Take breaks every 30 minutes | Stand and stretch hourly | Avoid prolonged sitting |
Complementary recovery strategies
These additional methods can speed your recovery:
| Strategy | When to Use | Expected Benefit | Time Investment |
|---|---|---|---|
| Heat before routine | Always | Muscle relaxation, better stretch | 5 minutes |
| Ice after painful activity | If area feels warm/inflamed | Reduce inflammation | 10-15 minutes |
| Professional massage | Weekly during acute phase | Deep muscle release | 30-60 minutes |
| Swimming or water walking | When land activities hurt | Maintain fitness without impact | 30+ minutes |
| Cross-training (elliptical, bike) | During recovery phase | Keep cardiovascular fitness | 20-45 minutes |
When to see a professional
Not all IT band pain needs professional treatment, but sometimes you need extra help:
| Symptom | Self-Treat | See Professional | Urgent Care |
|---|---|---|---|
| Mild outer knee pain | ✓ Try routine first | After 2 weeks no improvement | Never |
| Moderate pain with activity | ✓ Modify activities | After 1 week if worsening | If pain prevents walking |
| Severe pain at rest | ✓ Within 2-3 days | If can’t bear weight | |
| Swelling or warmth | ✓ Within 24 hours | If severe or with fever | |
| Numbness or tingling | ✓ Within 24 hours | If spreading or severe |
Long-term prevention
This routine works, but only if you stick with it. Five minutes might seem short, but consistency beats intensity every time. Make this part of your daily routine, especially before workouts or long walks.
Listen to your body
You should feel a good stretch or muscle activation, not sharp pain. If any movement causes shooting pain or makes your symptoms worse, skip that exercise and try the others.
A good stretch feels like pressure or mild discomfort that eases as you hold it. Sharp, stabbing pain means stop immediately.
Check your training habits
Poor running form puts extra stress on your IT band. If you’re a runner, consider getting your gait analyzed. Simple changes like taking shorter steps or landing under your center of gravity can make a huge difference.
Your shoes matter too. Worn-out running shoes or shoes that don’t match your foot type can throw off your alignment. Replace running shoes every 300-500 miles.
If you always run on the same side of a crowned road, switch it up. That slight angle puts more stress on your downhill leg’s IT band.
Make it a lifestyle
The best treatment for IT band syndrome is prevention. Once your pain resolves, keep doing this routine 3-4 times per week. Think of it as maintenance for your body, just like changing the oil in your car.
Strong, flexible hips protect you from more than just IT band pain. They help prevent low back pain, knee injuries, and ankle problems too.
Conclusion
IT band syndrome feels frustrating because the pain keeps coming back. But now you know why – you were treating the symptom, not the cause. This 5-minute routine targets the real problem: tight, weak muscles that put stress on your IT band.
Skip the painful foam rolling sessions. Spend those five minutes doing movements that actually work. Your knees will thank you, and you’ll get back to the activities you love without that nagging outer leg pain.
Start today. Set a timer for five minutes and work through each exercise. Track your progress using the chart above. Your future self will be grateful you took action instead of just hoping the pain would disappear on its own.
The path to pain-free movement is simpler than you think. It just takes five minutes a day and the commitment to stick with it.
FAQs
How long does IT band syndrome take to heal?
Most people see improvement within 2-3 weeks of consistent stretching and strengthening. Complete recovery usually takes 6-8 weeks, but this varies based on how long you’ve had symptoms and your activity level.
Can I run with IT band syndrome?
Light running is often okay if your pain stays below 3/10 during and after activity. Stop if pain increases during your run or lasts more than 2 hours afterward. Cross-training is often better during the acute phase.
What’s the difference between IT band syndrome and runner’s knee?
IT band syndrome causes pain on the outside of your knee and thigh. Runner’s knee (patellofemoral pain) typically hurts around or behind your kneecap. Both benefit from hip strengthening, but the stretches are different.
Should I stretch or strengthen first?
Always stretch first to release tight muscles, then strengthen. Trying to strengthen tight muscles often leads to compensation patterns that make problems worse.
Why do I only have pain on one side?
IT band syndrome often affects just one leg due to muscle imbalances, leg length differences, or training habits like always running on the same side of a crowned road. The routine works both sides to prevent problems from switching legs.
Can sitting too much cause IT band pain?
Yes. Prolonged sitting tightens your hip flexors and weakens your glutes, creating the perfect setup for IT band problems. Office workers often develop this condition even without running.


