If you’re over 40, you’re likely at the peak of your career responsibilities. Family needs pull you in every direction. Financial planning keeps you up at night. Your body sends new signals – a twinge here, tension there.
Here’s what most people don’t realize: stress isn’t just mental. It lives in your body. It sits in your tight shoulders from hunching over a computer. It hides in your shallow breathing. It camps out in your stiff lower back.
You don’t need another overwhelming commitment. You need a simple tool that actually works.
The 10-minute reset: why this works
Your body has two main operating systems. When stress hits, your sympathetic nervous system kicks in. This is your “fight-or-flight” mode. Your heart races. Your muscles tense. Your breathing gets shallow.
This worked great when humans needed to outrun predators. But when you’re stuck in traffic or dealing with a difficult boss, this system doesn’t shut off. It keeps running in the background, wearing you down.
Your body also has a “rest-and-digest” system called the parasympathetic nervous system. This is where healing happens. Where tension melts away. Where you feel calm and centered.
Yoga acts like a gentle switch between these systems. Just 10 minutes can flip you from stressed to settled.
What happens in your body during stress vs. relaxation
| Stress Response (Sympathetic) | Relaxation Response (Parasympathetic) |
|---|---|
| Heart rate increases | Heart rate slows down |
| Breathing becomes shallow | Breathing deepens naturally |
| Muscles tense up | Muscles release and soften |
| Cortisol levels spike | Cortisol levels decrease |
| Blood pressure rises | Blood pressure normalizes |
| Digestion slows down | Digestion improves |
| Sleep quality suffers | Sleep becomes more restful |
Why 10 minutes? Because consistency beats intensity every time. You can find 10 minutes. You can’t always find an hour. A daily 10-minute practice will reduce your stress more than a once-weekly yoga class.
Research shows that even brief yoga sessions can lower cortisol levels by up to 23% and reduce perceived stress by 27%. That’s significant relief in just 10 minutes.
The 10-minute stress-relief flow
This isn’t just a list of poses. It’s a timed sequence you can follow from start to finish. Each movement builds on the last, creating a complete reset for your body and mind.
Quick reference: your 10-minute flow at a glance
| Time | Pose | Primary benefit | Key focus area |
|---|---|---|---|
| 0-1 min | Easy Seated Pose | Mental centering | Mind transition |
| 1-3 min | Cat-Cow Stretches | Spine mobility | Neck & shoulders |
| 3-5 min | Child’s Pose | Deep hip release | Lower back & hips |
| 5-7 min | Bridge Pose | Heart opening | Chest & front body |
| 7-9 min | Legs-Up-Wall | Nervous system reset | Full body relaxation |
| 9-10 min | Final Relaxation | Integration | Complete restoration |
Minute 0-1: arrival & centering (easy seated pose)
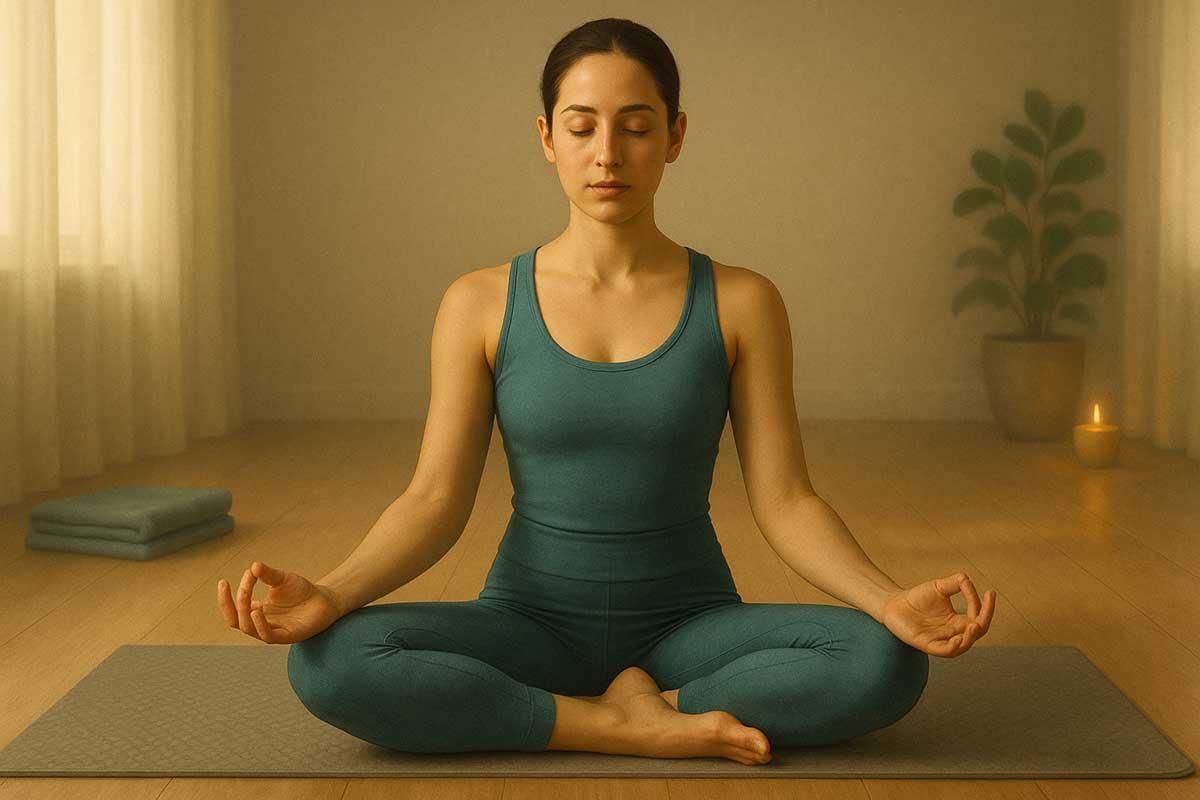
Step-by-step instructions:
- Find your seat: Choose a cushion on the floor or a sturdy chair
- Position your hips: Sit toward the front edge of your seat
- Align your spine: Lengthen from the crown of your head, but keep shoulders relaxed
- Place your hands: Rest palms on your thighs or knees, whatever feels natural
- Set your gaze: Close your eyes or soften your gaze downward
- Find your breath: Notice the natural rhythm without forcing changes
- Scan your body: Start from the top of your head and work down, noticing any tension
- Set an intention: Think of one word for how you want to feel (calm, peaceful, centered)
The goal: This is your transition from “doing” to “being.” Your mind is probably racing with your to-do list. That’s normal. Just notice your breathing. Feel your body settling into stillness.
Optional modifications for the over-40 body:
- Chair option: Use a supportive chair with your feet flat on the ground
- Hip support: Place a cushion or folded blanket under your hips if sitting on the floor
- Back support: Sit against a wall if you need extra support
- Leg position: Cross your legs loosely or extend them straight if crossing is uncomfortable
- Hand alternatives: Place hands on your heart or rest them in your lap if knees feel too high
Minutes 1-3: releasing neck & shoulder tension (cat-cow stretches)
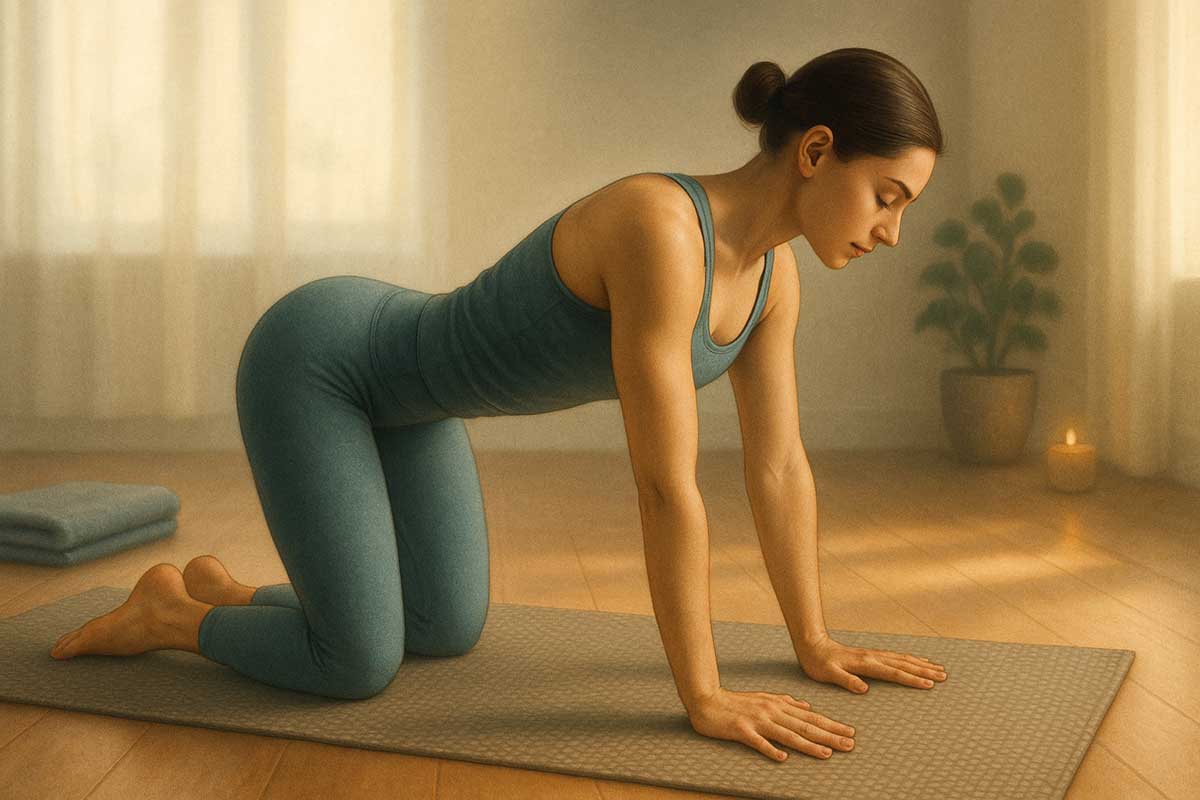
Step-by-step instructions:
- Start position: Come to hands and knees on your mat or carpet
- Hand placement: Position wrists directly under shoulders, fingers spread wide
- Knee placement: Place knees directly under hips, about hip-width apart
- Neutral spine: Start with a flat back, looking down at the floor
- Cow pose (inhale): Drop your belly toward the floor, lift your chest and tailbone up
- Eye gaze: Look forward or slightly up, but don’t crane your neck
- Cat pose (exhale): Press through your hands, round your spine toward the ceiling
- Head position: Let your head hang naturally, don’t force your chin to chest
- Flow rhythm: Move slowly between positions, matching breath to movement
- Repetitions: Continue for 8-10 breath cycles
- End position: Return to neutral spine before moving to next pose
The goal: This awakens your spine after hours of sitting. It releases the knots you carry in your upper back and neck. Those tight spots from hunching over your computer or phone? This is their antidote.
Optional modifications for the over-40 body:
- Knee comfort: Place a folded blanket or towel under your knees
- Wrist issues: Make fists and rest on knuckles, or use yoga blocks under palms
- Limited range: Move only as far as feels comfortable – small movements count
- Neck sensitivity: Keep your head in line with your spine, avoid looking up or down
- Balance concerns: Place a bolster or pillows under your torso for extra support
Minutes 3-5: unlocking tight hips (child’s pose)
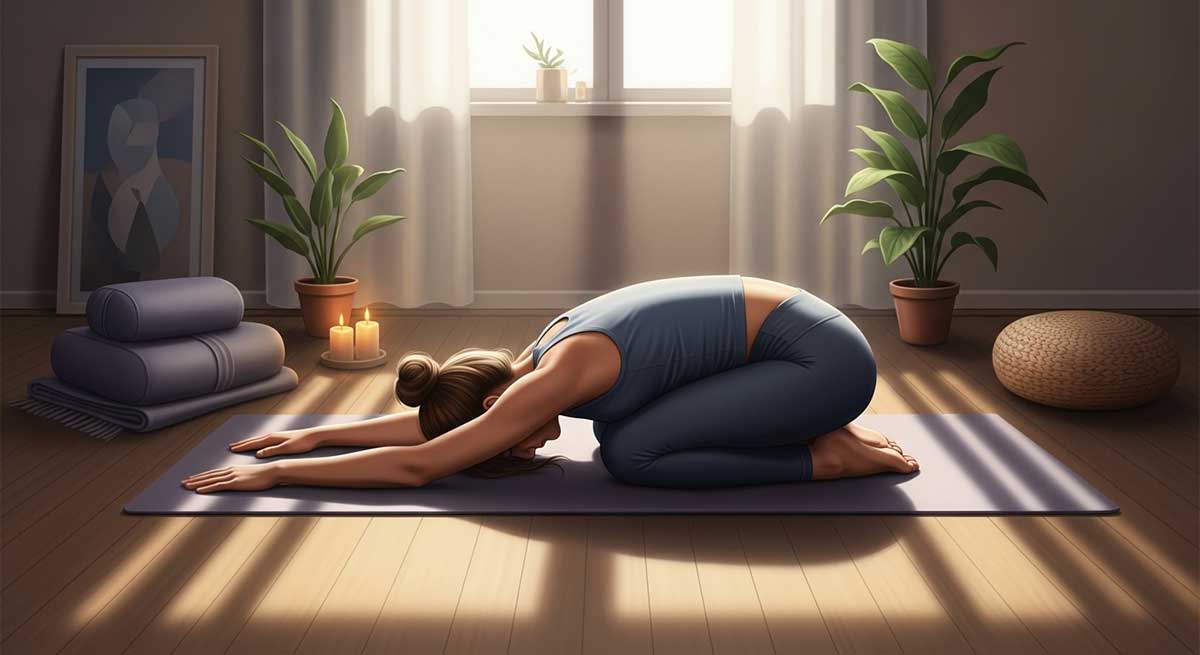
Step-by-step instructions:
- Starting position: From hands and knees, keep your hands where they are
- Toe touch: Touch your big toes together behind you
- Knee position: Separate your knees about hip-width apart (or wider for comfort)
- Hip movement: Slowly sit your hips back toward your heels
- Arm options: Reach your arms forward or bring them alongside your body
- Head rest: Let your forehead rest on the mat, a block, or stacked fists
- Shoulder release: Allow your shoulders to soften away from your ears
- Breathing: Take slow, deep breaths into your back ribs
- Duration: Stay here for the full 2 minutes, adjusting as needed
- Side stretch option: Walk your hands to the right for 30 seconds, then to the left
- Exit slowly: Press through your hands to come back to hands and knees
The goal: This is a deep, passive stretch for your lower back and hips. It’s also inherently calming. Many people feel an immediate sense of relief and safety in this pose.
Optional modifications for the over-40 body:
- Tight hips: Place a pillow or bolster between your heels and glutes
- Knee discomfort: Widen your knees or place a rolled towel behind each knee
- Can’t reach the floor: Stack your fists, a block, or pillow under your forehead
- Shoulder issues: Bring your arms alongside your body with palms facing up
- Ankle discomfort: Tuck a small towel under your ankles for cushioning
- Alternative version: Sit in a chair and fold forward over your thighs
Minutes 5-7: gentle heart opener (bridge pose)
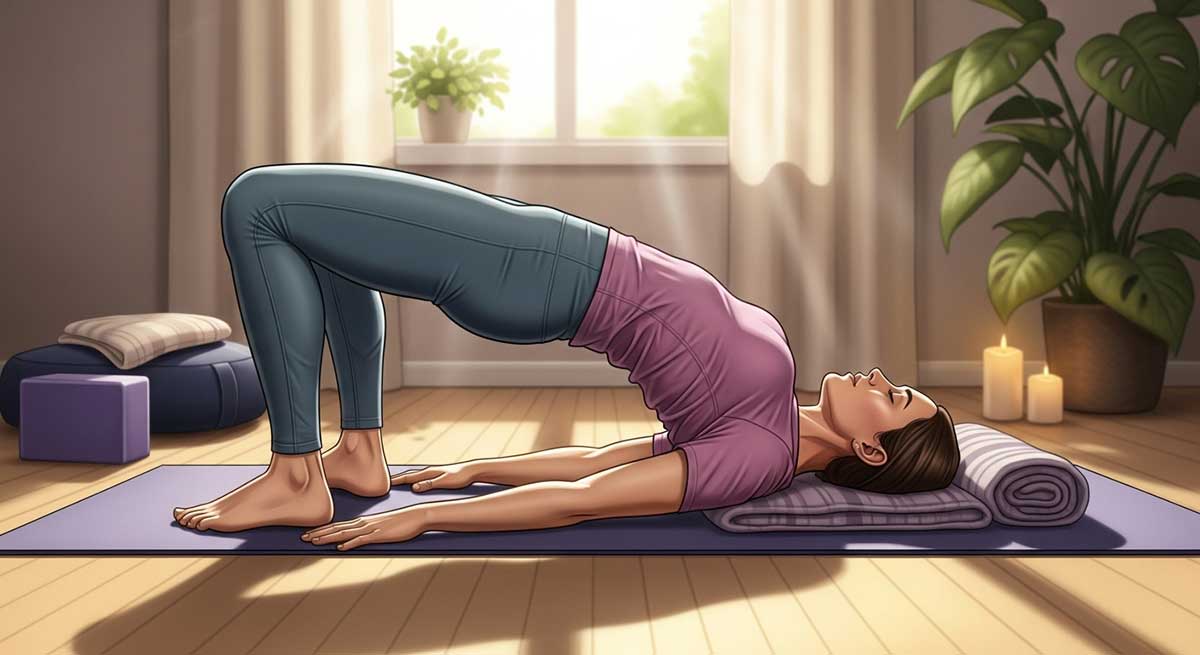
Step-by-step instructions:
- Lie down: Come onto your back with your knees bent
- Foot placement: Place feet flat on the floor, hip-width apart
- Foot distance: Position feet close enough that you can touch your heels with fingertips
- Arm position: Rest your arms alongside your body, palms facing down
- Preparation: Press your feet down and engage your glutes
- Lift phase: Press through your feet and slowly lift your hips off the floor
- Height: Lift only as high as comfortable – this isn’t about maximum height
- Shoulder blades: Draw your shoulder blades toward each other
- Neck position: Keep your neck long and don’t turn your head
- Breathing: Take 5-8 slow, deep breaths in this position
- Hold option: Stay lifted, or pulse gently up and down
- Lower slowly: Release one vertebra at a time from top to bottom
The goal: This counters the “stress slump” we all develop. When we’re anxious, we curl forward. This pose gently opens the front of your body, which can feel energizing and confidence-boosting.
Optional modifications for the over-40 body:
- Low lift version: Lift only a few inches off the ground – small movements count
- Supported version: Place a yoga block or firm pillow under your sacrum and rest there
- Neck comfort: Place a thin pillow under your head if needed
- Knee support: Place a block between your thighs to engage inner legs
- Tight shoulders: Keep your arms wider apart or bend your elbows
- Back sensitivity: Skip the lift and just practice pressing feet down while lying flat
Minutes 7-9: soothing the nervous system (legs-up-the-wall pose)
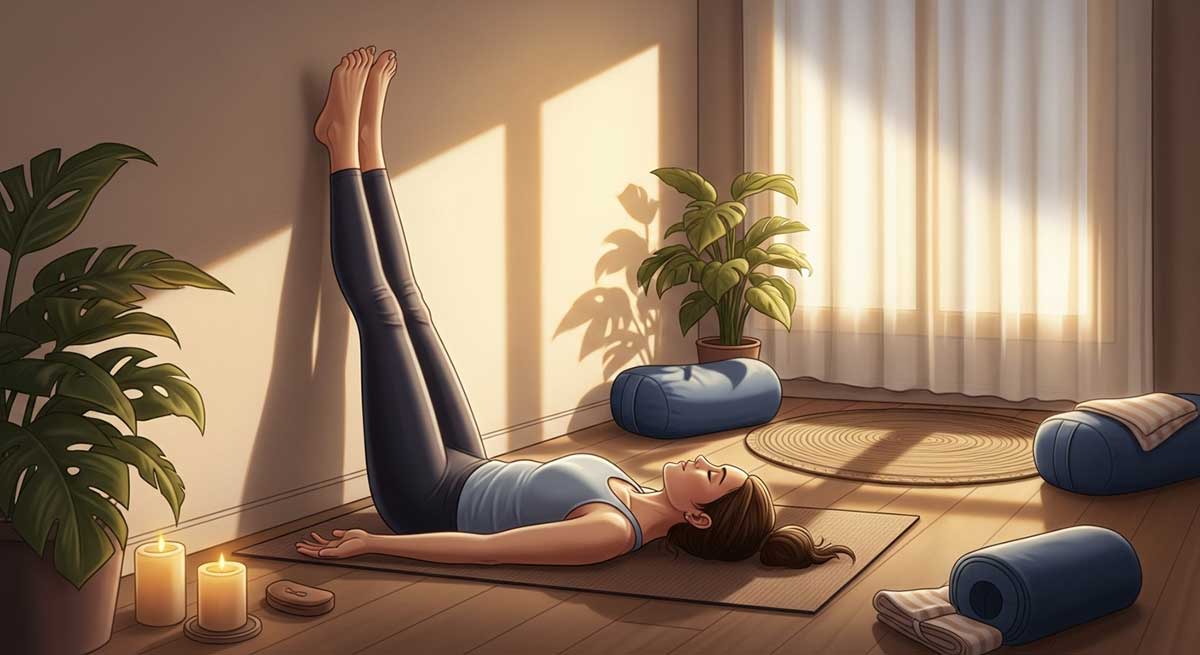
Step-by-step instructions:
- Setup: Find a clear wall space and have a pillow nearby
- Getting into position: Sit sideways next to the wall with your hip touching it
- The transition: Swing your legs up the wall as you lower your back to the floor
- Leg position: Let your legs rest against the wall, as straight as comfortable
- Distance from wall: Scoot closer or farther away until you find your sweet spot
- Hip elevation: Place a pillow or folded blanket under your lower back and hips
- Arm placement: Let your arms rest comfortably by your sides, palms facing up
- Eye comfort: Close your eyes or place an eye pillow over them
- Leg adjustment: Let your legs be heavy and relaxed against the wall
- Breathing focus: Allow your breath to slow down naturally
- Mental noting: Notice the gentle stretch in the back of your legs
- Stay present: If your mind wanders, return attention to the sensation of support
The goal: This is the ultimate nervous system reset. It’s like hitting the refresh button on your stress response. It can help reduce fatigue, calm anxiety, and even soothe swollen ankles.
Optional modifications for the over-40 body:
- No wall available: Lie down and rest your calves on a couch, chair, or ottoman
- Hip discomfort: Use a thicker pillow or folded blanket under your hips
- Leg numbness: Bend your knees slightly or place a bolster under your knees
- Tight hamstrings: Move farther away from the wall or bend your knees
- Lower back issues: Use additional support under your lower back
- Circulation concerns: If legs tingle, come out of the pose and try with bent knees
Minutes 9-10: integration & stillness (final relaxation)
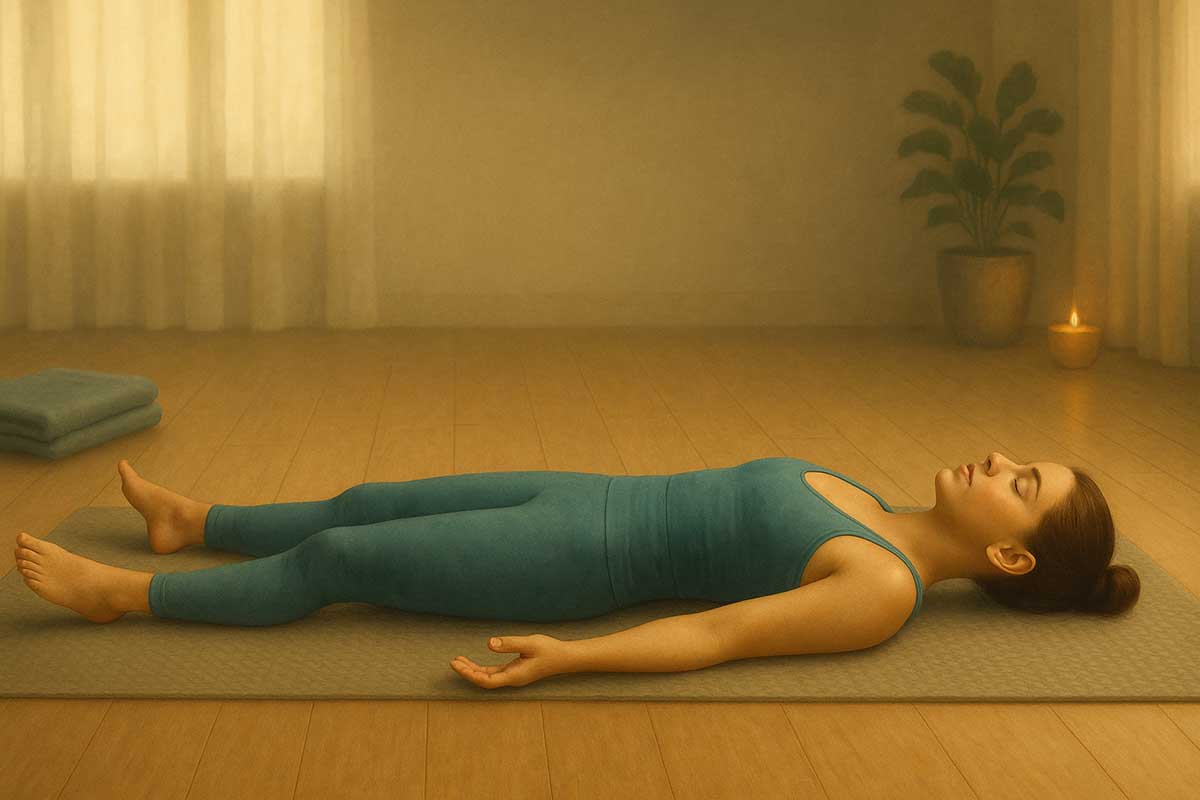
Step-by-step instructions:
- Position change: Gently move away from the wall and lie flat on your back
- Leg placement: Let your legs extend naturally, feet falling open wider than hip-width
- Arm position: Rest your arms alongside your body, a few inches away from your torso
- Palm direction: Turn your palms to face upward in a gesture of openness
- Head comfort: Adjust your head position so your neck feels neutral
- Eye closure: Close your eyes and let your facial muscles soften
- Body scan: Starting from your toes, consciously relax each part of your body
- Breath awareness: Notice your natural breathing rhythm without controlling it
- Thought observation: When thoughts arise, acknowledge them and let them pass
- Full surrender: Allow yourself to feel completely supported by the ground
- Stay present: If you feel restless, return focus to the weight of your body
- Gentle awakening: Begin to wiggle fingers and toes before slowly opening eyes
The goal: This is where the magic happens. Your body absorbs all the benefits of the previous poses. Your nervous system completes its shift from stressed to settled.
Optional modifications for the over-40 body:
- Knee support: Place a rolled towel or pillow under your knees to release lower back tension
- Head support: Use a thin pillow under your head if lying flat is uncomfortable
- Warmth: Cover yourself with a blanket as your body temperature may drop
- Eye comfort: Use an eye pillow, folded washcloth, or small towel over your eyes
- Leg comfort: If extending legs is uncomfortable, keep knees bent with feet flat
- Time adjustment: Stay longer if you have time, or shorter if you’re pressed for time
- Alternative position: If lying down isn’t possible, sit comfortably in a chair with eyes closed
Making it stick: your daily dose of calm
The best yoga practice is the one you actually do. Here’s how to make this flow part of your daily routine.
Building your stress-relief habit
| Challenge | Solution | Pro tip |
|---|---|---|
| “I don’t have time” | Start with 5 minutes | Link to existing habits (after coffee, before bed) |
| “I forget to do it” | Set a phone reminder | Pick the same time daily |
| “I feel too stiff” | Modify every pose | Use props (pillows, chairs, blankets) |
| “My mind wanders” | This is normal | Gently return focus to breath |
| “I don’t see results” | Give it 2 weeks | Track mood changes, not flexibility |
Create a ritual: Link this practice to something you already do every day. Maybe it’s right after your morning coffee. Or before you turn on the evening news. Habit stacking makes new routines stick faster.
Listen to your body: Some days your hips will feel tight. Other days your shoulders will need extra attention. It’s okay to spend more time in poses that feel good and skip ones that don’t serve you today.
Start small: Can’t do all 10 minutes? Do 5. Can’t do 5? Do the breathing minute. Something is always better than nothing.
Be patient with yourself: You might feel silly at first. Your mind will wander. You’ll remember urgent tasks mid-pose. This is all normal. Stress relief isn’t about perfection – it’s about practice.
What to expect: your 30-day journey
- Week 1: You’ll feel awkward but proud of trying something new. Your body starts remembering how to relax.
- Week 2: The sequence feels more natural. You notice small moments of calm throughout your day.
- Week 3: Your body craves this daily reset. You sleep a bit better and feel less reactive to stress.
- Week 4: This practice feels essential. You handle daily challenges with more ease and patience.
The ripple effect
Here’s what happens when you give yourself 10 minutes of intentional calm every day: You sleep better. You react less to daily annoyances. Your shoulders don’t live up by your ears. You feel more patient with your family. Work stress doesn’t follow you home as much.
Beyond stress relief: additional benefits you’ll notice
Physical changes:
- Better sleep quality and easier time falling asleep
- Reduced muscle tension, especially in neck and shoulders
- Improved flexibility and joint mobility
- Lower blood pressure and resting heart rate
- Better digestion and less stomach tension
Mental benefits:
- Clearer thinking and better decision-making
- Increased patience with family and coworkers
- Less reactive responses to daily stressors
- Improved mood and emotional regulation
- Greater sense of control over your day
Life quality improvements:
- More energy for activities you enjoy
- Better relationships due to increased patience
- Improved work performance through better focus
- Greater confidence in handling challenges
- Stronger sense of self-care and personal boundaries
This isn’t about becoming a yoga expert. It’s about having a reliable tool for stress management. When life feels overwhelming – and it will – you’ll know exactly what to do. You don’t need more time or energy to feel better. You need a smarter, gentler approach. Ten minutes is all it takes to remind your body how to relax.
FAQs
What if I can’t do a pose?
Skip it or modify it. Your practice, your rules. The goal is feeling better, not looking perfect.
Is it normal for my mind to race?
Absolutely. This is why we practice. Notice the thoughts, then gently return to your breath or the pose.
Should I do this if I have back pain?
These poses are gentle, but listen to your body. Child’s pose and legs-up-the-wall are particularly good for back issues.
What if I fall asleep during final relaxation?
That’s your body telling you it needed rest. Congratulations on listening to it.


