For people over 50, yoga builds strength and keeps joints mobile without the pounding and strain of other exercises. You don’t need an hour at the gym or special equipment. Just 12 minutes each day can make a real difference in how you move and feel.
This article shows you a simple, beginner-friendly yoga routine with 6 key poses. Each one targets the muscles and joints that matter most for staying independent and active as you age.
Your 12-Minute Routine at a Glance
| Pose Name | Primary Benefits | Hold Time | Difficulty Level |
|---|---|---|---|
| Chair Pose | Leg & core strength | 30 seconds | Beginner |
| Warrior II | Hip opening, balance | 30 seconds each side | Beginner |
| Bridge Pose | Back & glute strength | 30 seconds | Beginner |
| Cat-Cow | Spine flexibility | 10 repetitions | Very Easy |
| Bird-Dog | Core stability | 15 seconds each side × 2 | Moderate |
| Legs-Up-Wall | Relaxation, circulation | 2-3 minutes | Very Easy |
Before You Start: Important Safety Guidelines
Yoga is safe for most people, but taking a few precautions helps you practice wisely.
Talk to your doctor first if you have:
- Recent surgery or joint replacements
- Severe osteoporosis or recent fractures
- Uncontrolled high blood pressure
- Heart conditions or frequent dizziness
- Herniated discs or chronic pain conditions
Research shows that yoga is very safe. A large study found that only 1.9% of yoga participants experience adverse events serious enough to stop practice. That’s lower than many other forms of exercise.
Stop immediately if you feel:
- Sharp or shooting pain (different from muscle soreness)
- Dizziness or lightheadedness
- Chest pressure or difficulty breathing
- Numbness or tingling in your extremities
Mild muscle soreness the next day is normal, especially when you’re starting out. This means your muscles are working and getting stronger. True pain signals a problem.
What you’ll need:
- Yoga mat or large towel for cushioning
- Sturdy chair without wheels
- Wall space (at least 3 feet wide)
- Optional: pillow or folded blanket for extra support
- Comfortable, loose clothing
- Bare feet (better grip and balance than socks)
The total cost? Less than $20 if you buy a basic mat. Compare that to gym memberships that run $30-100 per month.
Why Yoga is Your Perfect Workout Partner After 50
More Than Just Stretching: The Science-Backed Benefits of Yoga for Healthy Aging
Yoga does something special for aging bodies. Research shows it works on multiple systems at once—muscles, bones, balance, and even your stress levels.
A study in Complementary Therapies in Medicine found that yoga improves muscle strength, flexibility, and balance in adults 60 and older. It also reduces joint stiffness and lowers the risk of falls. These aren’t small benefits. Falls are a leading cause of injury in older adults, and anything that prevents them is worth doing.
Here’s what makes yoga especially good for people over 50:
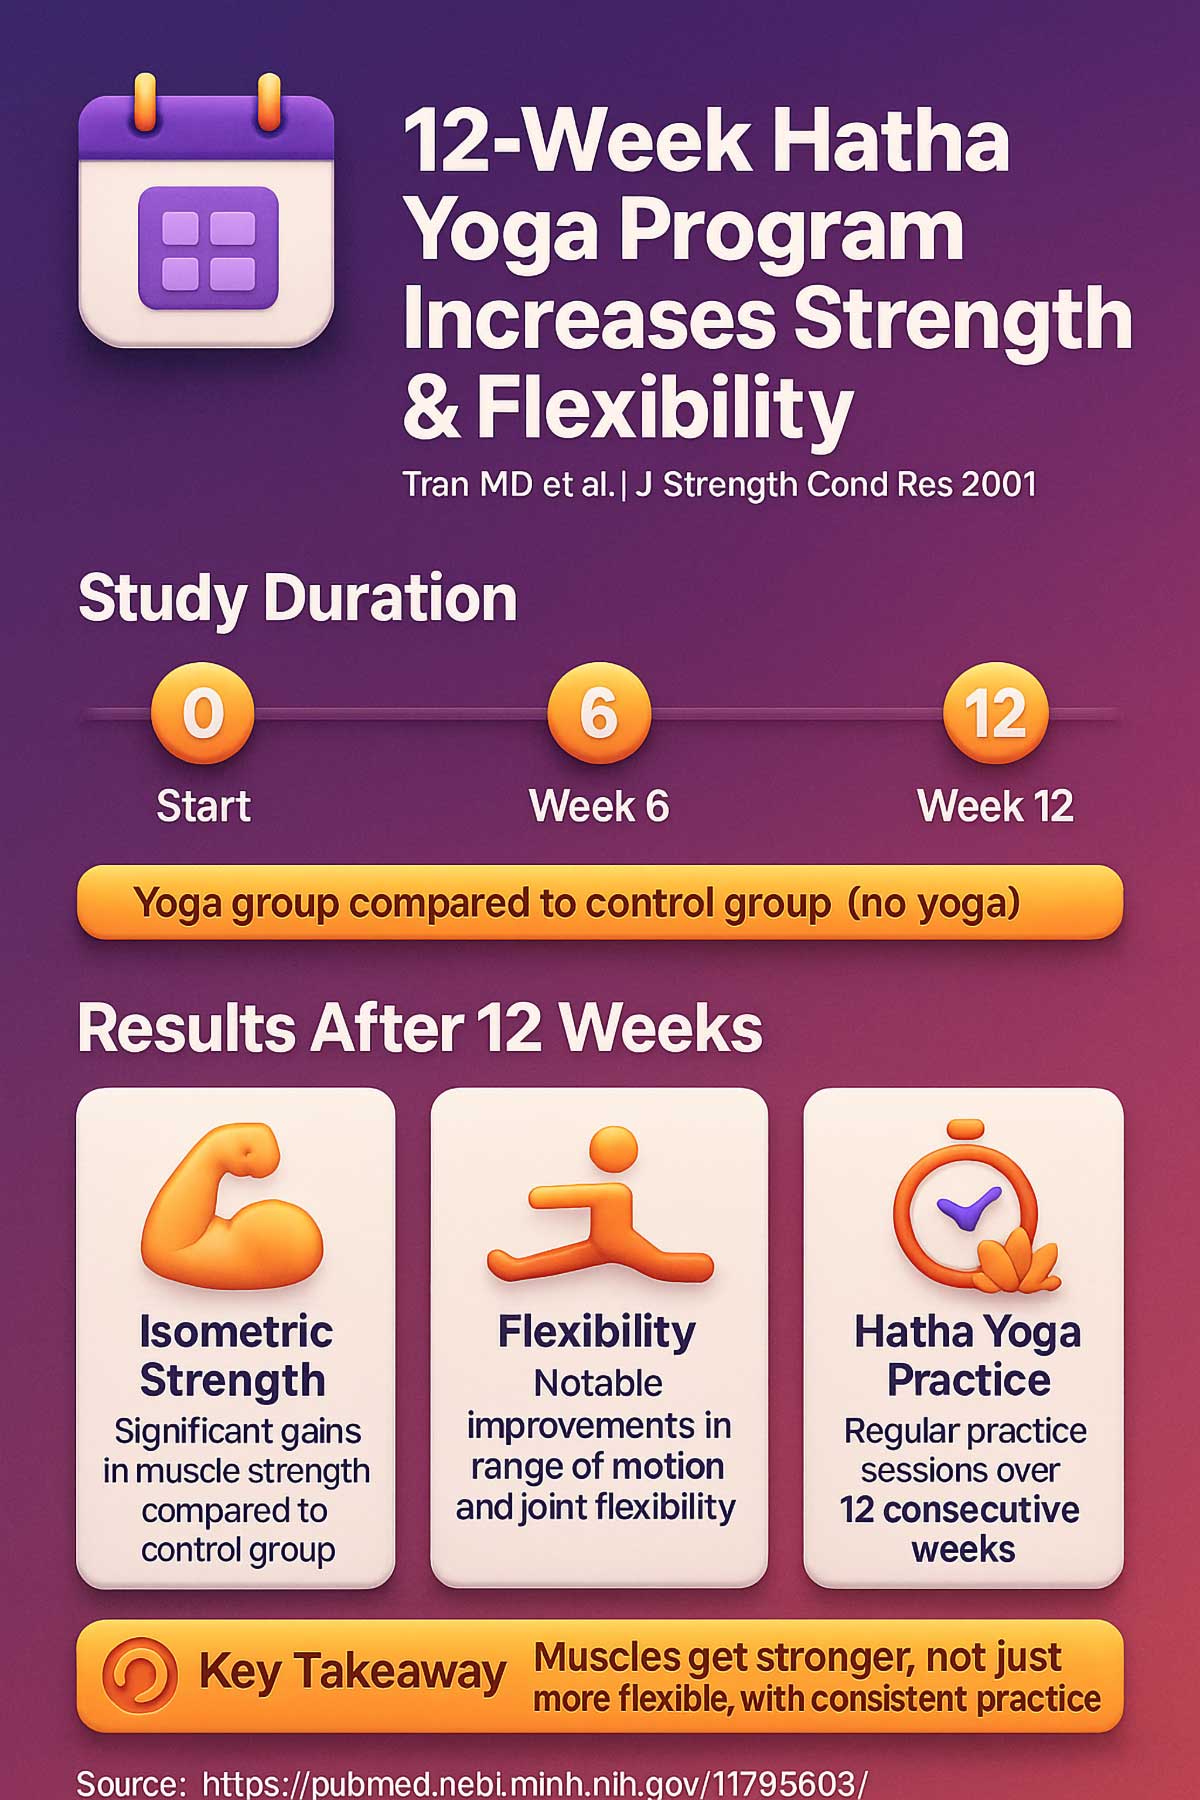
It maintains muscle mass. After 50, we naturally lose muscle mass each year. This process, called sarcopenia, makes everyday tasks harder. Yoga poses require you to support your own body weight, which builds and maintains muscle. Another study published in the Journal of Strength and Conditioning Research looked at a 12-week Hatha yoga program. Participants showed real gains in isometric strength and flexibility compared to people who didn’t do yoga. That means your muscles actually get stronger, not just more limber.
It protects your bones. Weight-bearing exercise helps maintain bone density. Many yoga poses qualify as weight-bearing, which helps fight osteoporosis. When you hold Chair Pose or Warrior II, your bones respond to the load by maintaining their strength.
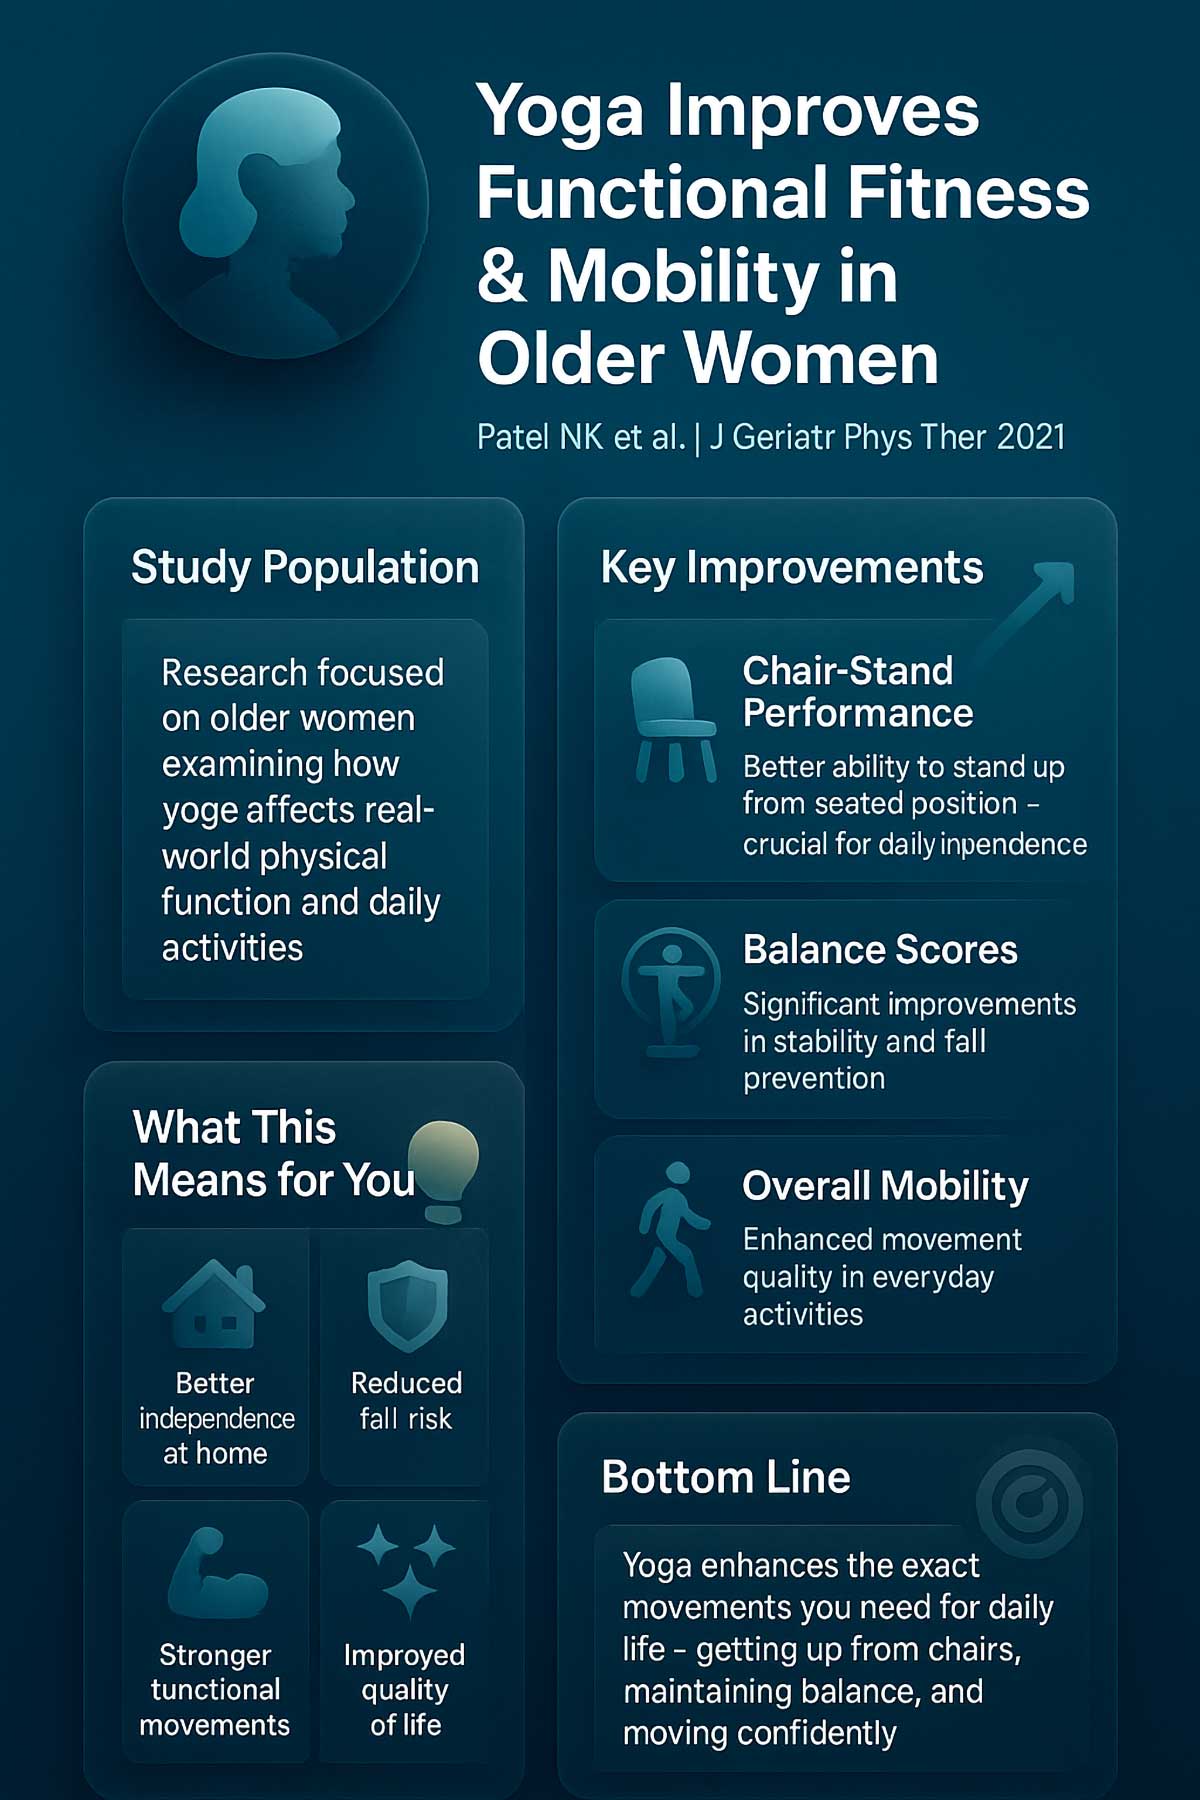
It keeps you balanced. Balance training is one of the best ways to prevent falls. Almost every yoga pose challenges your balance in some way. A 2021 study in the Journal of Geriatric Physical Therapy showed that yoga improved functional fitness and mobility in older women, with better scores on chair-stand and balance tests. These are the exact movements you need for daily life.
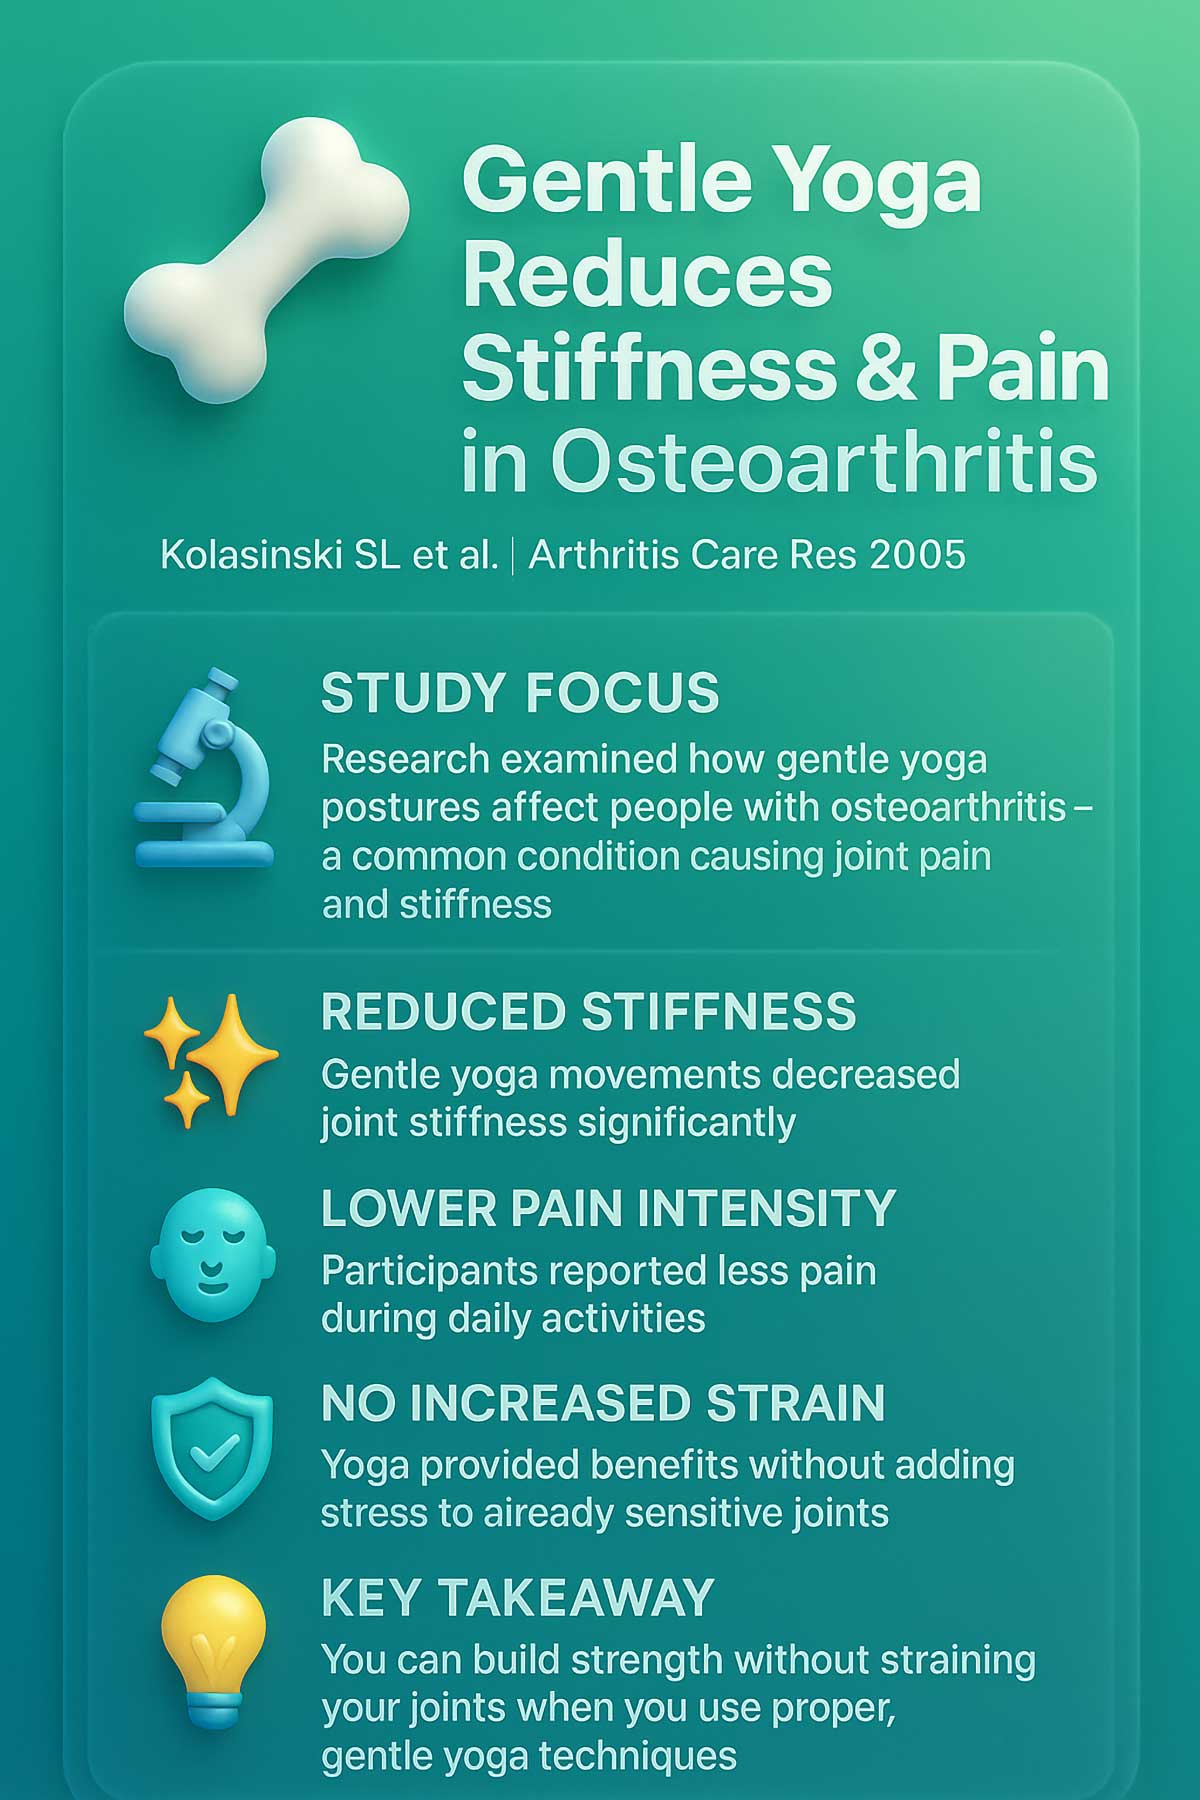
It’s gentle on joints. Research published in Arthritis Care and Research found that gentle yoga postures reduce stiffness and pain in people with osteoarthritis. The key word is “gentle”—you can build strength without straining your joints. The controlled movements and proper alignment protect your knees, hips, and shoulders while still giving them a workout.
It reduces stress. Chronic stress affects everything from sleep to immune function. The breathing and mindfulness aspects of yoga activate your body’s relaxation response. A 2024 meta-analysis showed that yoga significantly improves mental wellbeing, with notable effects on depression scores, sleep quality, and perceived mental health in older adults.
What the Latest Research Shows
The scientific evidence for yoga keeps getting stronger. A comprehensive meta-analysis examined dozens of studies on yoga for older adults. The results were clear: yoga improves balance with a moderate to large effect size, increases lower body flexibility, and builds lower limb strength compared to inactive controls.
Here’s what stands out: a 2024 study found that 12-week yoga programs significantly improve gait, balance, fall risk, flexibility, and muscle strength in older adults. That’s exactly the length of time needed to see real changes.
The best part? You don’t need to practice for hours. Research in Evidence-Based Complementary and Alternative Medicine showed that short, daily yoga sessions of just 10-15 minutes improve flexibility and perceived strength, even in beginners.
Interestingly, research shows people in their 60s and 70s who practice yoga for 9-12 weeks see the largest positive effects on physical fitness. If you’re in this age group, you’re in the sweet spot for getting maximum benefits.
Yoga vs. Other Exercises for People Over 50
You have options when it comes to staying active. Here’s how yoga stacks up:
| Exercise Type | Joint Impact | Equipment Needed | Time Required | Strength Gains | Balance Gains | Cost |
|---|---|---|---|---|---|---|
| Yoga | Very Low | Minimal | 12-20 min | Moderate | High | $0-20 |
| Walking | Low | Good shoes | 30+ min | Low | Low | $0-150 |
| Swimming | None | Pool access | 30+ min | Moderate | Low | $300-900/year |
| Weight Training | Moderate | Weights/gym | 30+ min | High | Low | $360-1200/year |
| Tai Chi | Very Low | None | 30+ min | Low | High | $0-500/year |
Yoga offers a unique combination: low joint impact, high balance benefits, and minimal time and cost investment. You can do it at home, in any weather, and adjust it to your ability level.
Setting Up Your Space (Takes Just 5 Minutes)
Creating a dedicated spot for yoga helps you stick with the practice.
Choose your location:
- Pick a quiet area with enough room to lie down and stretch your arms out
- Near a sturdy wall (you’ll use it for support and one pose)
- Away from furniture you might bump into
- Good lighting, but not harsh overhead lights
- Comfortable temperature (slightly cool is better than too warm)
Best flooring options:
- Yoga mat on any surface (provides cushioning and grip)
- Carpet works well (may want a towel for extra padding)
- Hardwood or tile (definitely needs a mat)
- Avoid slippery surfaces like polished concrete
What to wear:
- Loose, stretchy pants or shorts
- Comfortable top that won’t ride up
- No shoes or socks (bare feet give better balance)
- Remove jewelry that might get in the way
- Avoid anything too baggy that obscures your form
Create the right atmosphere:
- Turn off your phone or put it on silent
- Let family members know you need 12 uninterrupted minutes
- Optional: play gentle background music
- Keep water nearby for after your practice
This setup takes 5 minutes the first time. After that, your space is ready whenever you are.
Breathing Basics
Breath is what separates yoga from just stretching. It reduces strain, calms your nervous system, and helps you hold poses longer.
Simple breathing pattern for beginners:
- Inhale through your nose for 4 counts
- Exhale through your nose for 4 counts
- Keep the breath smooth and even, not forced
- Never hold your breath during poses
When to breathe during each pose:
- Inhale as you prepare to move into a pose
- Exhale as you move deeper into the pose
- Breathe normally while holding (don’t hold your breath)
- Inhale as you come out of the pose
Why breath matters:
- Delivers oxygen to working muscles
- Reduces perceived effort and strain
- Lowers stress hormones like cortisol
- Helps you stay present and focused
- Signals your body to relax, not tense up
Common breathing mistakes to avoid:
- Holding your breath (makes poses harder and raises blood pressure)
- Breathing too fast or panting (creates tension)
- Only breathing into your chest (shallow breathing)
- Forgetting to breathe at all when concentrating
If you can’t maintain steady breathing in a pose, that’s a sign to back off slightly. The pose should challenge you, but you should still be able to breathe calmly.
Your 12-Minute Daily Strength and Mobility Routine
Quick Warm-Up (2 minutes)
Before you begin, take a minute to warm up. This prepares your body and reduces the chance of strain.
- Roll your neck slowly in circles, 5 times in each direction
- Shrug your shoulders up to your ears, then release them down, 10 times
- Make gentle circles with your wrists, 10 times in each direction
- Rotate your ankles in circles, 10 times each foot
- Take 5 deep breaths, inhaling and exhaling slowly
Now you’re ready for the main routine. Each pose takes about 1-2 minutes, including both sides when needed.
6 Gentle Poses to Get You Started
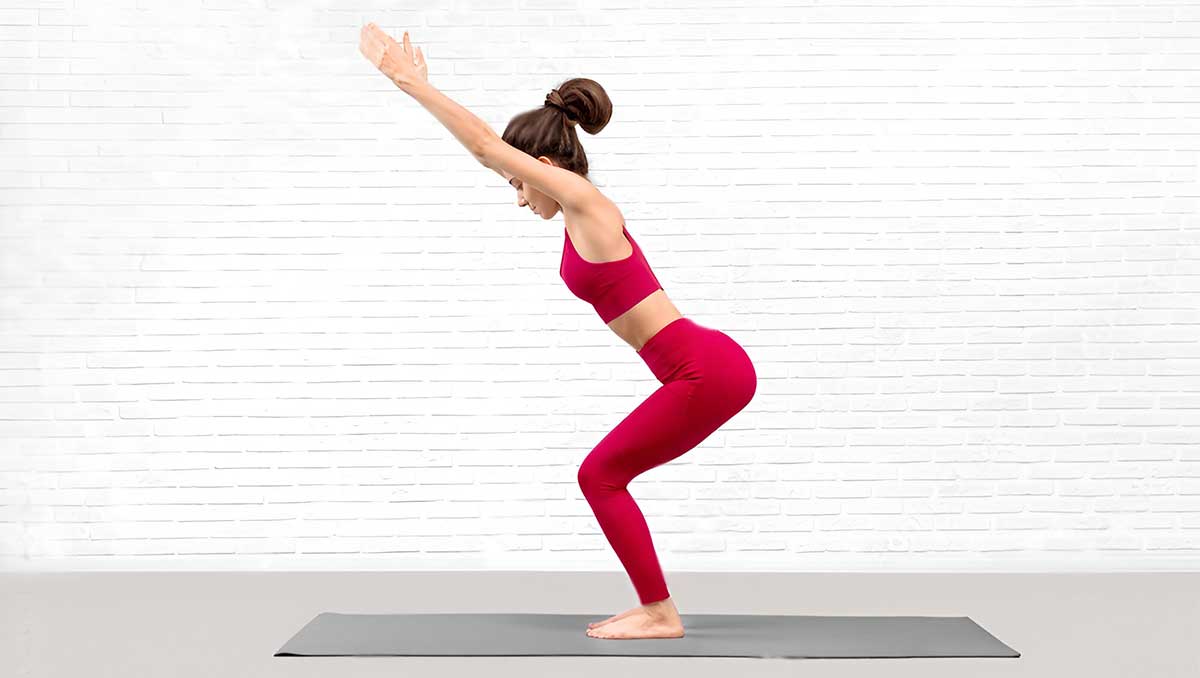
1. Chair Pose with or without Support (Utkatasana)
Why it’s great for you: Builds strength in your thighs, core, and lower back. These muscles help you get up from chairs and climb stairs without struggle. This pose mimics one of the most important movements in daily life—standing up from sitting.
How to do it (standard version):
- Stand with your feet hip-width apart
- Keep your hands on a sturdy chair back for support (optional)
- Bend your knees and lower your hips as if sitting down
- Keep your chest lifted and your weight in your heels
- Don’t worry about going too low—even a small bend works your muscles
- If you need more support, place the chair against a wall
- Engage your core by pulling your belly button toward your spine
Hold for: 30 seconds, breathing slowly and deeply
Easiest version (for limited mobility):
- Stand in front of the chair
- Practice sit-to-stand movements without holding the position
- Use the chair arms to help you stand if needed
- Repeat 5-10 times
Challenge version (after 8-12 weeks):
- Reduce hand support to just fingertips on the chair
- Bend deeper, bringing thighs closer to parallel with the floor
- Eventually practice without chair support, arms extended forward
- Work up to 45 seconds
Common mistakes to avoid:
- Letting your knees cave inward (keep them aligned over your toes)
- Rounding your back (keep your chest lifted)
- Rising up on your toes (weight should be in your heels)
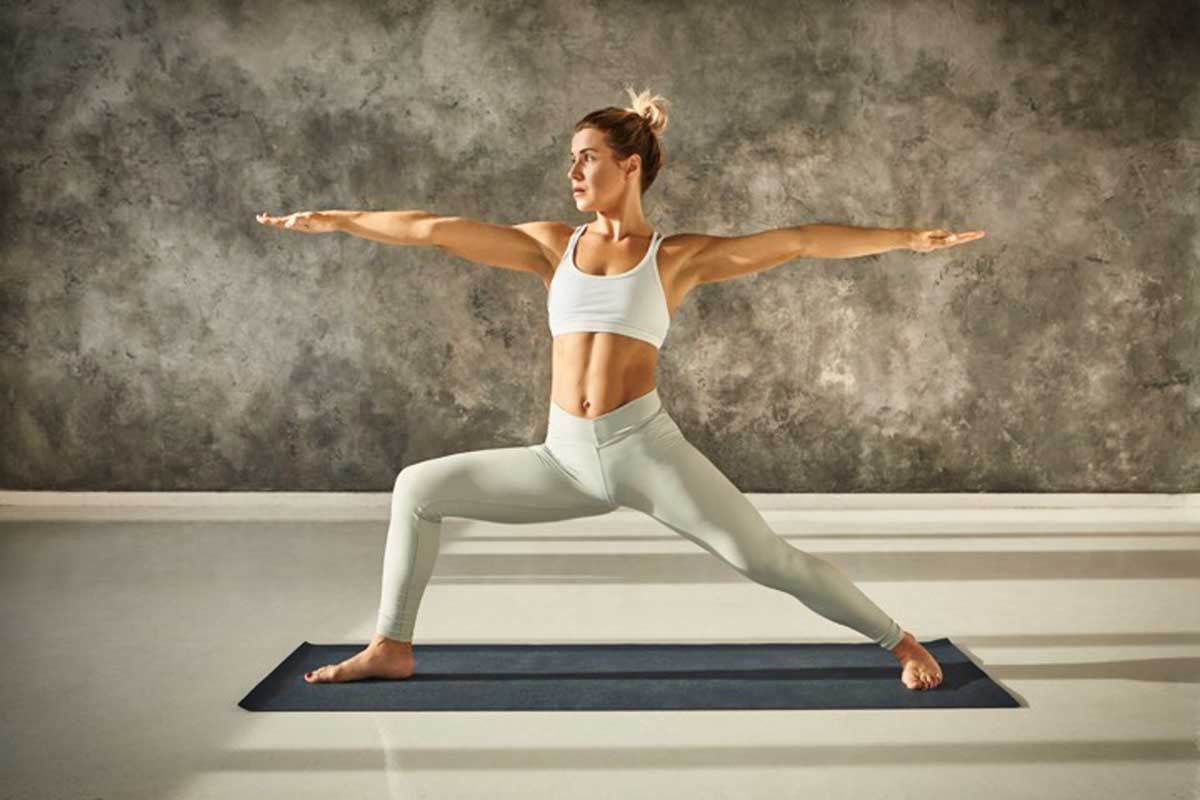
2. Warrior II (Virabhadrasana II)
Why it’s great for you: Strengthens your legs and opens your hips. This pose also builds stamina and improves your ability to stand for longer periods. The hip opening is especially valuable for people who sit a lot during the day.
How to do it (standard version):
- Step your feet about 3-4 feet apart
- Turn your right foot out 90 degrees and your left foot in slightly
- Bend your right knee over your ankle, keeping your left leg straight
- Stretch your arms out to the sides at shoulder height
- Look over your right hand
- Keep your shoulders relaxed, not hunched up
- Press through the outer edge of your back foot
- Use a wall or chair for balance if needed
Hold for: 30 seconds on each side
Easiest version (for limited mobility):
- Take a shorter stance (2-3 feet instead of 3-4 feet)
- Keep your front knee only slightly bent
- Rest one hand on a chair or wall for balance
- Don’t worry about having your arms extended
Challenge version (after 8-12 weeks):
- Take a wider stance for deeper stretch
- Bend your front knee to 90 degrees
- Hold for 45-60 seconds
- Add a slight backbend by lifting your chest
Common mistakes to avoid:
- Leaning your torso forward (stay upright)
- Letting your front knee drift inward (align it over your ankle)
- Tensing your shoulders up toward your ears
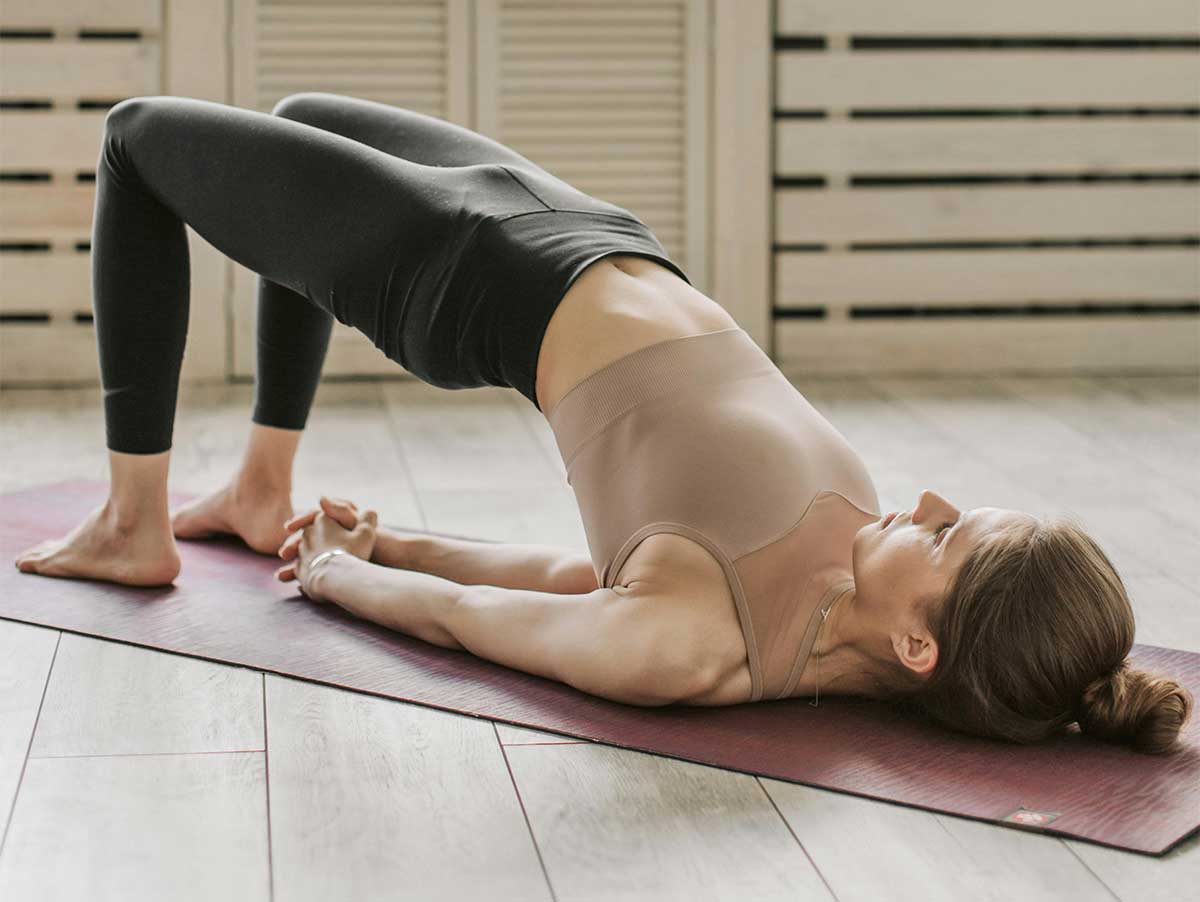
3. Bridge Pose (Setu Bandhasana)
Why it’s great for you: Strengthens your back, glutes, and hamstrings. This pose helps with posture and supports your lower back during daily activities. A strong posterior chain (back body) is key for preventing back pain.
How to do it (standard version):
- Lie on your back with your knees bent and feet flat on the floor, hip-width apart
- Place your arms by your sides, palms down
- Press through your feet and lift your hips toward the ceiling
- Keep your knees aligned over your ankles
- Squeeze your glutes at the top
- Your body should form a straight line from shoulders to knees
- Don’t lift your hips so high that your back arches uncomfortably
- Keep your neck neutral (don’t turn your head)
Hold for: 30 seconds, breathing normally
Easiest version (for limited mobility):
- Lift your hips just a few inches off the ground
- Hold for 10-15 seconds, then rest
- Repeat 3-4 times instead of one long hold
- Place a yoga block or cushion under your sacrum for support
Challenge version (after 8-12 weeks):
- Lift one leg straight up toward the ceiling while holding
- Clasp your hands under your back for deeper chest opening
- Hold for 45-60 seconds
- Do 2-3 repetitions with short rests between
Common mistakes to avoid:
- Letting your knees splay out to the sides (keep them hip-width)
- Pushing your hips too high (should feel strong, not strained)
- Holding your breath (breathe normally throughout)
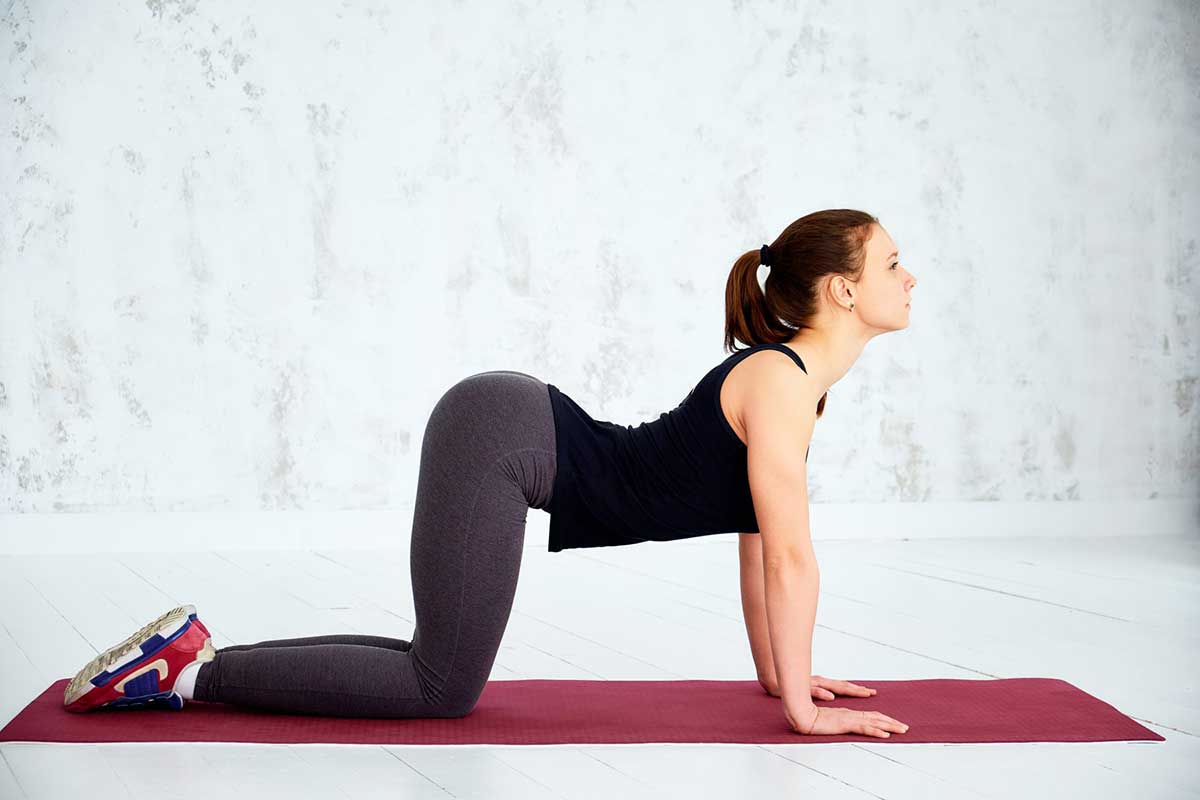
4. Cat-Cow Stretch (Marjaryasana-Bitilasana)
Why it’s great for you: Increases spinal flexibility and relieves tension in your back and neck. This movement keeps your spine mobile and reduces stiffness. Think of it as a massage for your spine from the inside.
How to do it (standard version):
- Start on your hands and knees, with your hands under your shoulders and knees under your hips
- For Cow Pose: Drop your belly toward the floor, lift your chest and tailbone up, and look forward
- For Cat Pose: Round your spine toward the ceiling, tuck your chin to your chest, and pull your belly in
- Move slowly between these two positions, matching the movement to your breath
- Inhale as you move into Cow, exhale as you move into Cat
- Each movement should take about 3-4 seconds
Repeat: 10 times, moving smoothly
Easiest version (for limited mobility):
- Sit in a sturdy chair with feet flat on the floor
- Place your hands on your knees
- Arch your back and look up (Cow), then round your back and look down (Cat)
- The movement will be smaller but still beneficial
- This version works great for people with wrist or knee issues
Challenge version (after 8-12 weeks):
- Increase to 15-20 repetitions
- Move more slowly (5-6 seconds per movement) for deeper stretch
- Add a side-to-side movement (thread the needle) between repetitions
- Hold each position for 2-3 breaths instead of flowing
Common mistakes to avoid:
- Moving too fast (this should be slow and controlled)
- Only moving your neck (the movement should come from your whole spine)
- Sagging in your shoulders (keep shoulders away from ears)
Modifications for comfort:
- Place a folded towel under your knees if they hurt
- Use yoga blocks under your hands if wrists feel strained
- Come down to your forearms instead of hands
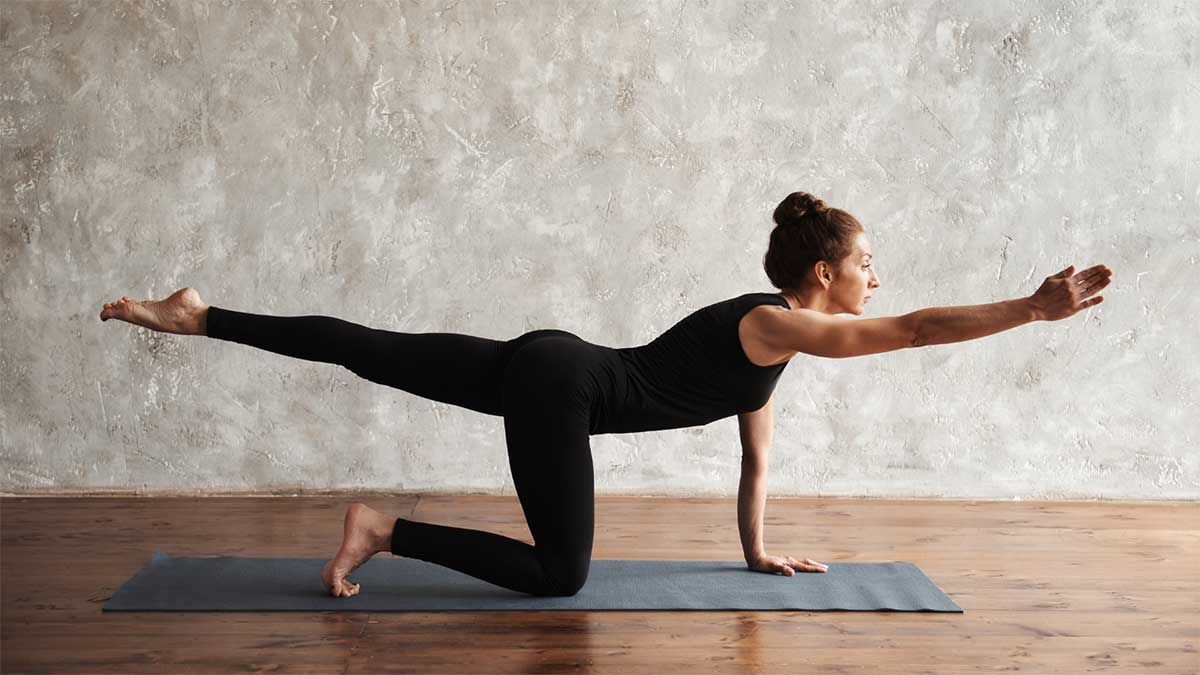
5. Bird-Dog (Parsva Balasana)
Why it’s great for you: Builds core stability and balance. This pose strengthens the muscles that support your spine and helps prevent back pain. It also challenges your coordination, which keeps your brain engaged.
How to do it (standard version):
- Start on your hands and knees, with a neutral spine
- Extend your right arm forward and your left leg back at the same time
- Keep your hips level and your core engaged
- Your arm and leg should form a straight line with your body
- Don’t let your lower back sag
- Look down at the floor to keep your neck aligned
- Focus on a spot on the floor to help with balance
Hold for: 15 seconds on each side, repeat twice
Easiest version (for limited mobility):
- Just lift your arm OR your leg, not both at once
- Start with leg lifts only (easier for most people)
- Hold for 5-10 seconds and build up
- Keep your supporting hand and knee firmly planted
Challenge version (after 8-12 weeks):
- Hold for 30 seconds on each side
- Add a crunch by bringing your elbow to your knee, then extending again
- Do 3-4 repetitions per side
- Close your eyes briefly for extra balance challenge
Common mistakes to avoid:
- Letting your hips rotate or tilt (keep them square to the floor)
- Arching your lower back (engage your abs to keep spine neutral)
- Raising your leg or arm too high (straight is better than high)
- Forgetting to breathe
Modifications for comfort:
- Place a cushion under your supporting knee
- Come down to your forearms for wrist relief
- Start by lifting just your arm or leg a few inches off the ground
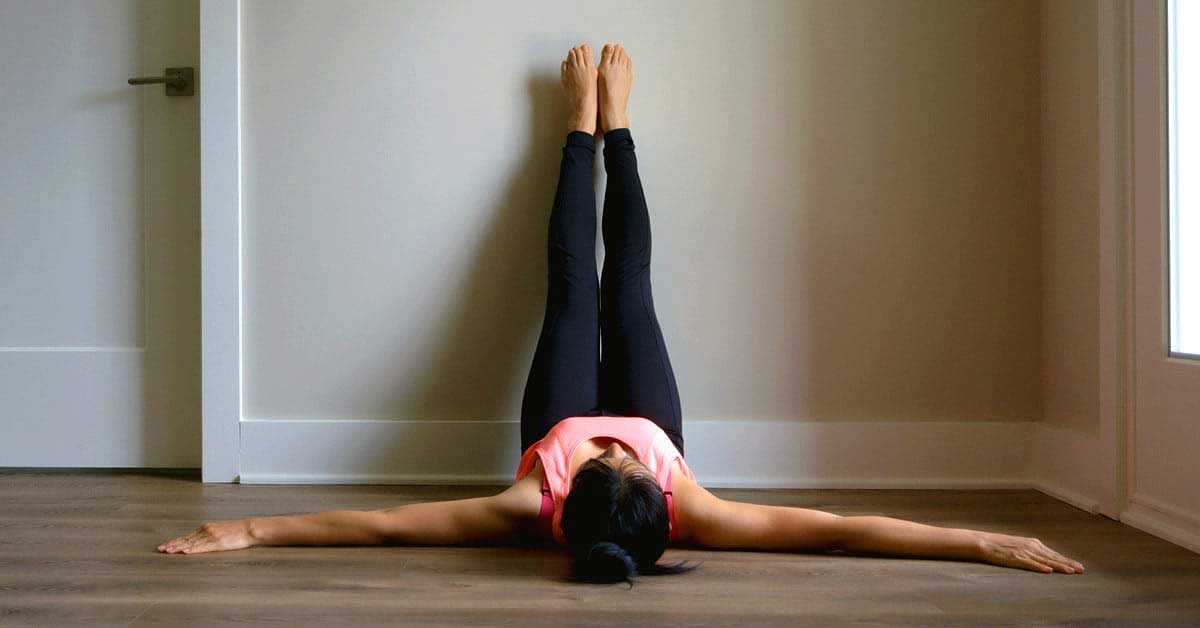
6. Legs-Up-The-Wall Pose (Viparita Karani)
Why it’s great for you: This gentle inversion reduces swelling in your legs and feet. It also calms your nervous system and helps you relax after the other poses. Many people find this pose so relaxing they want to stay in it longer.
How to do it (standard version):
- Sit sideways next to a wall with your hip touching it
- Swing your legs up the wall as you lower your back to the floor
- Your legs should be straight up the wall, and your arms can rest by your sides
- Scoot your hips as close to the wall as feels comfortable
- Close your eyes and breathe deeply
- Let your whole body relax into the floor
- Focus on releasing tension with each exhale
Hold for: 2-3 minutes (this is your cool-down)
Easiest version (for limited mobility):
- Bend your knees slightly instead of keeping legs straight
- Move your hips further from the wall (less intense stretch)
- Place your calves on a chair seat instead of using the wall
- Use a pillow under your head for neck comfort
Challenge version (after 8-12 weeks):
- Place a folded blanket or bolster under your hips for deeper inversion
- Hold for 5-10 minutes if time allows
- Add gentle leg movements: bend and straighten knees, make circles with ankles
- Open your legs into a wide V shape for inner thigh stretch
Common mistakes to avoid:
- Having your hips too far from the wall (reduces benefits)
- Tensing your legs (let them relax completely)
- Rushing out of the pose (exit slowly by bending knees and rolling to one side)
Modifications for comfort:
- Place a folded blanket under your lower back for support
- If your hamstrings are tight, keep your knees slightly bent
- Rest your arms on your belly or overhead, whatever feels best
🧘 12-Minute Yoga Timer
Your guided yoga practice companion
Which Pose Targets Your Biggest Concern?
Not sure where to focus your energy? Here’s a quick guide:
Want stronger legs for stairs and standing?
- Prioritize: Chair Pose and Warrior II
- These poses directly build the muscles you use to stand up and walk
Dealing with back pain or stiffness?
- Prioritize: Cat-Cow and Bridge Pose
- These movements strengthen and mobilize your spine
Struggling with balance and stability?
- Prioritize: Bird-Dog and Warrior II
- These poses challenge your balance safely with support nearby
Have swollen feet or legs by end of day?
- Prioritize: Legs-Up-Wall
- This pose uses gravity to drain fluid from your lower legs
Feel stiff all over in the morning?
- Do all 6 poses in order
- The sequence addresses total body mobility and strength
How This Helps Your Daily Life
The real test of any exercise program is whether it makes everyday activities easier. Here’s how these specific poses translate to daily life:
Chair Pose builds the strength to:
- Get up from low chairs and couches without using your hands
- Stand up from the toilet independently
- Get in and out of cars more easily
- Carry groceries from the car to your house
- Play with grandchildren on the floor
Warrior II builds the strength to:
- Stand while cooking or doing dishes without fatigue
- Walk longer distances without leg tiredness
- Carry bags or packages in one hand while staying balanced
- Navigate uneven sidewalks and curbs safely
- Garden or do yard work for longer periods
Bridge Pose builds the strength to:
- Maintain good posture while sitting or standing
- Lift items from the floor safely
- Get out of bed without back pain
- Carry heavier objects without straining your back
- Sit in cars for longer drives without discomfort
Cat-Cow maintains the flexibility to:
- Reach for items on high shelves
- Bend down to tie your shoes
- Look over your shoulder when backing up your car
- Twist to reach your seatbelt
- Get dressed without stiffness
Bird-Dog builds the stability to:
- Walk on slippery or uneven surfaces confidently
- Catch yourself if you trip
- Navigate stairs while carrying something
- Maintain balance in crowded spaces
- React quickly to avoid hazards
Legs-Up-Wall provides the recovery to:
- Reduce foot and ankle swelling after long days
- Sleep better by calming your nervous system
- Lower stress levels before bed
- Recover faster after physical activity
- Feel more energized the next day
Making Yoga a Daily Habit
Tips for Sticking With Your New Routine
Starting a new practice is exciting, but making it stick takes some planning. These strategies help turn your 12-minute yoga session into a lasting habit.
Pick the same time each day. Your body and mind respond well to routine. Morning yoga can energize you for the day. Evening yoga can help you unwind. Choose what fits your schedule best and stick with it. Research shows that people who practice at the same time daily are 3 times more likely to maintain the habit after 6 months.
Create a dedicated space. You don’t need much room—just enough to roll out a mat or towel. Having a consistent spot signals to your brain that it’s time to practice. Keep any props you need (like a chair or blanket) nearby so you don’t waste time gathering them.
Focus on consistency, not perfection. Doing these poses for 12 minutes every day beats doing an hour once a week. Some days you’ll feel strong and flexible. Other days you won’t. Both are fine. Just showing up matters most. Think of it like brushing your teeth—you do it even when you’re tired because it’s non-negotiable.
Listen to your body. Yoga should challenge you, but it shouldn’t hurt. You’ll feel muscles working and stretching, which is normal. Sharp pain or joint discomfort is your body’s way of saying to back off. Respect those signals. The difference between “good discomfort” and “bad pain” becomes clearer with practice.
Track your progress. Keep a simple log or mark your calendar each day you practice. Seeing your streak of consecutive days motivates you to keep going. You can also note how you feel—many people notice better sleep, less stiffness, or improved mood within a few weeks.
Adjust as you grow stronger. After a few weeks, these poses will feel easier. That’s a good thing. When you’re ready, try holding each pose for 10-15 seconds longer. Or work on your form—can you bend deeper in Warrior II? Can you hold Bird-Dog without wobbling?
Don’t judge yourself. Some people touch their toes easily. Others don’t. Some balance on one leg for minutes. Others need a wall for support. Your yoga practice is yours alone. Comparing yourself to others misses the point entirely. The only comparison that matters is you today versus you last month.
Ask for help if you need it. If you have chronic pain, injuries, or health concerns, talk to your doctor before starting. They can tell you if any poses need to be modified for your situation. A physical therapist or yoga instructor who works with older adults can also provide guidance.
Your 3-Month Progression Plan
Knowing what to expect helps you stay motivated. Here’s a realistic timeline:
Month 1: Master the Basics
Your focus: Form over depth
- Learn proper alignment for each pose
- Use all modifications as needed without shame
- Build the daily habit (aim for 6-7 days per week)
- Don’t worry about how long you can hold poses
What you’ll notice:
- Poses feel awkward at first
- You’ll need to check the instructions often
- Some mild muscle soreness (normal and good)
- The 12 minutes might feel long
Milestone: Completing all 6 poses with proper form, even if modified
Month 2: Increase Intensity
Your focus: Holding longer and reducing props
- Add 10 seconds to each hold time
- Reduce reliance on chair or wall support
- Challenge yourself to go slightly deeper in poses
- Add 2-3 minutes to your practice with longer warm-up or cool-down
What you’ll notice:
- Poses start feeling familiar
- You need the instructions less often
- Morning stiffness decreases noticeably
- You can balance better in Warrior II and Bird-Dog
Milestone: Holding poses for 40-45 seconds without excessive shaking
Month 3: Add Variety and Challenge
Your focus: Progressing to harder variations
- Try the “challenge versions” of poses you’ve mastered
- Add 3-4 new beginner poses to your routine (suggestions below)
- Increase total practice time to 15-20 minutes
- Consider adding a second short session (5-10 minutes) in the evening
What you’ll notice:
- You feel genuinely stronger in daily activities
- Friends or family comment on your improved posture
- You recover faster from physical activities
- You might actually look forward to your practice
Milestone: Completing the routine without checking instructions, using fewer modifications
After 3 Months: Next Steps
Once you’ve mastered these 6 poses, here are beginner-friendly options to add:
- Child’s Pose (resting pose for between other poses)
- Downward Facing Dog (full body stretch and strengthener)
- Triangle Pose (side body stretch and leg strengthener)
- Tree Pose (standing balance pose)
- Cobra Pose (gentle backbend for spine strength)
- Seated Forward Bend (hamstring stretch)
You can also extend your sessions to 20-30 minutes or join a local beginner yoga class to learn from an instructor.
📚 Yoga Pose Library
Explore 30+ beginner-friendly poses
Common Concerns and Solutions
Problems will come up as you practice. Here’s how to solve the most common ones:
| Concern | What It Means | Solution | When to Modify |
|---|---|---|---|
| Knee pain during poses | Too much pressure on joint | Use padding under knees; don’t bend as deeply | Immediately if sharp pain |
| Balance feels impossible | Core weakness or inner ear issues | Always use wall or chair support; practice near corner | Every time until stable |
| Wrist discomfort on hands and knees | Too much weight on wrists | Use fists instead of flat palms; try forearm versions | If pain persists after one session |
| Tight hips in Warrior II | Years of sitting; normal aging | Take narrower stance; don’t bend knee as deeply | As needed; improves with time |
| Can’t touch toes in stretches | Tight hamstrings (very common) | Bend knees; use strap or towel to reach feet | Always at first; gradually straighten |
| Dizziness when standing up | Blood pressure adjustment | Stand up slowly; pause before moving | Every time; tell your doctor |
| Neck strain looking up | Poor alignment or weak neck muscles | Keep |
FAQs
I can’t balance in Warrior II. What should I do?
Balance issues are completely normal, especially at first. Use a wall or sturdy chair for support—that’s what they’re there for. Position yourself so you can reach out and touch the support if you wobble. Over time, try using lighter touch, then just fingertips, then no support. It can take 4-6 weeks to feel stable.
My knees crack during poses. Is that bad?
Cracking or popping sounds without pain are usually harmless. Your joints have gases that create bubbles, and movement releases them. That’s the cracking sound. If you have pain along with the cracking, that’s different—talk to your doctor. Also, make sure your knees are aligned over your toes in poses like Chair Pose and Warrior II. Misalignment can cause unnecessary strain.
How long before I see results?
Most people notice improved flexibility within 2-3 weeks. Strength gains take 4-6 weeks to become obvious. Balance improvements happen gradually over 6-8 weeks. The timeline varies based on your starting point and how consistently you practice. Daily practice produces faster results than sporadic practice.
Can I do this if I have arthritis?
Yes, in most cases. The research mentioned earlier showed that gentle yoga reduces stiffness and pain in people with osteoarthritis. However, talk to your doctor first. You’ll likely need to modify some poses and avoid deep bends if joints are inflamed. On bad arthritis days, do gentler versions or skip poses that aggravate specific joints.
What time of day is best?
Morning practice helps reduce stiffness and energizes you for the day. Evening practice promotes relaxation and better sleep. The best time is the time you’ll actually do it consistently. Some people split the difference and practice in the afternoon. Experiment to see what works for your body and schedule.
Should I eat before practicing?
Practice on an empty or nearly empty stomach works best. Wait at least 1-2 hours after a meal, or 30 minutes after a light snack. Bending and twisting with a full stomach feels uncomfortable and can cause nausea. That said, don’t practice if you’re very hungry either—that can make you dizzy. A small piece of fruit 20-30 minutes before works well for many people.
What if I miss a day?
Life happens. Missing one day won’t erase your progress. Just start again the next day without guilt. The danger is letting one missed day turn into a week. If you miss your regular time, see if you can fit in even 5 minutes later in the day. Something is always better than nothing.
Can I do this if I’m significantly overweight?
Absolutely. Yoga is adaptable to all body types. You might need to take a wider stance in some poses for stability. Use props freely—chairs, walls, blocks, and blankets make poses accessible. Focus on what your body can do, not what it can’t. Many people find that regular yoga practice helps them feel better in their bodies regardless of size.


