Millions of older adults deal with joint stiffness and reduced mobility every day. But the good news is that you don’t need an expensive gym membership or hours of free time to feel better.
Chair yoga offers a gentle, safe way to move your body and ease that stiffness. These aren’t complicated moves. You won’t need to get down on the floor. You can do them while watching your morning news.
This article shows you seven simple chair yoga exercises that take just 10 minutes a day. These moves target the areas that matter most: your hips, back, knees, and shoulders. You’ll learn how to do each one safely, and you’ll understand why they work.
The science behind why chair yoga works for better mobility
Chair yoga is exactly what it sounds like: yoga poses you do while sitting in a chair or using a chair for support. It adapts traditional yoga moves to make them safe and doable for people with limited mobility, balance issues, or joint problems.
Why does it work so well for people over 50? The answer lies in how it treats your body.
Improved flexibility and range of motion
When you move your joints through gentle stretches, you increase blood flow to the area. This helps keep the cartilage healthy and the joints lubricated. Think of it like oil in a door hinge. Regular movement keeps things gliding smoothly.
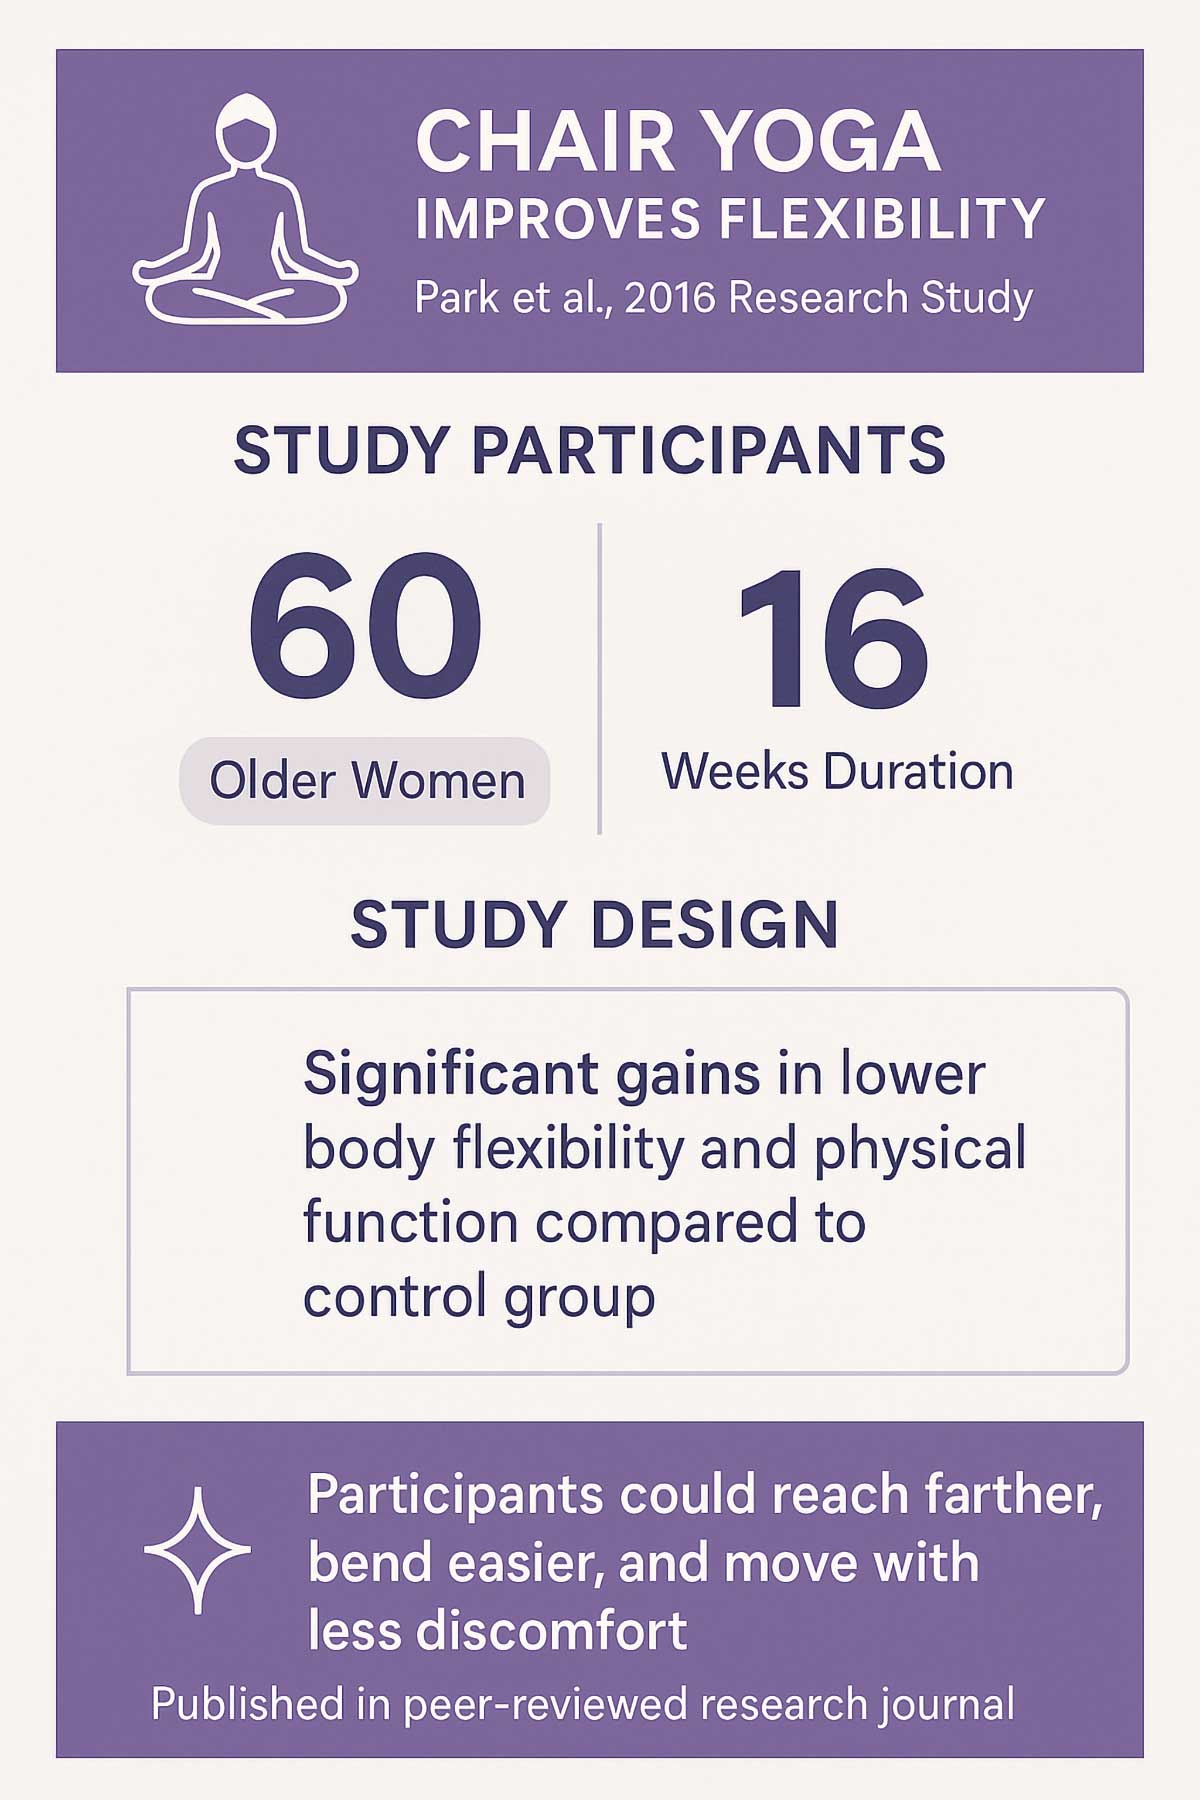
Park et al. (2016) studied 60 older women who practiced chair yoga twice a week for 16 weeks. The results showed significant gains in lower body flexibility and physical function compared to the control group. Participants could reach farther, bend easier, and move with less discomfort.
Better balance and stability
Falls are one of the biggest risks for older adults. Chair yoga helps you stay steady on your feet by strengthening the muscles that keep you upright. Even seated poses require you to engage your core and maintain good posture, which builds the stability you need in daily life.
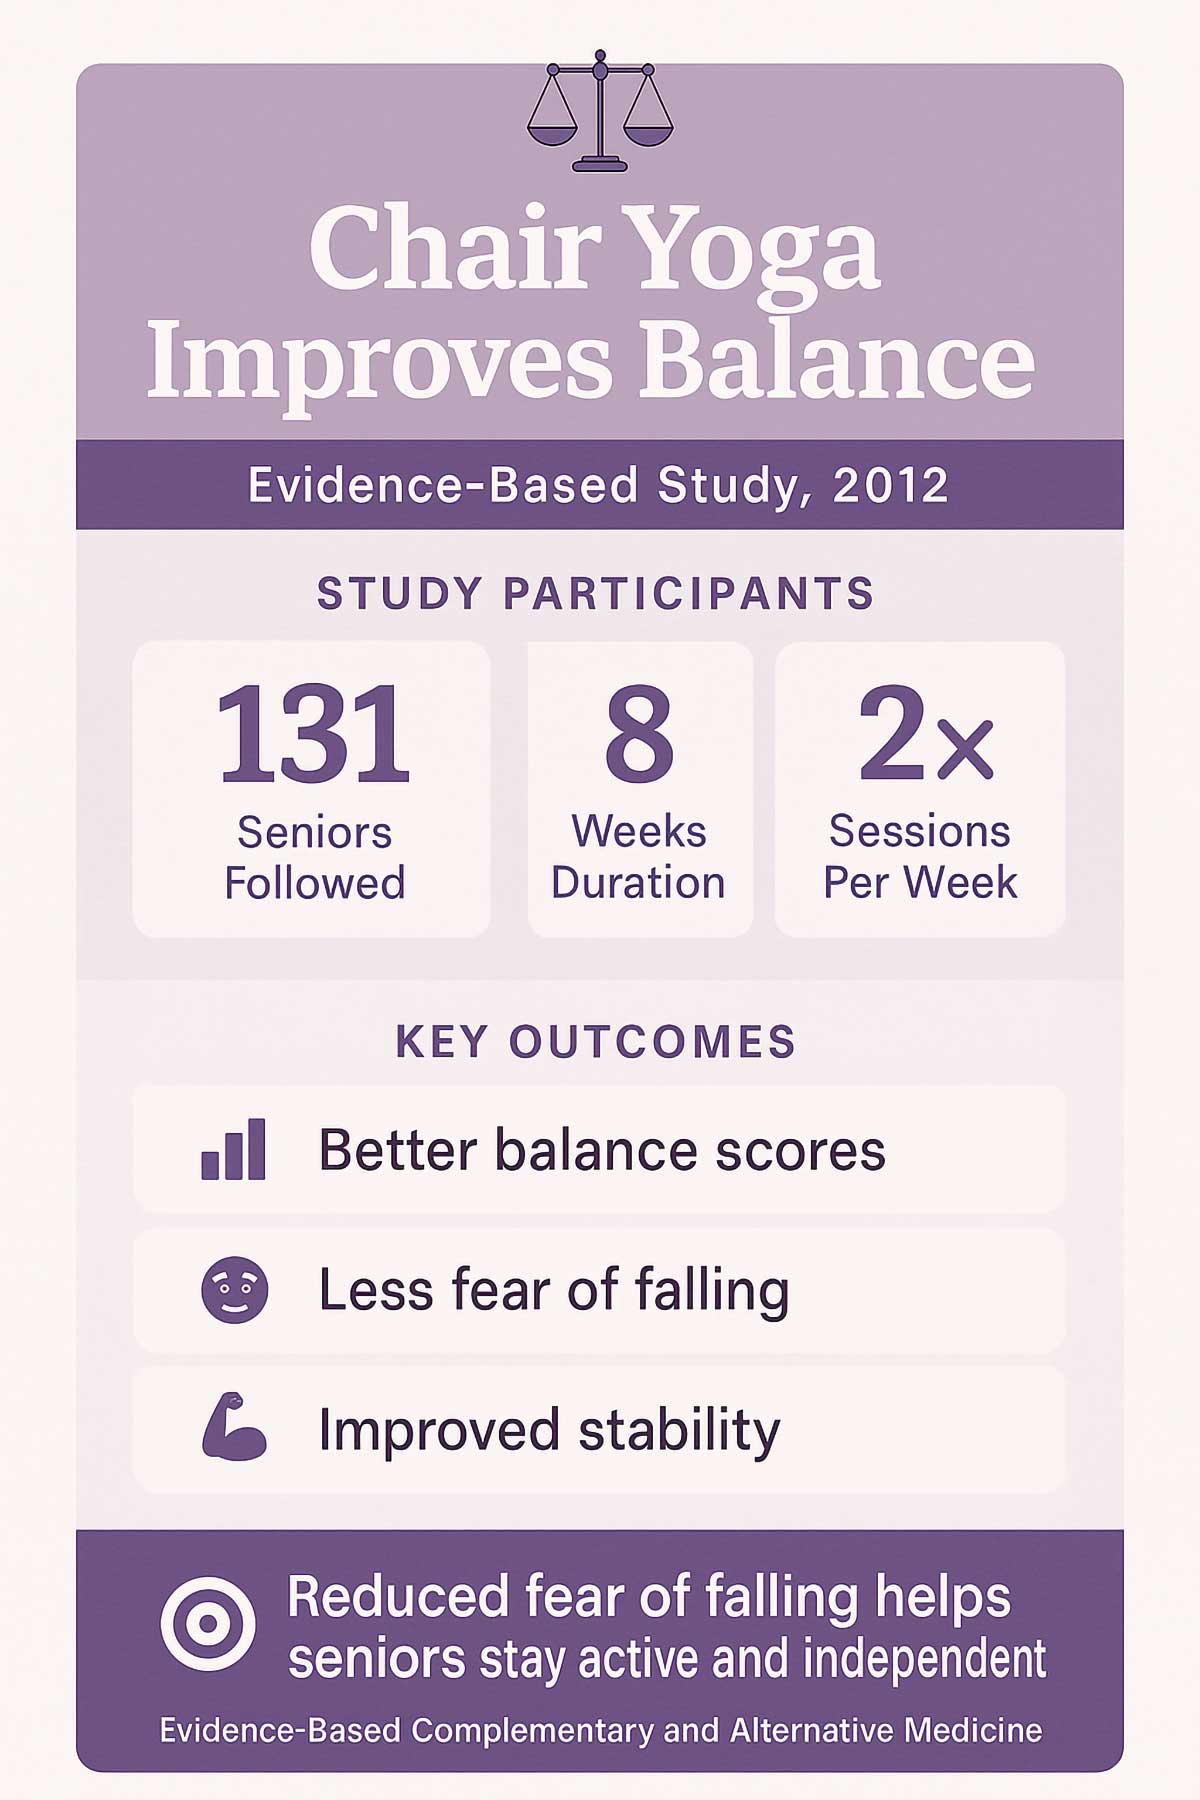
A 2012 study in Evidence-Based Complementary and Alternative Medicine followed 131 seniors over eight weeks. Those who practiced chair yoga showed better balance scores and reported feeling less afraid of falling. This fear reduction is just as important as the physical gains because it helps people stay active.
Stronger muscles around your joints
You might think yoga is just about stretching, but it also builds strength. When you hold poses or move slowly through them, your muscles work hard. Stronger muscles take pressure off your joints, which means less pain and better support for activities like climbing stairs or carrying groceries.
Less pain and stiffness
If you have arthritis or chronic joint pain, gentle movement is one of the best things you can do. Chair yoga gets your body moving without putting stress on painful areas. Many people find that regular practice reduces their morning stiffness and helps them feel more comfortable throughout the day.
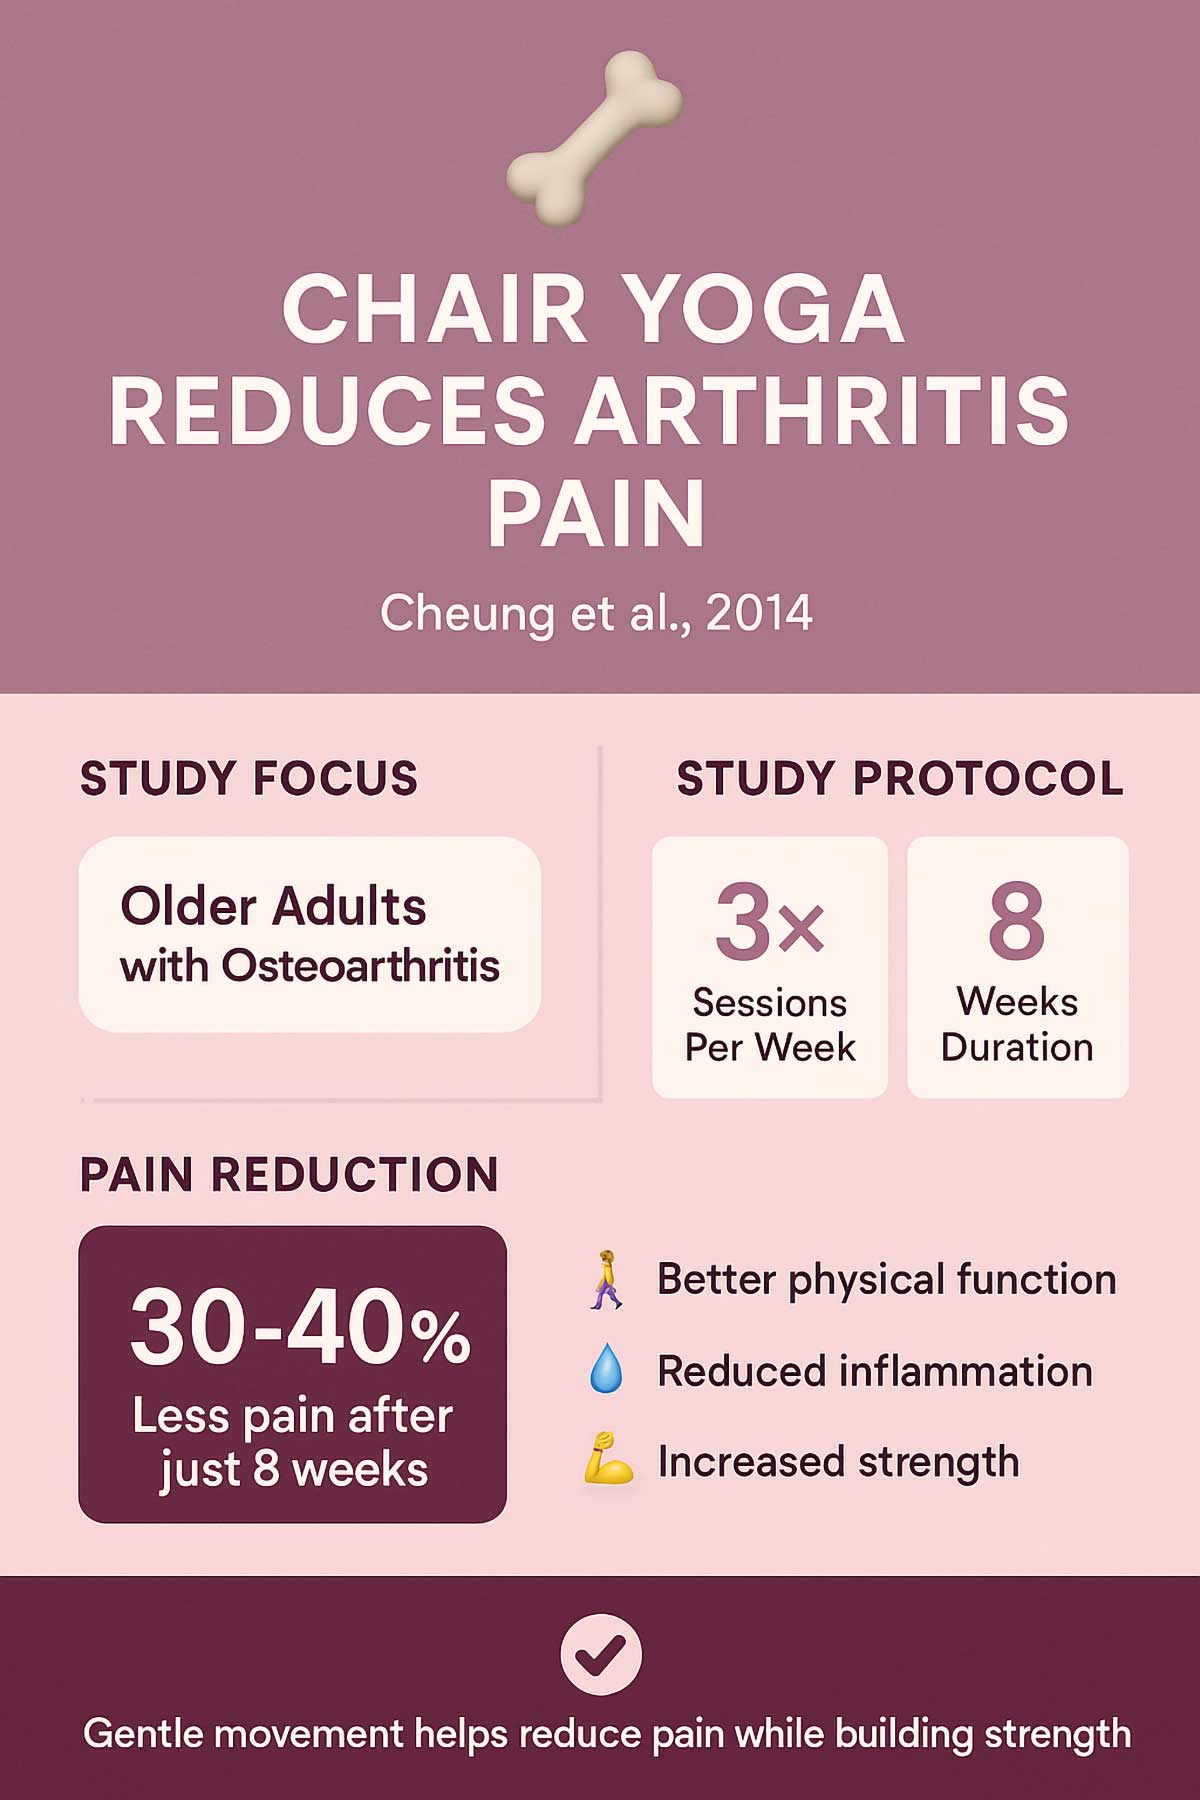
Cheung et al. (2014) published findings in the Journal of Physical Activity and Health showing that older adults with osteoarthritis who did chair yoga three times a week had measurably less pain and better physical function after just eight weeks. The gentle movements helped reduce inflammation while building strength.
How chair yoga compares to other senior exercise options
Not sure if chair yoga is right for you? Here’s how it stacks up against other popular choices.
| Exercise Type | Joint Impact | Equipment Needed | Fall Risk | Time Commitment | Best For |
|---|---|---|---|---|---|
| Chair Yoga | Very Low | Just a chair | Very Low | 10-30 min | Joint stiffness, limited mobility, beginners |
| Walking | Low-Medium | Good shoes | Medium | 30+ min | Cardio health, leg strength |
| Water Aerobics | Very Low | Pool access | Low | 45-60 min | Full-body workout, arthritis pain |
| Traditional Yoga | Medium | Mat, props | Medium-High | 45-60 min | Flexibility, those comfortable getting on the floor |
| Tai Chi | Low | None | Low | 30-45 min | Balance, mindfulness, outdoor practice |
Chair yoga wins for accessibility and safety. You can start today with just a chair and 10 minutes.
Getting started: your 3-step checklist for a safe practice
Before you start, take a minute to set yourself up for success. These three simple steps will keep you safe and comfortable.
Choose the right chair
You need a sturdy chair without wheels. It should have a flat seat, not a cushion that sinks down too much. If your chair has arms, that’s fine, but you might want to try one without arms for better range of motion.
When you sit, your feet should rest flat on the floor. Your knees should be at about a 90-degree angle. If your feet don’t touch the ground, put a book or block under them.
Listen to your body
This is the most important rule: stop if something hurts. You should feel a gentle stretch, but never sharp pain. “No pain, all gain” is the motto here.
Some days you’ll be able to stretch farther than others. That’s normal. Don’t compare today’s practice to yesterday’s. Just show up and do what feels good.
If you have any health concerns or recent injuries, talk to your doctor before starting a new exercise routine.
Focus on your breath
Your breath is your guide. Take slow, deep breaths through your nose. As you breathe in, your belly should expand. As you breathe out, it should soften.
If you find yourself holding your breath during a pose, that’s a sign you’re pushing too hard. Ease up a bit. Your breath should stay smooth and steady throughout each exercise.
The 10-minute daily mobility routine: 7 gentle chair yoga exercises
Do these exercises in order. Take your time with each one. If 10 minutes feels like too much at first, start with just three or four exercises and work your way up.
1: Seated cat-cow (for spine flexibility)
This gentle warm-up gets your spine moving and relieves tension in your back.
Sit near the front of your chair with your feet flat on the floor. Place your hands on your knees or the chair.
As you breathe in, arch your back slightly. Let your chest lift and your shoulders roll back. Look up just a little.
As you breathe out, round your spine. Let your chin drop toward your chest and your shoulders curve forward.
Go back and forth between these two positions five to eight times. Move slowly and smoothly, matching the movement to your breath.
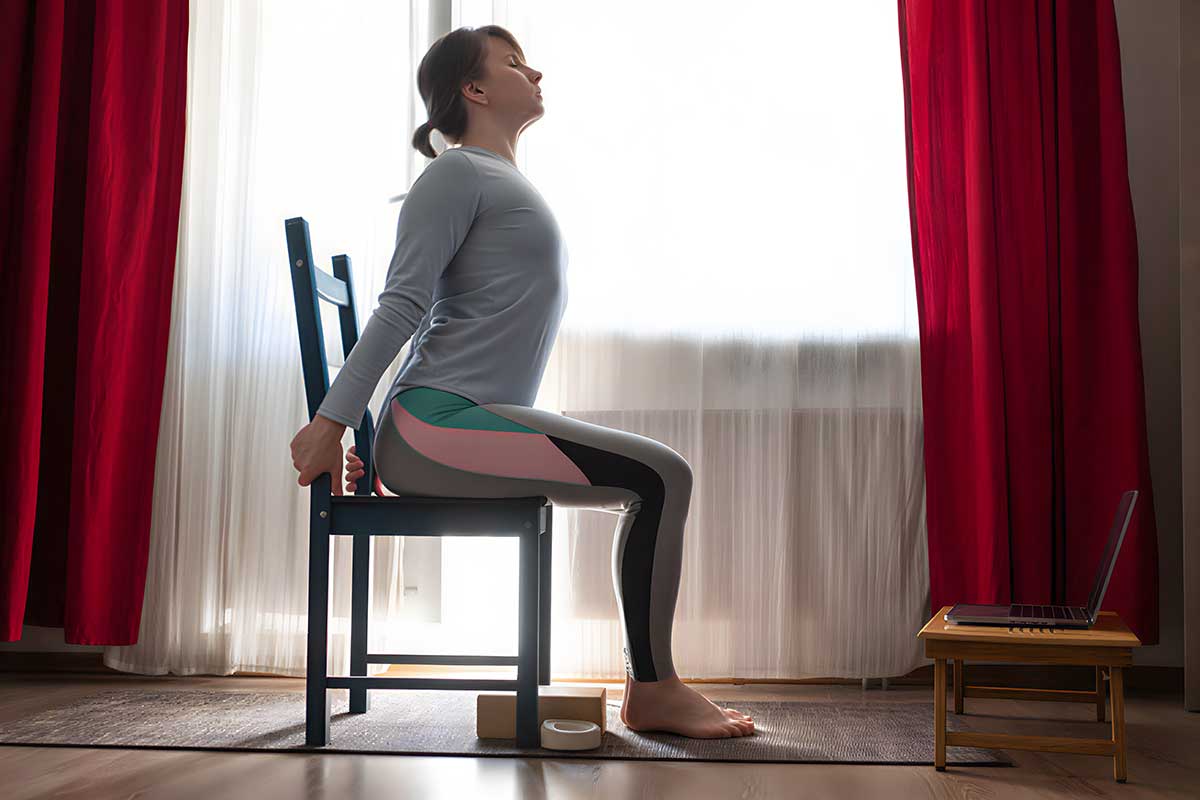
What it helps: This move wakes up your spine and relieves back tension. It’s perfect if you feel stiff after sleeping or sitting for a while.
2: Seated mountain pose with overhead stretch (for posture and reach)
This exercise opens up your chest and shoulders while helping you stand (or sit) taller.
Sit up tall in your chair. Press your feet firmly into the floor. Let your arms hang by your sides.
As you breathe in, raise both arms out to the sides and up over your head. If raising them all the way up bothers your shoulders, lift them only as high as feels comfortable.
Reach up toward the ceiling, but keep your shoulders relaxed. Don’t scrunch them up by your ears.
Hold for three to five breaths, then lower your arms slowly as you breathe out.
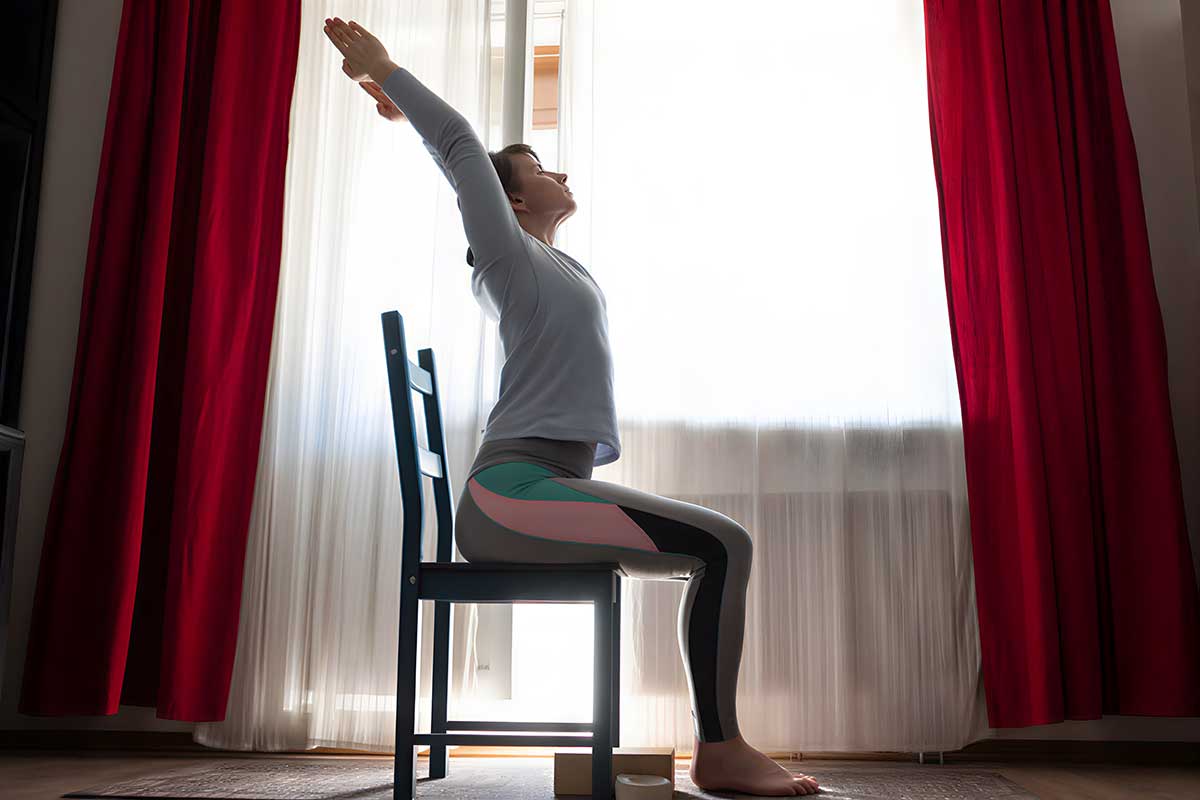
What it helps: This stretch improves your posture and loosens tight shoulders. It also feels great if you spend a lot of time hunched over.
3: Seated spinal twist (for rotational mobility)
Twisting helps your spine stay flexible and can even help with digestion.
Sit sideways in your chair with your right hip close to the back of the chair. Put both feet flat on the floor.
Hold the back of the chair with both hands. As you breathe in, sit up taller.
As you breathe out, gently turn your upper body to the right, using the chair back to support you. Don’t yank or force the twist. Let it happen gradually.
Hold for three to five breaths. With each exhale, see if you can twist just a tiny bit more. Then release and switch sides.
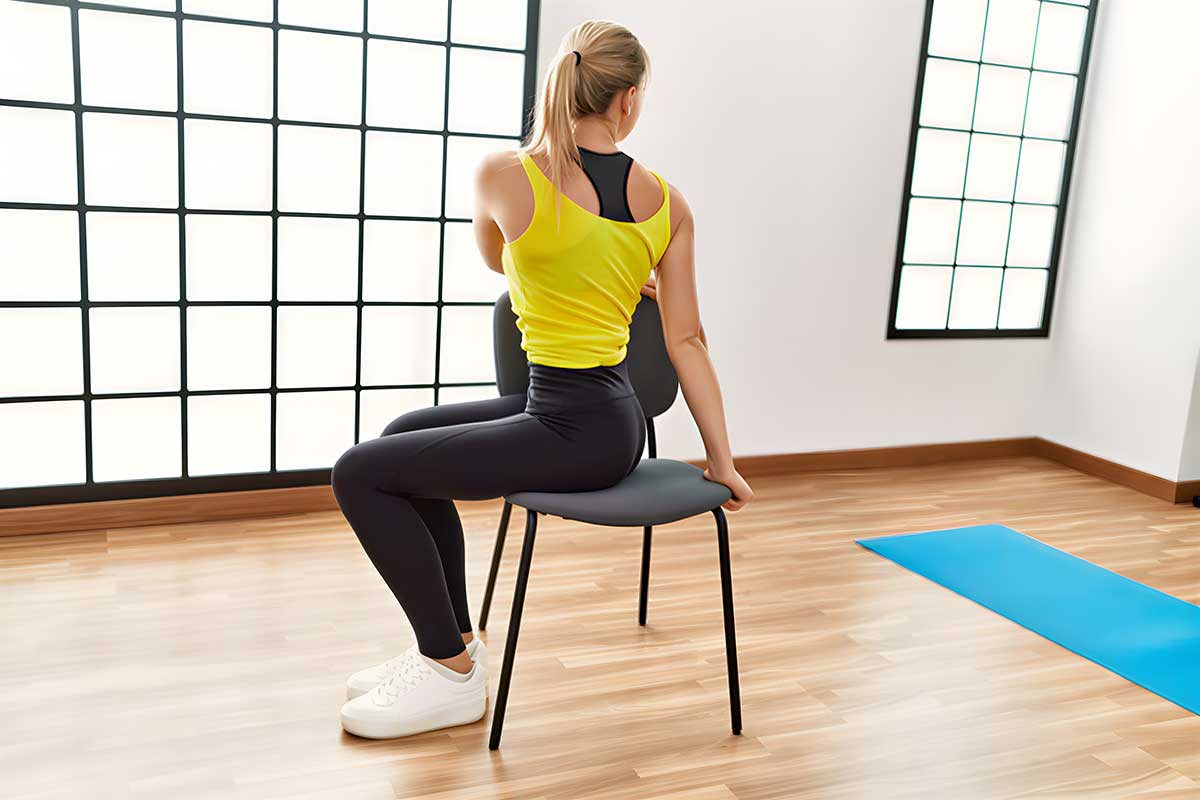
What it helps: This increases spinal mobility and aids digestion. Many people find it relieves lower back discomfort too.
4: Seated forward fold (for hamstring and lower back release)
This move stretches the back of your legs and releases tightness in your lower back.
Sit near the front of your chair with your feet hip-width apart.
As you breathe in, lift your arms overhead. As you breathe out, hinge forward from your hips. Let your hands reach toward your shins, ankles, or the floor.
Let your head and neck relax. Don’t worry about how far down you go. Even a small forward bend gives you benefits.
Hold for five to eight breaths. To come up, place your hands on your thighs and slowly roll up, one section of your spine at a time.
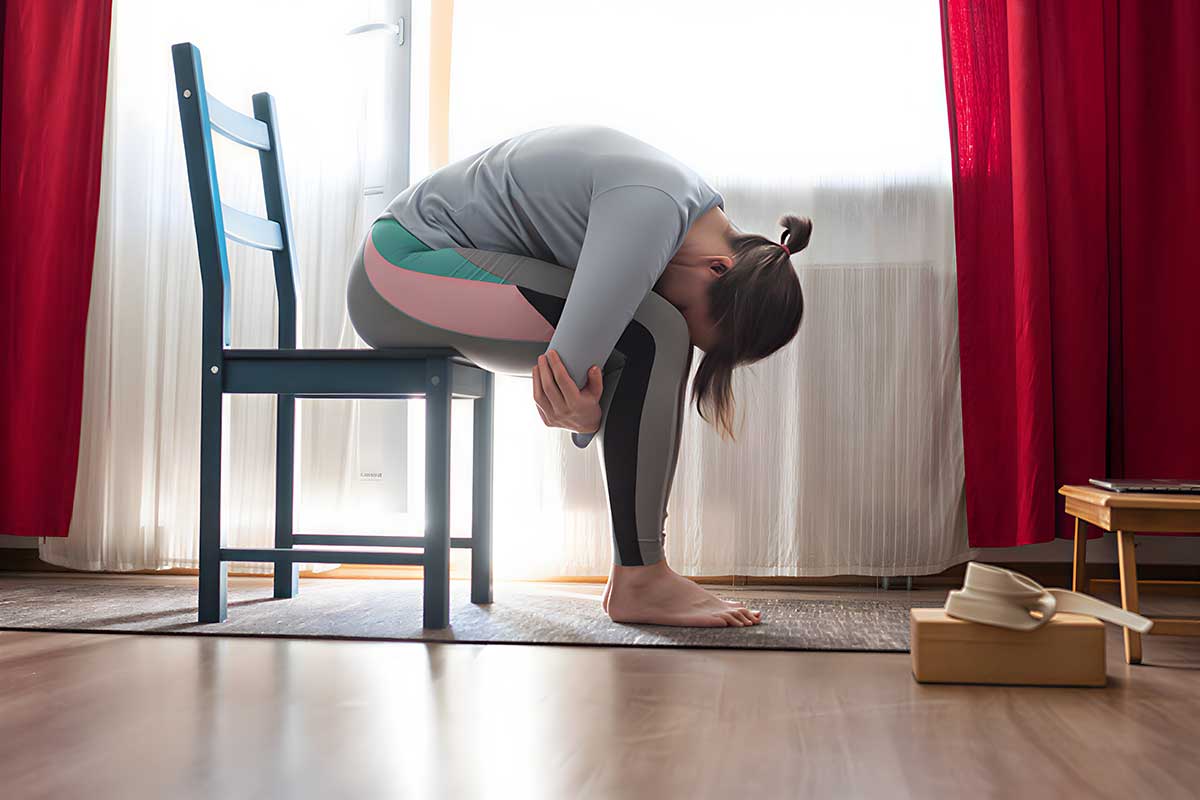
What it helps: This stretches the back of your legs and releases lower back tightness. It’s great after a day on your feet.
5: Seated figure-four stretch (for hip openness)
Tight hips are common as we age. This stretch opens them up and can ease sciatic discomfort.
Sit near the front of your chair with both feet on the floor.
Lift your right foot and place your right ankle on your left thigh, just above the knee. Your right knee will point out to the side.
If this is enough of a stretch, stay here. If you want more, gently press down on your right knee with your hand or lean forward slightly from your hips.
Hold for five to eight breaths, then switch sides.
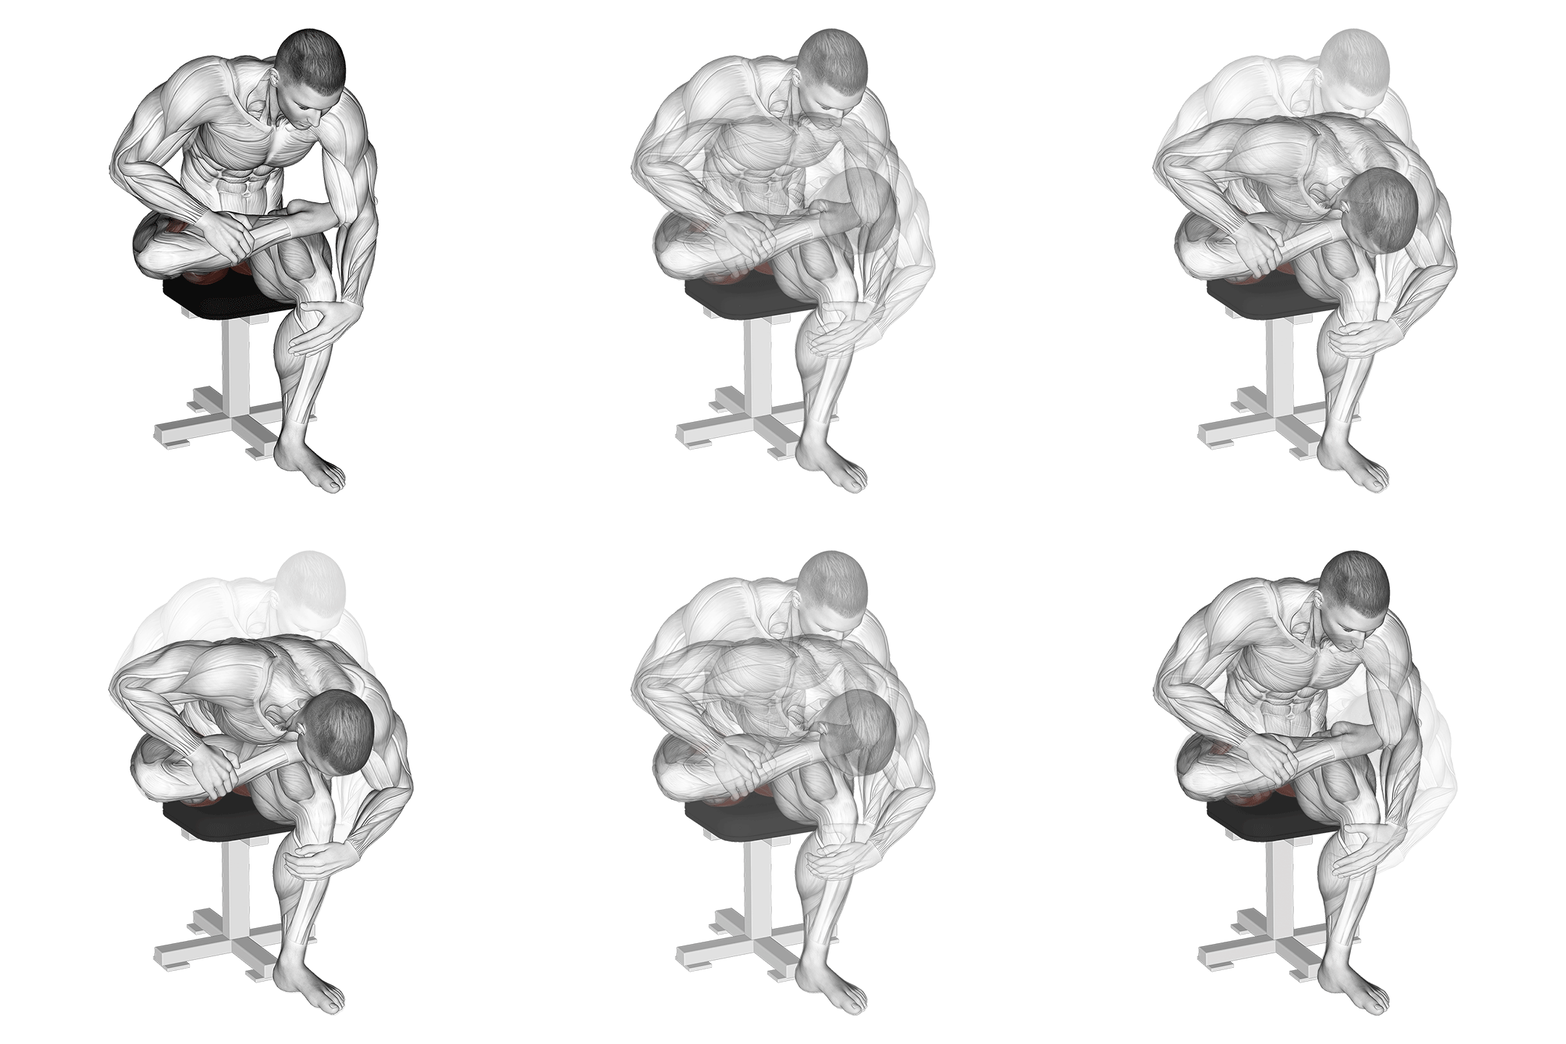
What it helps: This opens the hips and can ease sciatic discomfort. It also helps with activities that require you to bend or squat.
6: Chair pigeon pose (a deeper hip stretch)
This is a variation of the previous stretch for those who want to go deeper.
Sit near the front of your chair with your left foot on the floor.
Bring your right shin across your body so it’s roughly parallel to the front edge of the chair. Your right foot should be near your left hip, and your right knee near your right hip.
Keep your left foot planted firmly on the ground. Sit up tall. If you want more stretch, lean forward from your hips.
Hold for five to eight breaths, then carefully switch sides.
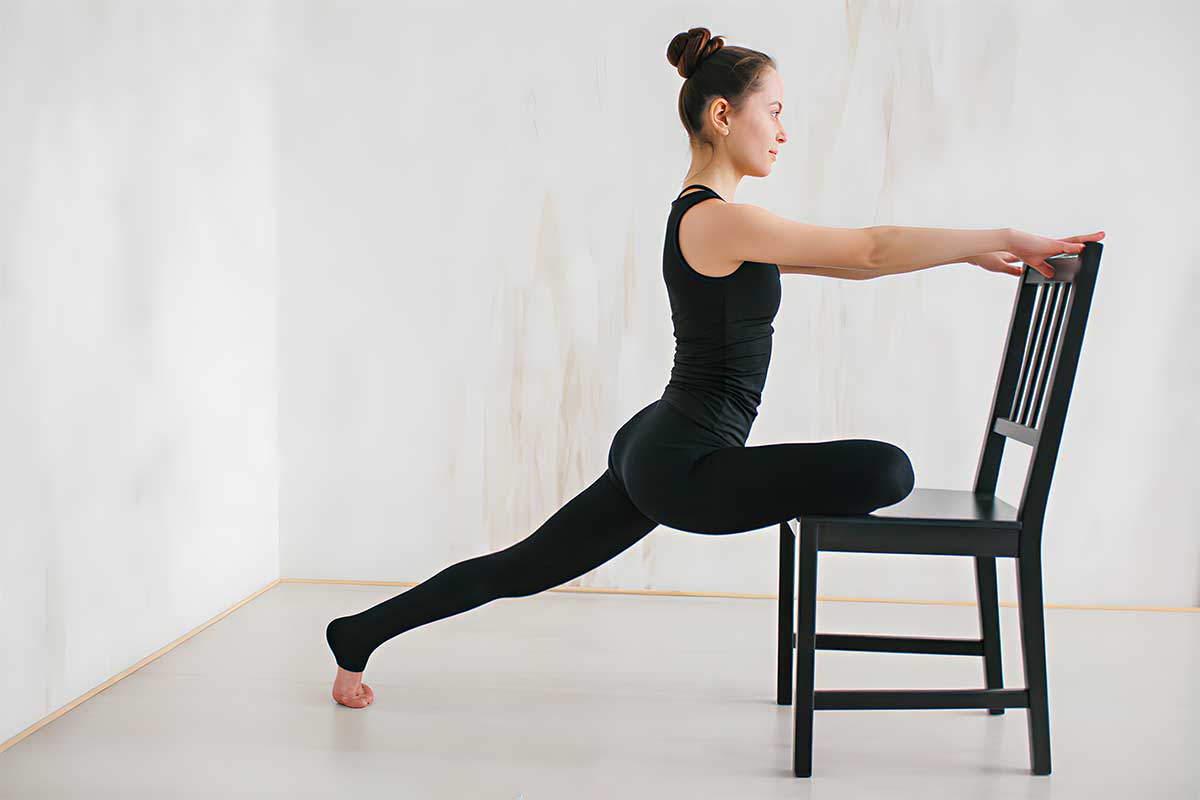
What it helps: This provides a deeper stretch for tight hips. It’s especially good if you have hip pain or stiffness.
7: Seated leg extensions with ankle circles (for knee and ankle joints)
This final exercise strengthens the muscles around your knees and keeps your ankles flexible.
Sit all the way back in your chair. Hold the sides of the seat for support.
Lift your right leg so it extends straight out in front of you. Point your toes, then flex your foot.
Now make slow circles with your ankle, five times in one direction and five times in the other.
Lower your right leg and repeat with your left leg.
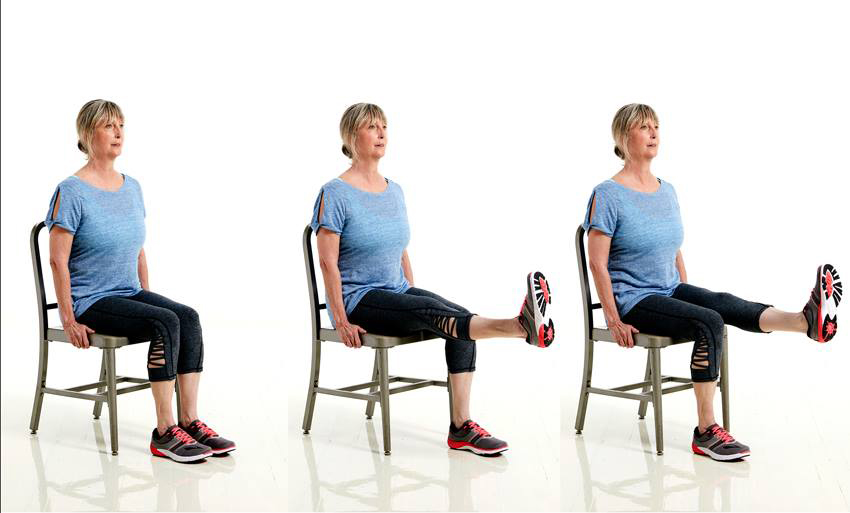
What it helps: This strengthens the muscles around the knee and improves ankle flexibility. It’s helpful for walking and prevents ankle stiffness.
10-Minute Guided Chair Yoga
Follow along with gentle audio cues
Quick reference: your 10-minute chair yoga routine at a glance
| Exercise | Target Area | Reps/Duration | Key Benefit |
|---|---|---|---|
| Seated Cat-Cow | Spine | 5-8 rounds | Relieves back tension |
| Mountain Pose with Overhead Stretch | Shoulders, Posture | 3-5 breaths | Opens chest, improves posture |
| Seated Spinal Twist | Spine, Core | 3-5 breaths each side | Increases spinal mobility |
| Seated Forward Fold | Hamstrings, Lower Back | 5-8 breaths | Releases lower back tightness |
| Figure-Four Stretch | Hips | 5-8 breaths each side | Opens hips, eases sciatica |
| Chair Pigeon Pose | Deep Hip Stretch | 5-8 breaths each side | Relieves hip pain |
| Leg Extensions with Ankle Circles | Knees, Ankles | 5 circles each direction | Strengthens knees, improves ankle mobility |
Print this table and keep it by your chair. You can glance at it during your practice until the routine becomes second nature.
Modifications for specific conditions
Everyone’s body is different. Here’s how to adapt these exercises for common health concerns.
If you have limited shoulder mobility
For the Overhead Stretch, raise your arms only to shoulder height. You can also do one arm at a time, which puts less strain on your shoulders. Hold onto the chair with your other hand for stability.
Some people find it easier to clasp their hands in front of their chest and gently press them away from their body instead of lifting overhead.
If you have knee pain
During Leg Extensions, skip the full extension. Just lift your foot a few inches off the floor and do the ankle circles. This still works your ankle joints without stressing your knees.
You can also keep your foot on the floor and just lift your heel, then do ankle circles. Any movement is better than none.
If you have severe hip arthritis
The Figure-Four and Chair Pigeon may be too intense. Instead, try gentle hip circles while seated. Lift one knee slightly and make small circles with it. Or skip these exercises and do the others twice.
On days when your hips feel better, you can try these stretches with a smaller range of motion.
If you use a walker or cane
Keep your mobility aid within reach during your practice. You can do most exercises with one hand on your walker for extra stability.
For exercises that require both hands, make sure your walker is locked and right in front of you so you can grab it quickly if you feel unsteady.
If you have osteoporosis
Talk to your doctor before starting. Most of these exercises are safe, but you may need to avoid or modify the forward folds. Bending forward can put pressure on your spine if you have bone loss.
Your doctor might suggest you skip Exercise 4 or do only a very small forward bend with your hands on your thighs for support.
If you have high blood pressure
Avoid holding your breath, which can raise blood pressure. Focus on steady, calm breathing throughout each pose.
If bending forward makes you dizzy, come up more slowly. Sit for a moment before standing up after your practice.
Common conditions chair yoga may help
Chair yoga isn’t a cure, but many people find it eases their symptoms. Here’s what the research shows.
| Condition | How It Helps | Which Exercises Focus Here | What Studies Show |
|---|---|---|---|
| Osteoarthritis | Gentle movement lubricates joints, reduces stiffness | All exercises, especially Cat-Cow | 30-40% reduction in pain scores after 8 weeks (Cheung et al., 2014) |
| Sciatica | Hip opening reduces pressure on the sciatic nerve | Figure-Four, Chair Pigeon | Many patients report reduced shooting pain with regular hip stretches |
| Lower Back Pain | Stretching relieves muscle tension, improves flexibility | Forward Fold, Cat-Cow, Spinal Twist | 50% of participants reported less pain after 12 weeks (Sherman et al., 2011) |
| Shoulder Stiffness | Opening chest and shoulders increases range of motion | Overhead Stretch, Cat-Cow | Improved shoulder mobility and reduced pain in frozen shoulder patients |
| Balance Issues | Core strengthening and proprioception improve stability | Mountain Pose, Leg Extensions, all poses | 34% improvement in balance scores after 8 weeks (Jeter et al., 2015) |
| Anxiety and Stress | Breathing and gentle movement calm the nervous system | All poses with breath focus | Reduced cortisol levels and improved mood scores in older adults |
The key is consistency. You won’t see these benefits from one session. Give it at least four weeks of regular practice.
Common mistakes to avoid (and how to fix them)
Even simple exercises can cause problems if you do them wrong. Here are the most common mistakes people make with chair yoga.
Holding your breath
When a pose feels hard, many people hold their breath. This tenses your muscles and makes the stretch less effective.
The fix: Count your breaths out loud or hum softly while you stretch. If you can’t breathe easily, you’re pushing too hard.
Rushing through the moves
This isn’t a race. Moving too fast means you miss out on the benefits and risk pulling a muscle.
The fix: Take at least three full breaths in each pose. Set a timer if you need to. Slow down and you’ll get better results.
Using a chair that rolls or rocks
A wobbly chair is dangerous. Office chairs with wheels can slide out from under you.
The fix: Always use a stable chair with four legs firmly on the ground. No office chairs with wheels unless you can lock them completely. Test your chair first by pressing down hard on the seat.
Comparing yourself to others
Your flexibility is yours alone. If you’re watching a video or in a class, don’t worry about how far someone else can bend or stretch.
The fix: Focus on how you feel, not how you look. Close your eyes during poses if that helps you tune in to your own body.
Skipping the warm-up
That first Cat-Cow stretch isn’t optional. It wakes up your spine and gets blood flowing to your muscles.
The fix: Never skip straight to the harder stretches. Always start with the Cat-Cow, even if you only have five minutes. Your body needs time to warm up.
Wearing restrictive clothing
Tight jeans or belts make it hard to breathe deeply and move freely.
The fix: Wear loose, comfortable clothes. Stretchy pants or soft shorts work great. You don’t need special yoga clothes, just something that lets you move.
Practicing on a full stomach
Bending and twisting right after a big meal feels uncomfortable and can cause cramping.
The fix: Wait at least an hour after eating before doing your routine. First thing in the morning or before dinner works well for most people.
Making it a habit
Knowing the exercises is one thing. Doing them every day is another. Here’s how to make this routine stick.
Tie it to something you already do
The easiest way to build a new habit is to attach it to something you already do regularly. Maybe you do these exercises right after your morning coffee. Or before you turn on your favorite TV show. Or after you get the mail.
Pick a time that works for you and stick with it. Your body will start to expect the movement at that time of day.
Your first week: a gentle start
Don’t try to be perfect right away. Here’s a realistic plan for your first week.
| Day | Goal | Focus |
|---|---|---|
| Day 1 | Read through all exercises | Get familiar with the moves |
| Day 2 | Try just 3 exercises slowly | Cat-Cow, Overhead Stretch, Spinal Twist |
| Day 3 | Add 2 more exercises | Add Forward Fold and Figure-Four |
| Day 4 | Rest day or gentle stretching | Let your body adapt |
| Day 5 | Try the full 7-exercise routine | Go slowly, focus on breath |
| Day 6 | Full routine again | Notice what feels easier |
| Day 7 | Rest and reflect | How does your body feel? |
After this first week, aim for five to six days of practice each week. One or two rest days help your body recover.
Start small if you need to
If 10 minutes feels like too much right now, start with just two or three exercises. Do those for a week. Then add another one. Before you know it, you’ll be doing the full routine.
The key is consistency, not perfection. Five minutes of chair yoga every day is better than 30 minutes once a week.
Track your progress
Keep a simple calendar by your chair. Put a checkmark on days when you do your routine. You’ll feel good watching those checkmarks add up.
Pay attention to how you feel too. Are you moving more easily? Is it easier to bend down? Can you reach a little farther? These small wins matter.
| Week | Focus | What to Notice |
|---|---|---|
| 1-2 | Learning the moves | You feel less stiff after each session |
| 3-4 | Building consistency | Morning stiffness lasts a shorter time |
| 5-8 | Seeing real change | You can reach farther, bend easier |
| 9-12 | Making it yours | You feel stronger, more balanced, more confident |
Be patient with yourself
You won’t transform overnight. But if you stick with these exercises, you’ll notice changes. Maybe your morning stiffness doesn’t last as long. Maybe you feel steadier on your feet. Maybe you can play with your grandkids without your back hurting afterward.
A journey of a thousand miles begins with a single stretch. You’ve got this.
When to progress: signs you’re ready for more
After a few weeks of daily practice, you might feel ready to add more. Here’s how to know when it’s time.
You’re ready to progress when:
- The current routine feels easy and you’re not tired afterward
- You can hold each pose without shaking or straining
- Your breathing stays calm and steady throughout all seven exercises
- You’re not sore the next day
- You find yourself wanting to hold poses longer
- You complete the routine and still feel energized
Ways to progress safely:
Add more time
Hold each pose for one or two extra breaths. This increases the stretch and strengthens your muscles more.
Add a second round
Run through the full routine twice. This doubles your practice time to 20 minutes and deepens the benefits.
Try standing versions
Some poses can be done standing with your hands on the chair for support. This adds a balance challenge and works your legs harder.
Explore other classes
Look for gentle yoga classes designed for seniors at your local community center or online. Many libraries offer free classes too.
Increase frequency
If you’re doing the routine five days a week, try six or seven days. Your body can handle daily gentle movement.
Don’t rush it
Building strength and flexibility takes time. Three months of consistent practice is better than one week of overdoing it.
Listen to your body. If you progress too fast and start feeling sore or strained, dial it back. There’s no prize for going faster. The goal is to feel better, not prove anything.
Lifestyle tips for better joint health
Chair yoga works best as part of a joint-friendly lifestyle. Here are simple daily habits that support your practice.
Stay hydrated
Your joints need water to stay lubricated. The cartilage in your joints is mostly water. When you’re dehydrated, your joints don’t glide as smoothly.
Aim for six to eight glasses of water daily. Keep a water bottle near your chair during your routine. Take small sips between exercises.
If plain water is boring, try adding a slice of lemon or cucumber. Herbal tea counts too.
Eat anti-inflammatory foods
What you eat affects your joints. Some foods can reduce inflammation, while others make it worse.
Foods that help your joints:
- Fatty fish like salmon, sardines, and mackerel (rich in omega-3s)
- Colorful vegetables like spinach, kale, and bell peppers
- Berries, especially blueberries and strawberries
- Nuts, particularly walnuts and almonds
- Olive oil instead of butter
- Turmeric and ginger in your cooking
Foods to limit:
- Sugary drinks and desserts
- Fried foods
- Processed meats
- White bread and pastries
- Too much red meat
You don’t need a perfect diet. Small changes add up. Start by adding one joint-friendly food to your meals each day.
Move throughout the day
Don’t just do your 10-minute routine and sit the rest of the day. Your joints need regular movement to stay healthy.
Get up and walk around every hour. Even a lap around your house helps. Stand up during TV commercials. Do a few shoulder rolls while you wait for your tea to brew.
These little movements keep your joints from getting stiff between your chair yoga sessions.
Apply heat before, cold after
Temperature can make a big difference in how your joints feel.
A warm shower or heating pad before your routine can make stretching easier. The heat increases blood flow and relaxes tight muscles. Spend 10 to 15 minutes warming up your stiff areas.
If you have any swelling after activity, ice can help. Apply an ice pack wrapped in a towel for 10 minutes. Don’t put ice directly on your skin.
Get quality sleep
Your body repairs itself during sleep. This includes healing any tiny tears in your muscles and reducing inflammation in your joints.
Aim for seven to eight hours each night. A body pillow between your knees can ease hip and back discomfort while you sleep.
Try to keep a regular sleep schedule. Going to bed and waking up at the same time helps your body get into a rhythm.
Maintain a healthy weight
Extra weight puts more pressure on your joints, especially your knees and hips. Losing even 10 pounds can make a noticeable difference in joint pain.
Chair yoga helps, but it’s not enough by itself for weight loss. Combine it with healthy eating and other gentle activities like walking.
Don’t aim for rapid weight loss. Slow and steady wins here. Losing one to two pounds per month is a healthy, sustainable goal.
Manage stress
Stress makes everything hurt more, including your joints. When you’re stressed, your muscles tense up, which can make joint pain worse.
The breathing you do during chair yoga helps manage stress. So does the gentle movement. Try to carry that calm feeling with you throughout your day.
Other stress-busters that work well:
- Spending time with friends and family
- Getting outside in nature
- Listening to music you love
- Reading or doing puzzles
- Practicing gratitude before bed
A note about your health
This article provides general information about chair yoga exercises. It’s not medical advice and shouldn’t replace guidance from your healthcare provider.
Always check with your doctor before starting a new exercise program, especially if you have:
- Chronic health conditions like heart disease, diabetes, or lung problems
- Recent injuries or surgeries
- Severe arthritis or osteoporosis
- Balance problems or a history of falls
- Medications that affect balance, blood pressure, or blood clotting
Your doctor knows your health history and can tell you if these exercises are safe for you. They might suggest modifications based on your specific needs.
If you experience chest pain, severe shortness of breath, dizziness, or any sharp pain during exercise, stop right away and contact your doctor.
Chair yoga is gentle and safe for most people, but your safety comes first. When in doubt, ask your healthcare team.
FAQs
How often should I do this routine?
Daily is best. Your joints love regular, gentle movement. But if daily feels like too much, aim for at least three to four times a week. You’ll still see benefits. Just try to be consistent with whatever schedule you choose.
Think of it like brushing your teeth. You do it every day because it prevents problems. Chair yoga is the same for your joints.
What if I can’t do a certain pose?
Skip it or modify it. Listen to your body. If something doesn’t feel right, don’t do it. You can also do a smaller version of any stretch. Less is more when you’re starting out.
Never push through pain. A gentle stretch is fine. Sharp pain means stop.
You can always ask your doctor or a physical therapist to help you modify poses for your specific needs.
Can I do these exercises in a wheelchair?
Yes. Lock your wheels before you start. Most of these exercises work just as well in a wheelchair. You might need to adjust your positioning slightly, but the movements are the same.
For exercises that involve foot placement, focus on what you can move. The upper body stretches work great. For lower body moves, do what’s comfortable and safe for you.
Will this help with arthritis pain?
Many people with arthritis find that gentle movement like chair yoga reduces their pain and stiffness. The key is to move gently and regularly.
Arthritis happens when the cartilage in your joints wears down. You can’t reverse that damage, but you can strengthen the muscles around your joints and keep them as flexible as possible. This reduces pain and helps you stay active.
If you have severe arthritis or a flare-up, check with your doctor first. They might suggest you modify certain moves or wait until the flare-up calms down.
How long before I see results?
Most people notice they feel a bit looser after just one session. That’s your muscles relaxing and your joints getting some movement.
Real changes in mobility and strength usually take a few weeks of regular practice. After four weeks, you’ll likely notice your morning stiffness doesn’t last as long. After eight weeks, you might find you can reach higher or bend easier.
Stick with it for at least a month before you decide if it’s working for you. Take notes on how you feel so you can track your progress.
Do I need special clothes?
No. Just wear something comfortable that lets you move freely. You don’t need yoga pants or special shoes. In fact, bare feet or non-slip socks work best if that’s comfortable for you.
Avoid tight jeans, belts, or anything that restricts your breathing or movement. Loose pants and a comfortable shirt are perfect.
What time of day is best for chair yoga?
Morning is great because it helps reduce the stiffness you wake up with. Many people feel better all day when they do their routine first thing.
But any time works. Some people prefer evening to wind down and release the tension from their day. Others fit it in during lunch.
Pick a time when you’re most likely to stick with it. The best time is the time you’ll actually do it.
Can I do this if I have osteoporosis?
Talk to your doctor first. Most of these exercises are safe, but you may need to avoid or modify the forward folds. Bending forward can put pressure on your spine if you have bone loss.
Your doctor can tell you which moves are safe for your specific level of bone density. They might clear you for everything except Exercise 4, or they might say you can do a modified version.
Don’t skip asking. Osteoporosis is serious, and you want to exercise safely.
Should I feel sore after chair yoga?
A little muscle tiredness is normal when you start something new. Your muscles are waking up and working in ways they haven’t in a while.
But you shouldn’t feel sharp pain or be very sore. If you are, you’re pushing too hard. Back off and move more gently.
If you’re sore for more than a day or two, take a rest day. Try again with less intensity. Build up gradually.
Can chair yoga help with balance problems?
Yes. These exercises strengthen your core and leg muscles, which helps with balance. The poses also improve proprioception (your sense of where your body is in space), so you’re more stable on your feet.
A 2015 study by Jeter and colleagues found that older adults who practiced chair yoga for eight weeks improved their balance scores by 34%. They also felt more confident moving around.
But if you have serious balance issues, hold onto your chair or a wall for extra support during poses. Safety first.
Is chair yoga enough exercise, or do I need to do more?
Chair yoga is great for flexibility, gentle strength, and mobility. But for overall health, you also need some cardiovascular activity and regular walking.
The American Heart Association suggests 150 minutes of moderate activity per week for older adults. That could be 30 minutes of walking five days a week, plus your daily chair yoga.
Think of chair yoga as part of your exercise routine, not the whole thing. It pairs perfectly with walking, swimming, or any other gentle activities you enjoy.
Can I do chair yoga if I’ve never done yoga before?
Absolutely. Chair yoga is perfect for beginners. You don’t need any yoga experience. You don’t need to be flexible. You don’t need to know any special terms or poses.
This routine teaches you everything you need to know. The moves are simple and safe. You can start right now, no matter what shape you’re in.
What if my joints pop or crack during the exercises?
Popping and cracking sounds are usually normal, especially if they don’t hurt. This happens when gas bubbles in your joint fluid burst. It’s harmless.
But if the popping comes with pain, swelling, or if your joint feels like it’s catching or locking, see your doctor. That could be a sign of a problem that needs attention.
Can I do these exercises if I have a pacemaker?
Yes, these gentle stretches are safe for people with pacemakers. Chair yoga doesn’t put strain on your heart the way intense cardio does.
But always check with your cardiologist before starting any new exercise program. They know your specific situation and can give you personalized advice.
How do I stay motivated on days I don’t feel like doing it?
Some days you won’t feel like practicing. That’s normal. Here’s what helps:
- Do just one or two exercises instead of skipping entirely
- Set your chair out the night before as a visual reminder
- Practice at the same time every day so it becomes automatic
- Find a friend to do it with you, even over the phone
- Track your progress and celebrate small wins
- Focus on how good you feel after, not how much you don’t want to start
On low-motivation days, tell yourself you’ll do just the Cat-Cow stretch. Usually once you start, you’ll keep going. But even if you don’t, one exercise is better than none.


