This 15-minute dumbbell workout targets all three glute muscles with moves proven to activate your backside better than most gym machines. You’ll do it three times a week, right at home. That’s less time than scrolling through social media, and the payoff? A stronger, firmer posterior that looks great and supports your body in everything you do.
These aren’t random exercises thrown together. Each move in this circuit was chosen for maximum muscle activation. You’ll hit your gluteus maximus, medius, and minimus for balanced development. The result is a well-rounded shape and real functional strength.
What You’ll Need to Get Started
Essential Equipment:
- 2 dumbbells (adjustable set recommended: 5-25 lbs each)
- Sturdy bench or couch (12-16 inches high)
- Exercise mat (optional but more comfortable)
- Wall or chair (for balance during kickbacks)
Budget-Friendly Alternatives:
- Use water jugs or heavy books instead of dumbbells
- Replace bench with a sturdy ottoman or coffee table
- Start with bodyweight versions for the first two weeks
The beauty of this workout is its simplicity. You don’t need fancy gym equipment or expensive machines. A pair of dumbbells and a stable surface are enough to transform your glutes.
The Science Behind This 15-Minute Workout
Your Glutes: More Than Just One Muscle
Your backside isn’t a single muscle. It’s made up of three distinct muscles working together:
Gluteus Maximus: This powerhouse is the largest muscle in your body. It creates that rounded, lifted look and powers your hip extension. Every time you stand up, climb stairs, or jump, your glute max is doing the heavy lifting.
Gluteus Medius: Think of this as your “side glute.” It sits on the outer part of your hip and keeps your pelvis stable when you walk or stand on one leg. A strong glute medius prevents your hips from wobbling and creates that attractive side curve.
Gluteus Minimus: This deep stabilizer works beneath the other two. It assists the medius in keeping your hips steady and your movements smooth.
Training all three creates a complete, balanced physique. Skip one, and you miss out on both aesthetics and function.
The Power of Dumbbells
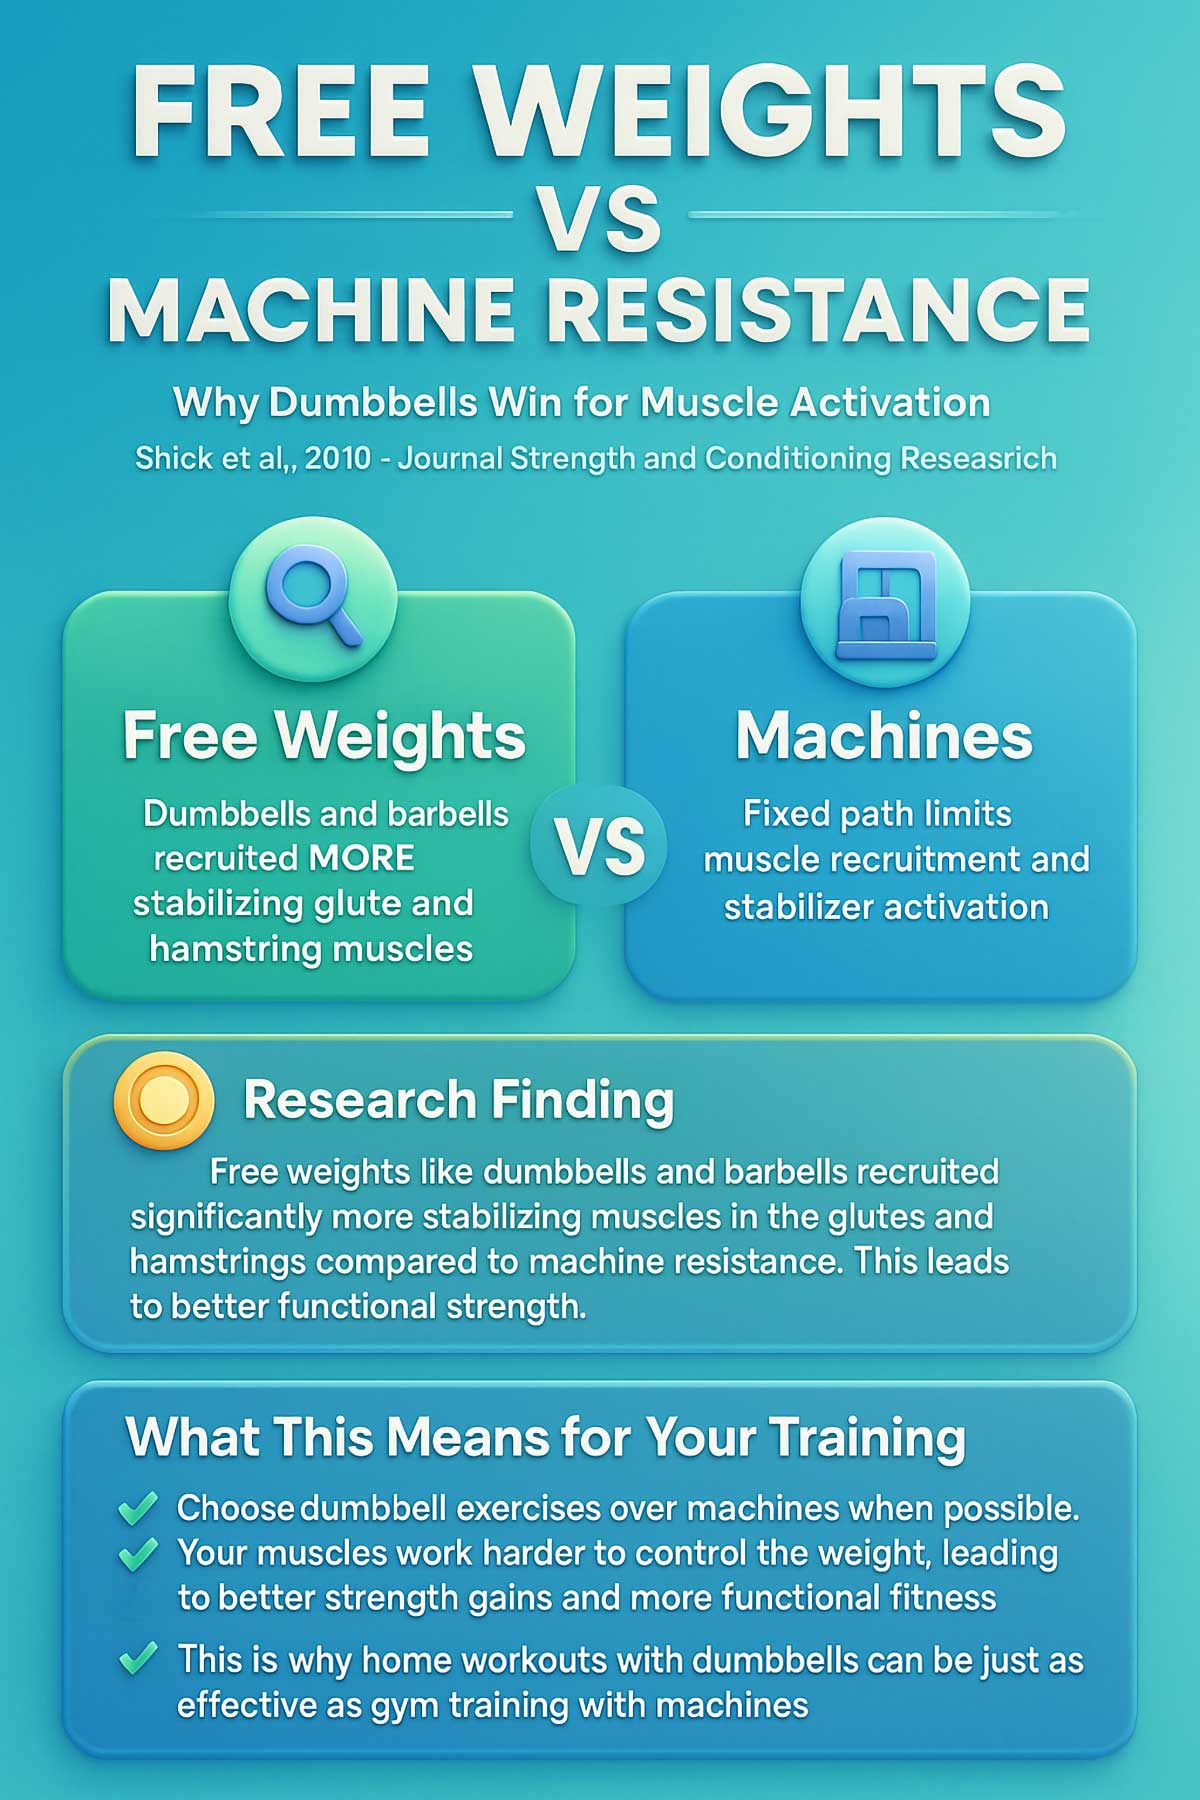
Free weights like dumbbells force your muscles to work harder than machines. A 2010 study in the Journal of Strength and Conditioning Research compared free weights to machine resistance and found that free weights recruited significantly more stabilizing muscles in the glutes and hamstrings. Your body has to balance the weight, which means more muscle fibers fire with each rep.
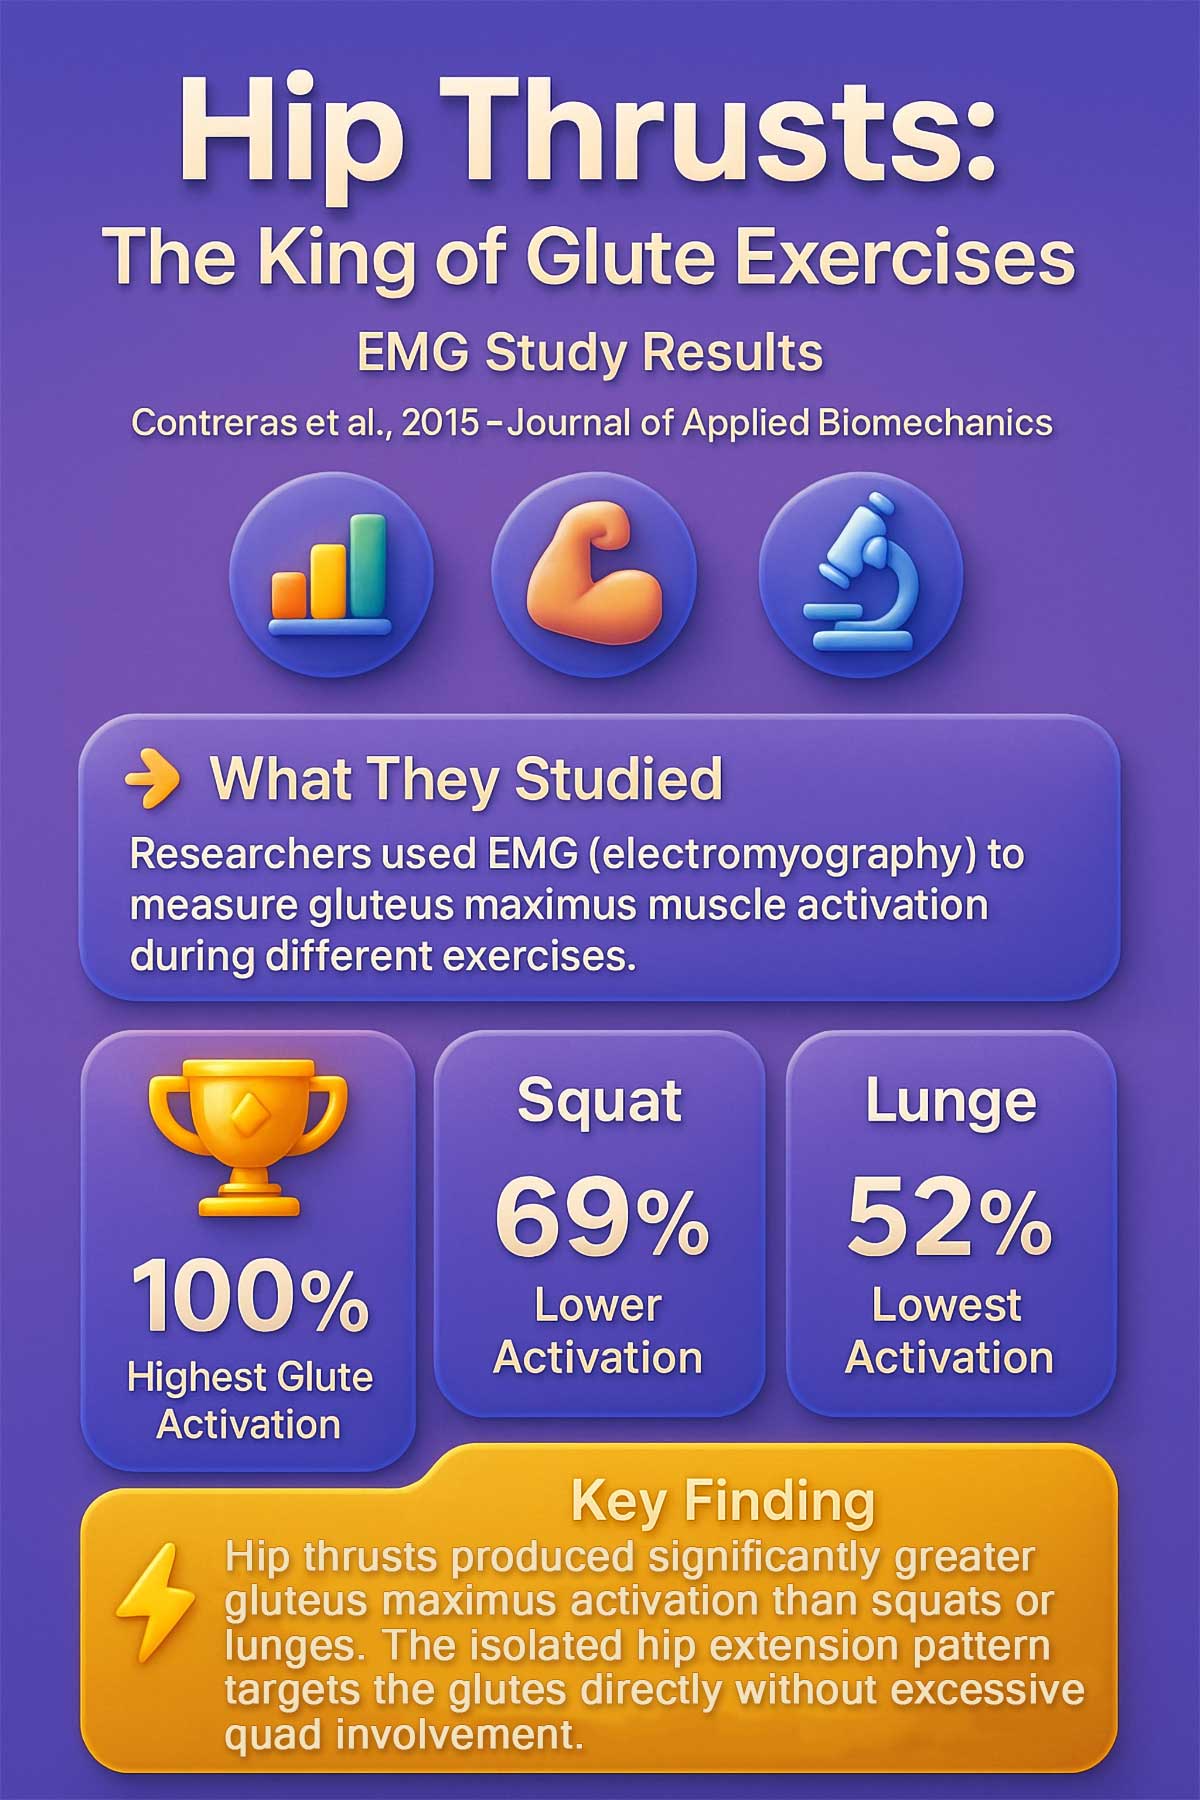
Research using EMG (electromyography) to measure muscle activation confirms that specific exercises produce superior glute engagement. A 2015 study published in the Journal of Applied Biomechanics tested various exercises and found that hip thrusts generated greater gluteus maximus activation than squats or lunges. This means you get more results in less time when you choose the right moves.
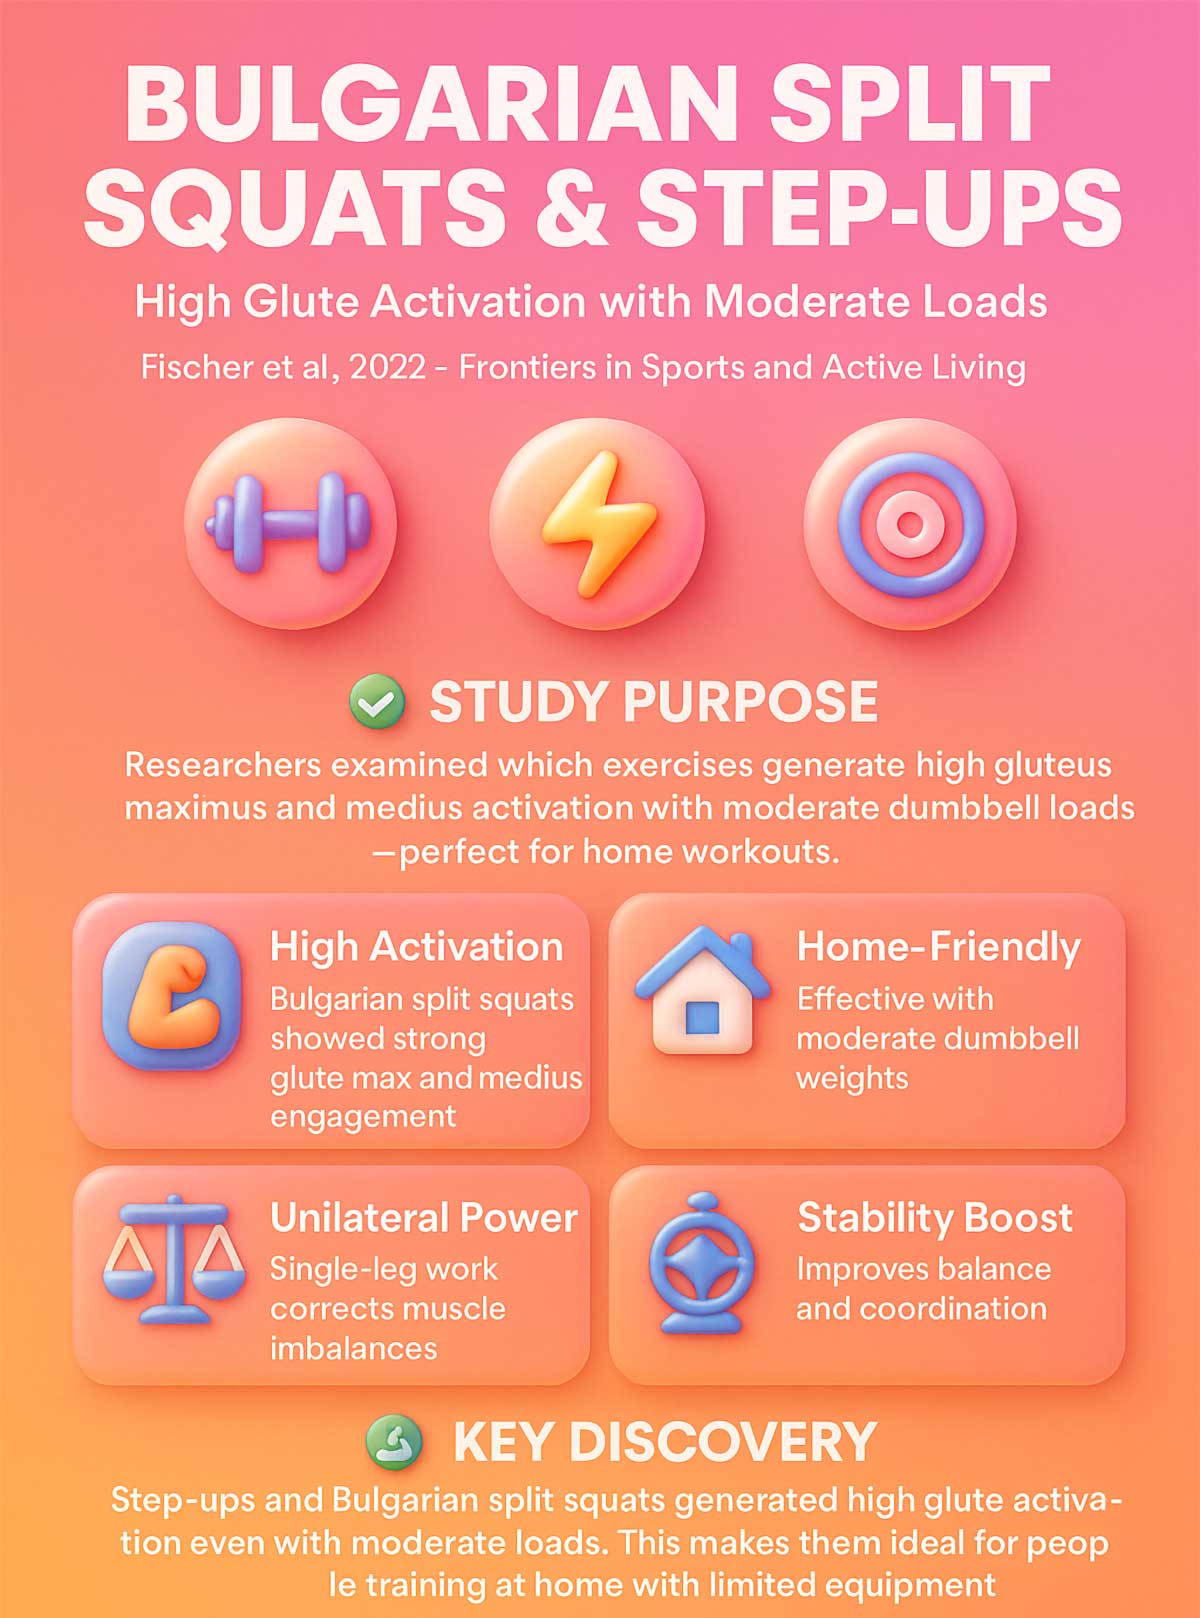
A 2022 study in Frontiers in Sports and Active Living examined Bulgarian split squats and step-ups, finding they generated high glute activation even with moderate loads. This makes them perfect for home workouts where you might not have access to heavy barbells.
Bottom line? Dumbbells give you more bang for your buck.
Warm Up Your Glutes (3 Minutes)
Never skip your warm-up. These three minutes prepare your muscles, reduce injury risk, and help you get better results from your workout.
Quick Glute Activation Routine:
- Glute Bridges (Bodyweight): 15 reps
- Lie on your back, knees bent, feet flat
- Lift hips until body forms a straight line
- Squeeze glutes at the top, lower slowly
- Fire Hydrants: 10 reps per side
- Start on hands and knees
- Lift one knee out to the side, keeping it bent
- Lower with control and repeat
- Leg Swings: 10 forward/back per leg
- Stand next to a wall for support
- Swing one leg forward and back in a controlled motion
- Keep your core tight
- Hip Circles: 10 per direction
- Stand with feet hip-width apart
- Make big circles with your hips
- Go both clockwise and counterclockwise
This warm-up takes just three minutes but makes a huge difference in how your muscles respond during the workout.
The 15-Minute Glute-Sculpting Dumbbell Routine
Your Weekly Plan
Do this 4-exercise circuit three times a week on non-consecutive days. Monday, Wednesday, and Friday works perfectly. Your muscles need rest to grow stronger, so don’t skip those off days.
Sample Weekly Schedule
| Monday | Tuesday | Wednesday | Thursday | Friday | Saturday | Sunday |
|---|---|---|---|---|---|---|
| 15-min Circuit | Rest/Walk | 15-min Circuit | Yoga/Stretch | 15-min Circuit | Active Rest | Full Rest |
How It Works
You’ll move through these four exercises with minimal rest:
- Exercise 1: 45 seconds
- Rest: 15 seconds
- Exercise 2: 45 seconds
- Rest: 15 seconds
- Exercise 3: 45 seconds per side (1.5 minutes total)
- Rest: 15 seconds
- Exercise 4: 45 seconds per side (1.5 minutes total)
- Rest: 1 minute
Then repeat the entire circuit two more times. That’s three total rounds in 15 minutes.
Your 15-Minute Circuit at a Glance
| Exercise | Duration | Rest | Primary Targets | Equipment |
|---|---|---|---|---|
| Dumbbell Hip Thrust | 45 sec | 15 sec | Glute Max, Hamstrings | 1 dumbbell |
| Dumbbell RDL | 45 sec | 15 sec | Glute Max, Hamstrings | 2 dumbbells |
| Bulgarian Split Squat | 45 sec/side | 15 sec | Glute Max, Medius, Quads | 1 dumbbell |
| Standing Glute Kickback | 45 sec/side | 1 min | Glute Max | 1 light dumbbell |
| Total Circuit Time | ~5 min | Repeat 3x = 15 min |
The 4 Essential Dumbbell Exercises for Maximum Impact
1. Dumbbell Hip Thrust
Why it’s a must-do: The hip thrust is king when it comes to glute exercises. It isolates and activates your gluteus maximus better than almost any other move. You’ll feel this one immediately.
The Research: A 2015 study in the Journal of Applied Biomechanics used EMG analysis to compare muscle activation across different exercises. Researchers found that hip thrusts produced significantly greater gluteus maximus activation than squats or lunges. The isolated hip extension pattern targets the glutes directly without excessive quad involvement.
How-To:
- Sit on the floor with your upper back against a bench or couch. Place a dumbbell across your hips.
- Bend your knees and plant your feet flat, about hip-width apart.
- Hold the dumbbell steady with both hands.
- Push through your heels and lift your hips until your body forms a straight line from shoulders to knees.
- Squeeze your glutes hard at the top for one second.
- Lower back down with control and repeat.
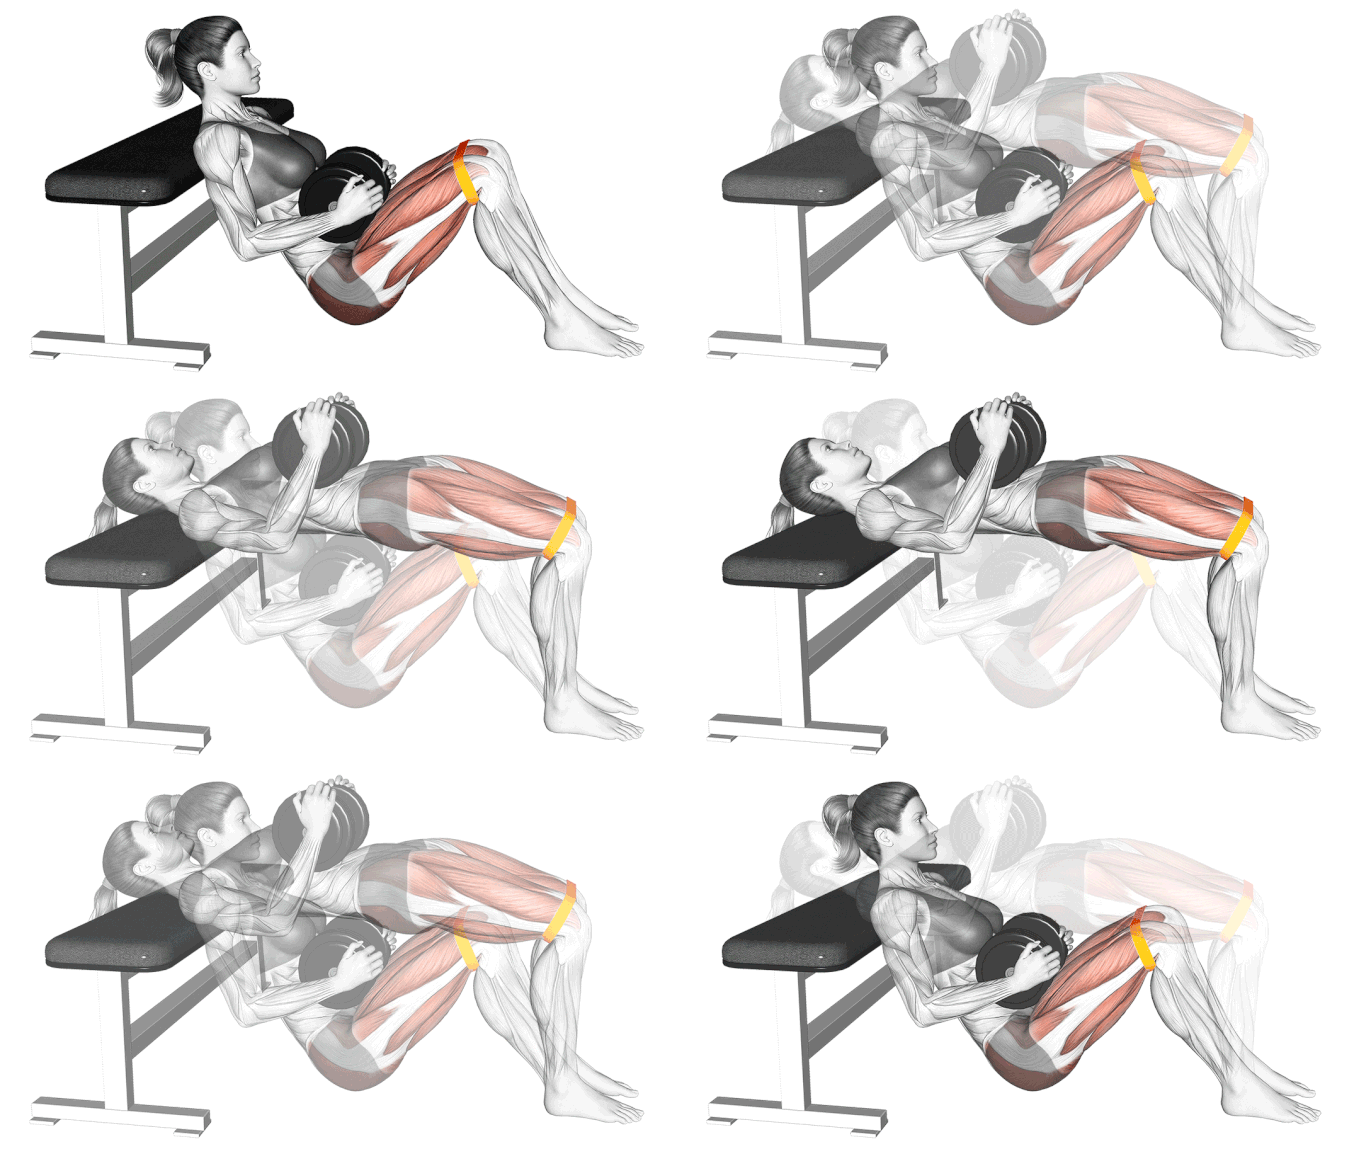
Targets: Gluteus Maximus, Hamstrings
Common Mistakes to Avoid:
- Overextending your back: Your spine should stay neutral. Don’t arch your lower back at the top. The movement comes from your hips, not your back.
- Pushing through your toes: Drive through your heels. This keeps the focus on your glutes instead of your quads.
- Incomplete hip extension: Go all the way up. Half reps mean half results.
- Moving too fast: Control the descent. The lowering phase builds just as much strength as the lifting phase.
2. Dumbbell Romanian Deadlift (RDL)
Why it’s a must-do: The RDL targets the glute-hamstring tie-in beautifully. It builds posterior chain strength and improves flexibility in your hamstrings. This move teaches you to hinge properly, which protects your lower back in daily life.
The Research: A 2012 study in the European Journal of Applied Physiology examined how targeted loading affects muscle growth. Researchers found that compound hip-extension movements like RDLs enhance posterior chain development through what they call “regional hypertrophy.” This means the muscle grows specifically where you load it.
How-To:
- Stand with feet hip-width apart, holding a dumbbell in each hand in front of your thighs.
- Keep a slight bend in your knees throughout the movement.
- Push your hips back and lower the dumbbells down your legs, keeping them close to your body.
- Go as low as your hamstring flexibility allows while keeping your back flat.
- Feel the stretch in your hamstrings and glutes at the bottom.
- Drive your hips forward to stand back up, squeezing your glutes at the top.
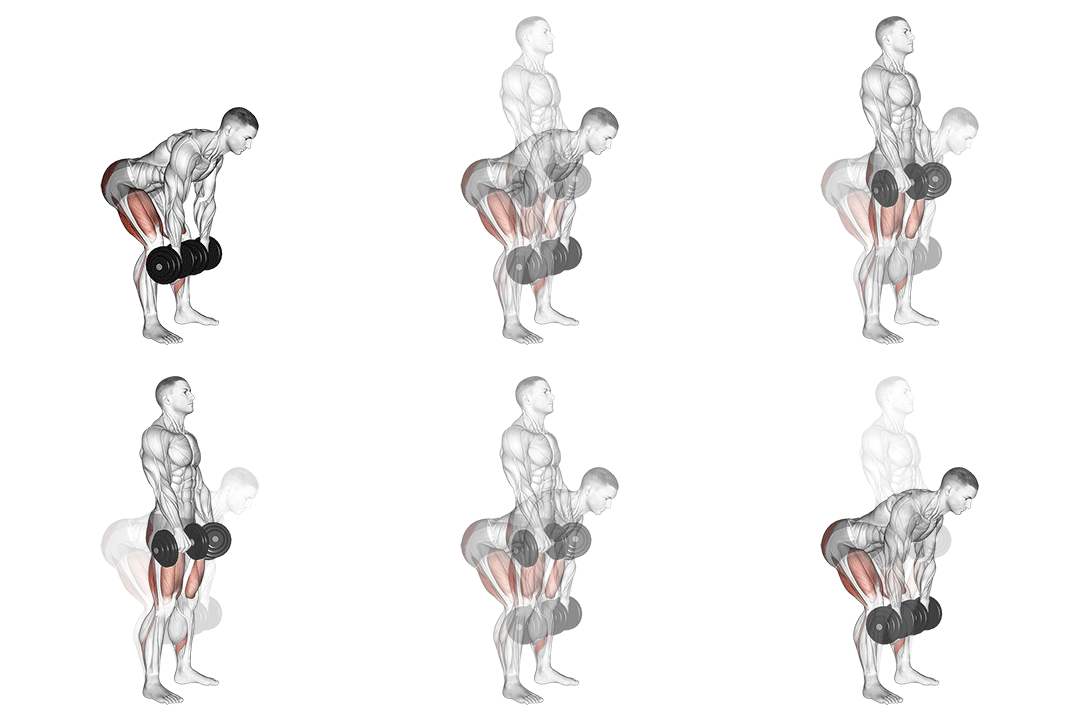
Targets: Gluteus Maximus, Hamstrings
Common Mistakes to Avoid:
- Rounding your lower back: Keep your chest proud and shoulders back. A rounded back puts pressure on your spine.
- Bending your knees too much: This isn’t a squat. The slight knee bend stays constant. The movement happens at your hips.
- Letting the dumbbells drift away: Keep the weights close to your legs. This maintains tension on your glutes and hamstrings.
- Starting with too much weight: Master the hip hinge pattern with lighter weights first.
3. Bulgarian Split Squat
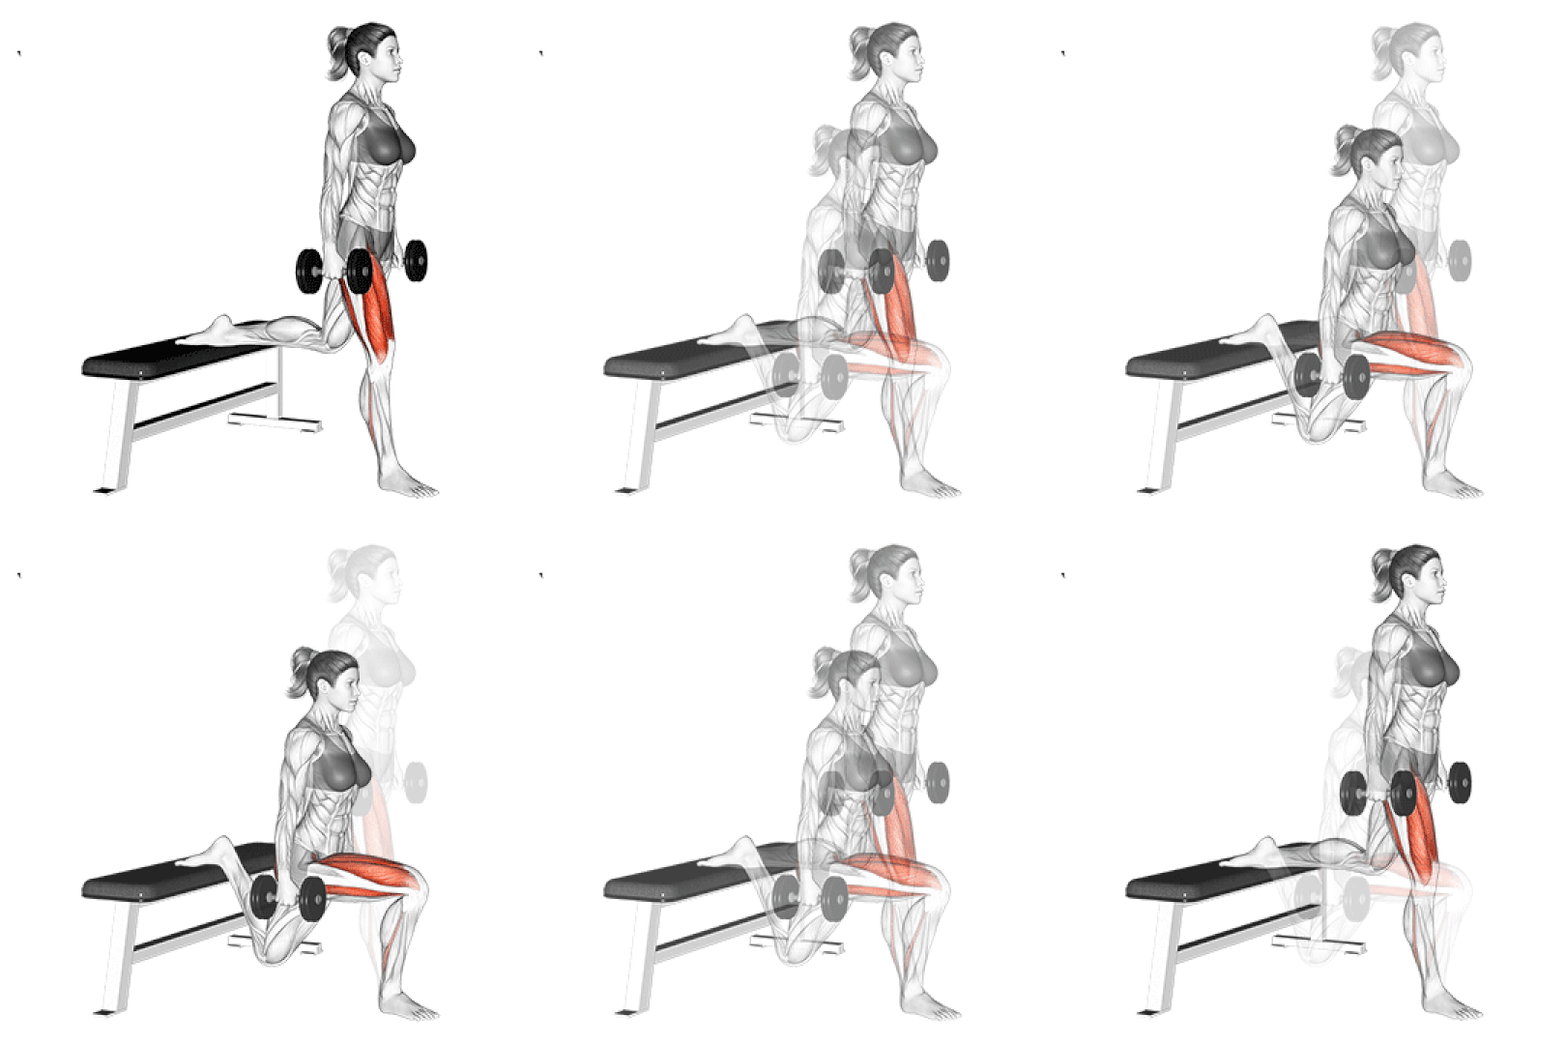
Why it’s a must-do: This single-leg exercise challenges your balance and hammers both your glute max and glute medius on your front leg. Unilateral moves correct muscle imbalances and build real-world stability.
The Research: A 2022 study in Frontiers in Sports and Active Living tested step-ups and Bulgarian split squats for glute activation. Researchers discovered that these exercises generated high gluteus maximus and medius activation even with moderate dumbbell loads.
How-To:
- Stand about two feet in front of a bench or couch.
- Place the top of your back foot on the bench behind you.
- Hold one dumbbell in the hand on the same side as your back leg.
- Keep your torso upright and core engaged.
- Lower down by bending your front knee until your thigh is roughly parallel to the floor.
- Your back knee should drop toward the ground but not touch it.
- Push through your front heel to stand back up.
- Complete all reps on one side before switching.
Targets: Gluteus Maximus, Gluteus Medius, Quads
Common Mistakes to Avoid:
- Pushing off your back foot: Your back leg is just for balance. All the work should happen in your front leg.
- Letting your front knee cave inward: Keep your knee tracking over your toes. This protects your knee joint and keeps tension on your glutes.
- Standing too close or too far from the bench: Find the right distance where you can drop straight down without lunging forward.
- Leaning forward excessively: Keep your chest up and core braced. A slight forward lean is fine, but don’t fold at the waist.
4. Standing Dumbbell Glute Kickback
Why it’s a must-do: This isolation move finishes your workout strong. It targets your gluteus maximus with a focus on the mind-muscle connection. You’ll feel the burn.
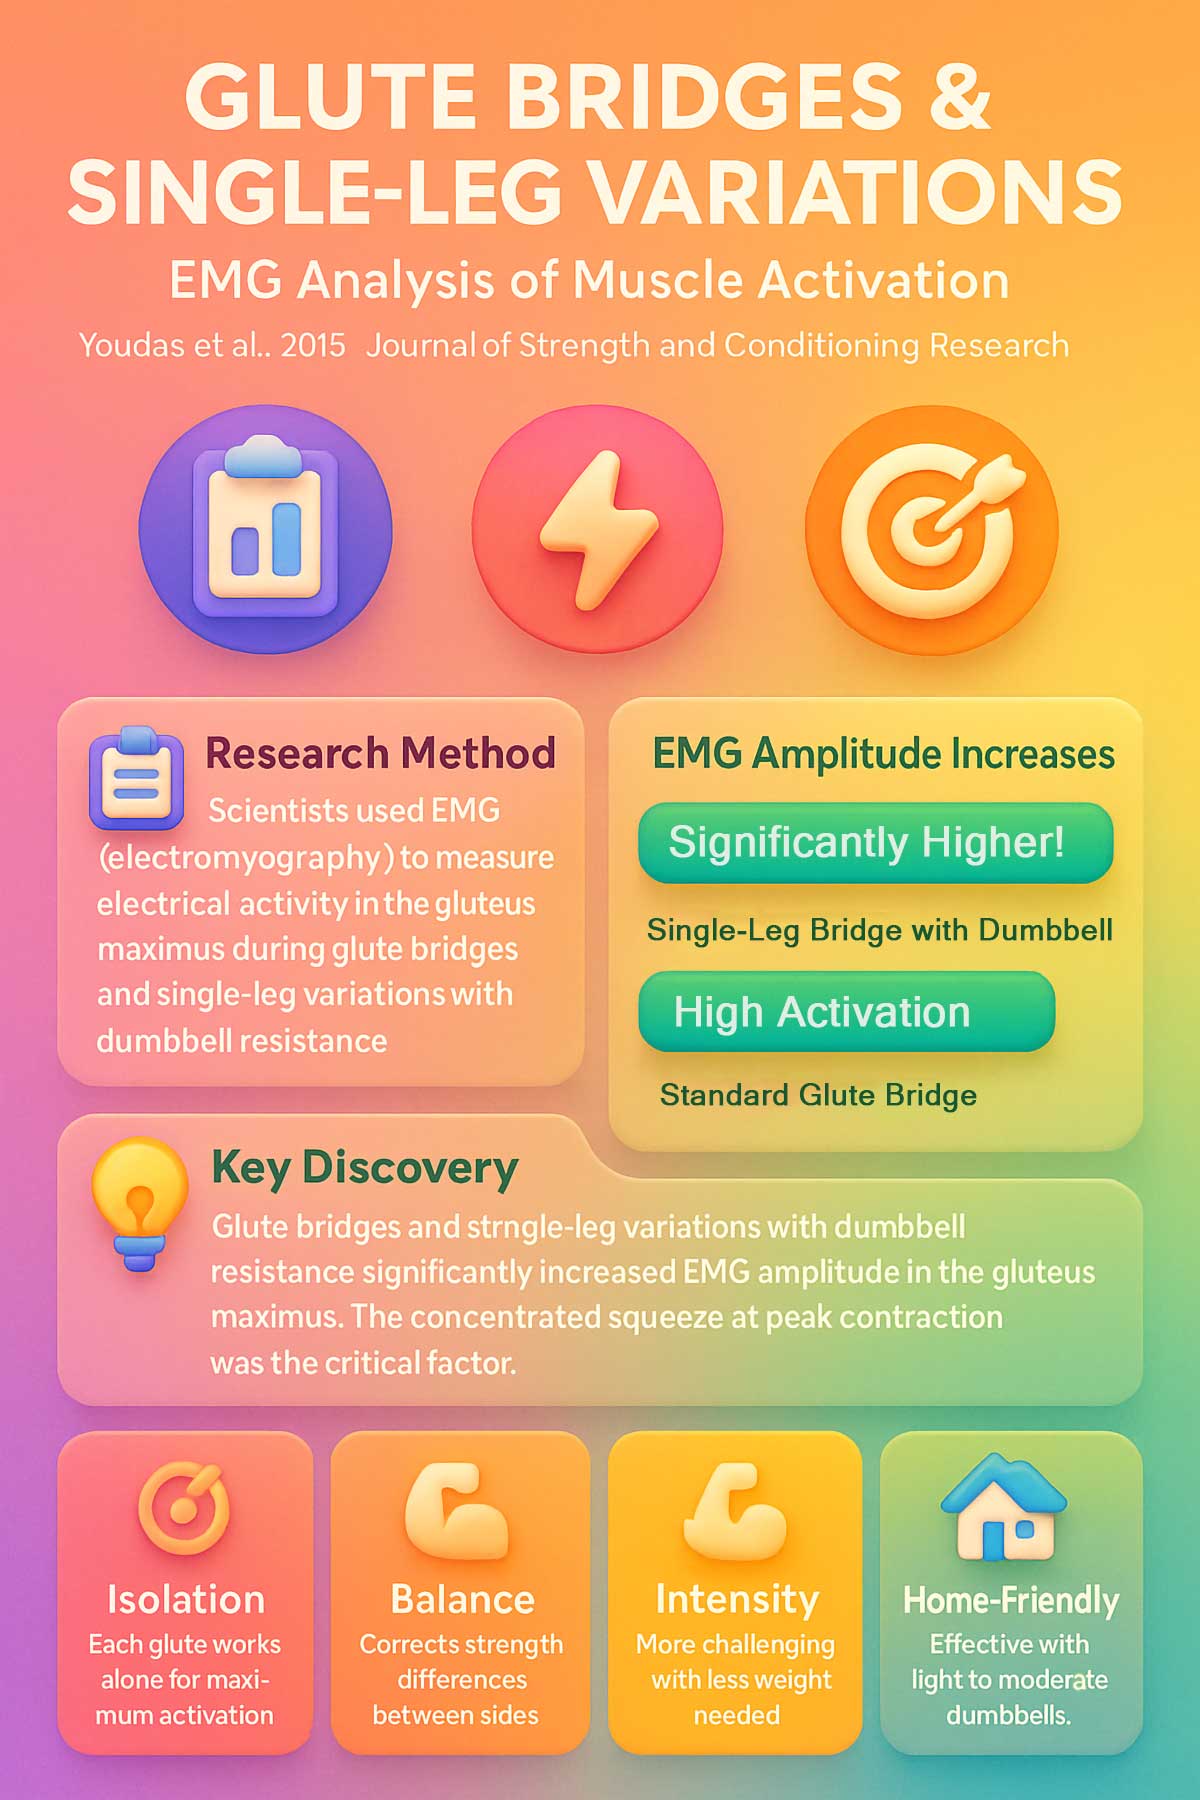
The Research: A 2015 study in the Journal of Strength and Conditioning Research examined glute bridges and single-leg variations with dumbbell resistance. Using EMG measurements, researchers found significant increases in gluteus maximus amplitude during these isolated hip extension movements. The key was the concentrated squeeze at peak contraction.
How-To:
- Stand facing a bench or sturdy chair and place one or both hands on it for support.
- Hold a light dumbbell behind one knee, securing it in the bend of your leg.
- Keep your standing leg slightly bent and core tight.
- Kick your bent leg straight back, extending your hip.
- Squeeze your glute hard at the top of the movement.
- Lower back down with control.
- Complete all reps on one side before switching.
Targets: Gluteus Maximus
Common Mistakes to Avoid:
- Swinging your leg with momentum: Use controlled movements. Quality beats quantity every time.
- Arching your lower back excessively: Keep your core braced. The movement should come from your hip, not your spine.
- Not squeezing at the top: The squeeze is where the magic happens. Pause and contract your glute for one second at the top of each rep.
- Using too much weight: This is a finisher exercise. Light weight with perfect form works better than heavy weight with poor form.
15-Minute Glute Circuit Timer
Follow along with audio cues for each exercise
Workout Sequence
Modifications for All Fitness Levels
This workout adapts to your current fitness level. Here’s how to adjust it:
Complete Beginner?
Start with bodyweight versions of all exercises for one to two weeks. This lets you master the movement patterns without the added challenge of external resistance. Once you can complete all three rounds with good form, add light dumbbells.
Bodyweight modifications:
- Hip thrust: No weight across hips
- RDL: Use just your body or hold a water bottle
- Bulgarian split squat: Use just bodyweight, hold wall for balance
- Glute kickback: No dumbbell, focus on the squeeze
Knee Issues?
If Bulgarian split squats bother your knees, try these alternatives:
- Reduce your range of motion (don’t go as low)
- Use a lower surface for your back foot
- Switch to reverse lunges instead
- Place a folded towel under your back foot for cushioning
Advanced Lifter?
Challenge yourself with these progressions:
- Add pause reps (hold for three seconds at peak contraction)
- Increase to four rounds instead of three
- Use tempo training (three seconds down, one second hold, three seconds up)
- Add a resistance band around your knees during hip thrusts for extra glute medius activation
- Increase weight by 5-10% every two weeks
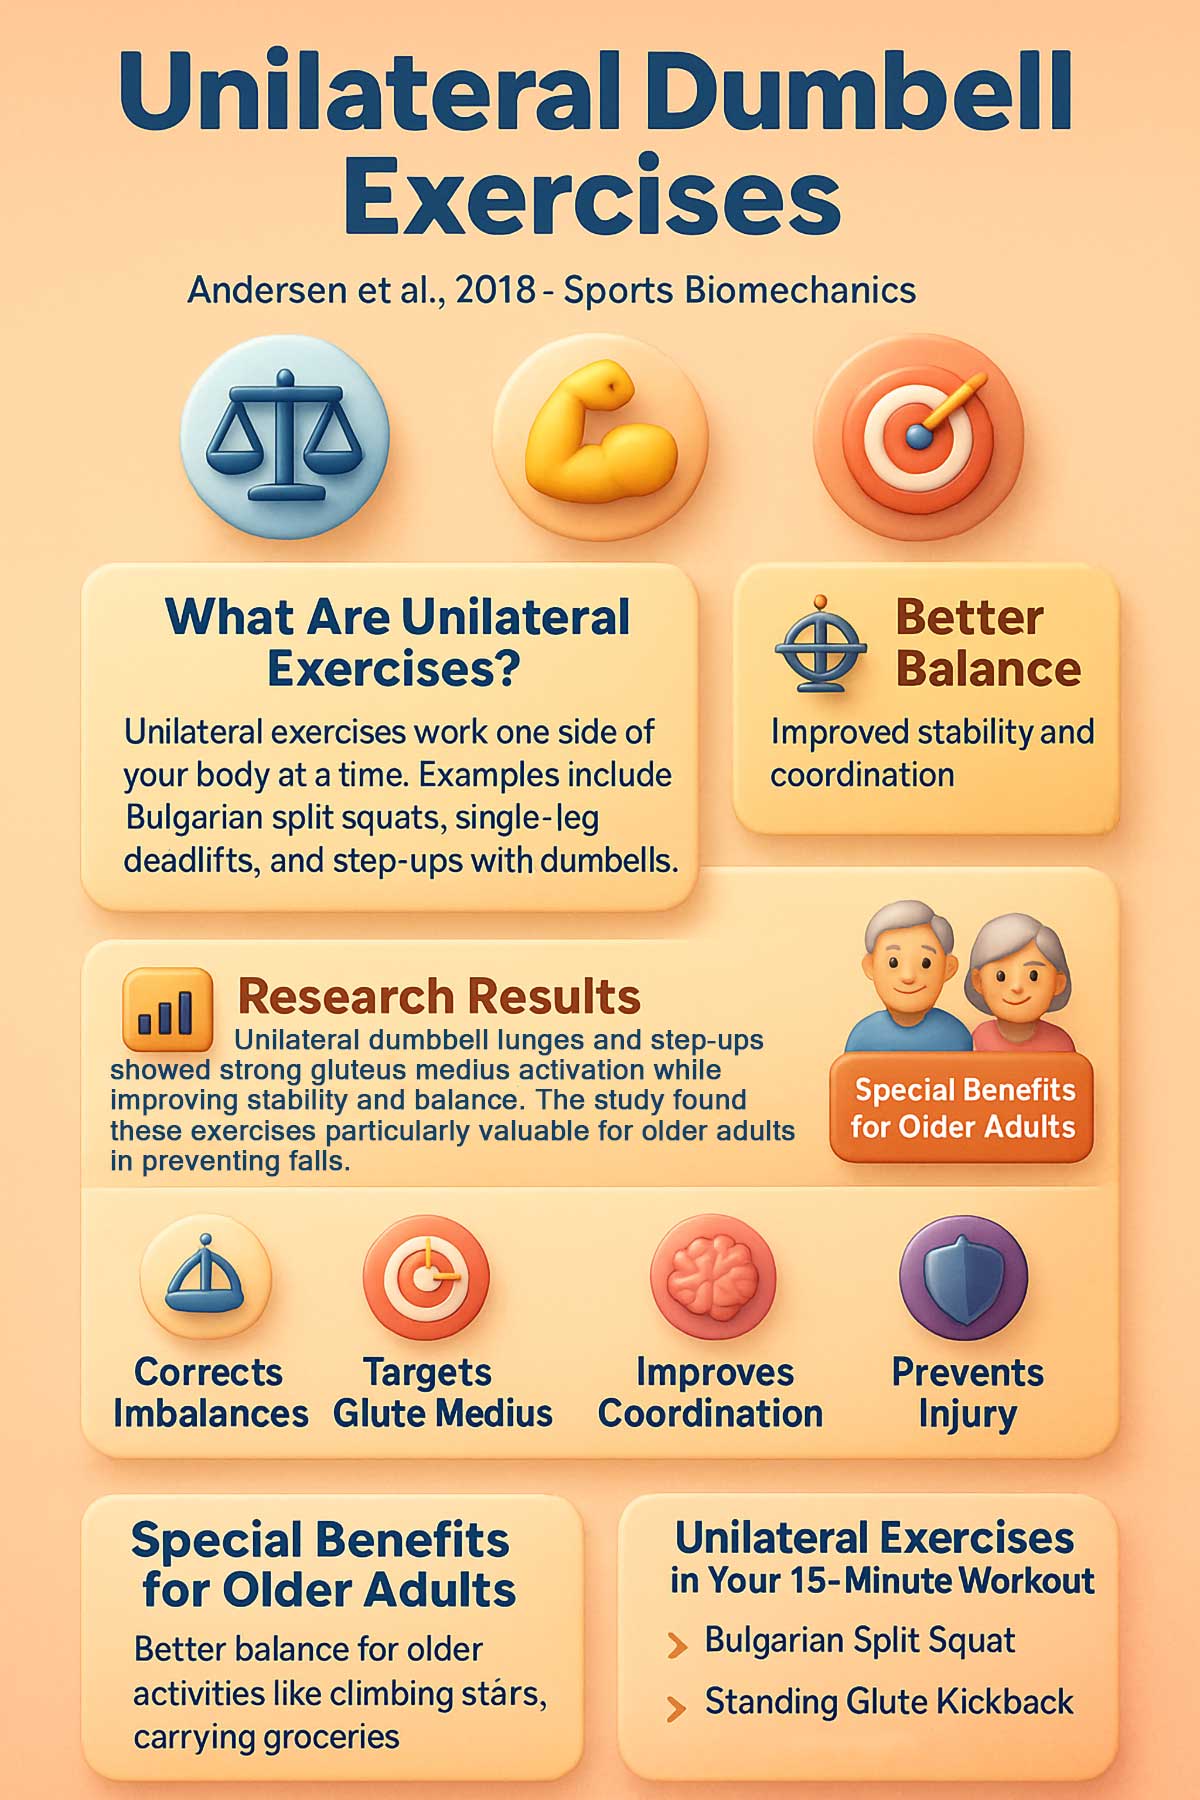
An interesting finding from a 2018 study in Sports Biomechanics showed that unilateral exercises like split squats improved stability and balance, making them particularly valuable for older adults and anyone looking to prevent falls.
Your 8-Week Progression Plan
Don’t use the same weight for eight weeks and expect different results. Your muscles adapt, so you need to progress systematically.
| Week | Rounds | Weight Progression | Focus |
|---|---|---|---|
| 1-2 | 3 rounds | Light (learn form) | Master technique, feel the muscle working |
| 3-4 | 3 rounds | Moderate (challenging last 10 sec) | Build mind-muscle connection, increase time under tension |
| 5-6 | 4 rounds | Moderate-Heavy (struggling at 35 sec mark) | Push your strength limits, maintain perfect form |
| 7-8 | 4 rounds | Heavy (barely finish last few reps) | Maximum strength gains, prepare for next cycle |
How to know when to increase weight:
- If you can complete all reps with perfect form and could do more, add 2.5-5 pounds
- If the last five seconds of each set feel very challenging but doable, you’re at the right weight
- If you can’t maintain good form, reduce the weight
Troubleshooting Common Problems
“I don’t feel my glutes working”
Solution: Try glute activation drills before starting your workout. Spend five minutes doing bodyweight glute bridges and clamshells. This “wakes up” your glutes and makes them easier to feel during the main exercises.
Reduce your weight and focus on the squeeze. Place your hand on your glute during each rep to feel it contract. This physical feedback helps build that mind-muscle connection.
“My lower back hurts during hip thrusts”
Solution: You’re likely overextending at the top. Reduce the weight and focus on keeping your spine neutral. Your ribs should stay down, not flare up.
Engage your core throughout the movement. Think about pulling your belly button toward your spine. This protects your lower back.
Check your bench height too. If it’s too high, it puts you in an awkward position. The bench should be about mid-back height when you’re in the bottom position.
“I lose balance during Bulgarian split squats”
Solution: Hold onto a wall or sturdy chair with your free hand initially. There’s no shame in using extra support while you build balance.
Start with a lower surface for your back foot. A thick book or low step is less challenging than a full-height bench.
Widen your stance slightly. Your front foot should be far enough from the bench that you drop straight down, not forward.
“The workout feels too easy”
Solution: You need to increase the challenge. Add more weight to your dumbbells. If you can chat comfortably during the workout, you’re not working hard enough.
Try the advanced modifications: add pause reps, increase to four rounds, or use tempo training. These techniques increase time under tension without requiring heavier weights.
Make sure you’re truly resting only the prescribed 15 seconds between exercises. Many people rest longer than they think.
“The workout feels too hard”
Solution: Reduce your weights. There’s no prize for using heavy dumbbells if your form suffers.
Start with just two rounds instead of three. Build up to three rounds over the next few weeks.
Extend your rest periods to 30 seconds instead of 15 if needed. As your fitness improves, gradually reduce rest time back to 15 seconds.
Fuel Your Glute Growth: Nutrition Essentials
You can’t out-train a bad diet. Your glutes need proper nutrition to recover and grow stronger after each workout.
Protein is Your Priority
Aim for 0.7 to 1 gram of protein per pound of body weight daily. If you weigh 150 pounds, that’s 105-150 grams of protein per day.
Protein provides the building blocks (amino acids) your muscles need to repair and grow. Without enough protein, your workouts won’t produce the results you want.
Protein-rich foods:
- Chicken breast (30g per 4 oz)
- Greek yogurt (20g per cup)
- Eggs (6g per egg)
- Salmon (25g per 4 oz)
- Lean beef (25g per 4 oz)
- Cottage cheese (14g per half cup)
- Protein powder (20-30g per scoop)
Post-Workout Nutrition Window
Eat a protein-rich meal or snack within two hours after your workout. This is when your muscles are primed to absorb nutrients.
Quick post-workout options:
- Greek yogurt with berries and granola (20g protein)
- Protein shake with banana and almond butter (25g protein)
- Chicken and sweet potato (30g protein)
- Eggs and whole grain toast (18g protein)
- Tuna salad on crackers (22g protein)
Don’t Forget Carbs and Fats
Carbs replenish the energy your muscles use during workouts. Healthy fats support hormone production, which is essential for muscle growth.
Good carb sources: Rice, oats, quinoa, sweet potatoes, fruits, whole grain bread
Healthy fat sources: Avocados, nuts, seeds, olive oil, fatty fish
Hydration Matters
Drink eight to ten glasses of water daily. Dehydration reduces strength and makes recovery slower. Your muscles are about 75% water, so staying hydrated directly impacts muscle function.
Drink extra water on workout days, especially if you sweat a lot.
Your Off-Day Recovery Toolkit
Rest days aren’t about doing nothing. They’re about active recovery that speeds up muscle repair and keeps you mobile.
Light Movement (20-30 minutes)
- Easy walking (don’t push the pace)
- Leisurely cycling
- Gentle swimming
- Light yoga flow
These activities increase blood flow to your muscles without causing additional stress. Better blood flow means faster recovery.
Foam Rolling (10-15 minutes)
Focus on your glutes, hamstrings, and hip flexors. Foam rolling releases muscle tension and improves flexibility.
How to foam roll glutes:
- Sit on the foam roller with one ankle crossed over the opposite knee
- Lean slightly toward the crossed leg
- Roll slowly, pausing on tender spots for 20-30 seconds
- Repeat on the other side
Stretching Routine (10 minutes)
- Figure-four stretch (30 seconds per side)
- Pigeon pose (45 seconds per side)
- Standing quad stretch (30 seconds per side)
- Hamstring stretch (30 seconds per side)
Stretching maintains your range of motion and reduces muscle tightness.
Sleep 7-9 Hours Per Night
This is non-negotiable. Sleep is when your body produces growth hormone and repairs muscle tissue. Shortchange your sleep, and you shortchange your results.
Track Your Progress: Measure What Matters
You can’t improve what you don’t measure. Tracking your progress keeps you motivated and helps you spot when it’s time to increase the challenge.
Strength Metrics
Log the weights you use for each exercise after every workout. Write it in a notebook or use a fitness app.
When you can complete all three rounds with good form, increase the weight by 2.5-5 pounds for that exercise.
Body Measurements
Measure your glutes at the widest point every two weeks. Use a flexible tape measure and measure at the same time of day (morning is best, before eating).
Don’t get discouraged by small fluctuations. Look at the trend over eight weeks, not week to week.
Progress Photos
Take same-angle photos weekly. Wear the same outfit and use the same lighting. Photos often show changes that the mirror misses.
Take three angles: side view, back view, and a three-quarter view. You’ll be amazed at the difference after eight weeks.
Performance Markers
Pay attention to how you feel during daily activities:
- Do stairs feel easier?
- Can you walk farther without fatigue?
- Is your posture better?
- Do you have less lower back pain?
These functional improvements matter just as much as aesthetics.
Quick Reference: Common Workout Mistakes
✗ Don’t: Rush through reps with momentum
✓ Do: Control each movement, squeeze at peak contraction
✗ Don’t: Use the same weight for all exercises
✓ Do: Adjust load based on exercise (kickbacks need less weight than hip thrusts)
✗ Don’t: Skip rest days
✓ Do: Allow 48 hours between glute sessions for proper recovery
✗ Don’t: Train through pain
✓ Do: Distinguish between muscle burn (good) and joint pain (stop immediately)
✗ Don’t: Ignore your warm-up
✓ Do: Spend three minutes activating your glutes before starting
✗ Don’t: Compare your Week 1 to someone else’s Week 52
✓ Do: Focus on your own progress and celebrate small wins
Your Results Timeline: What to Expect
WEEK 1-2: Learning Phase
→ You’ll feel: Muscle soreness, getting used to movements, figuring out the right weights
→ What’s happening: Your nervous system is learning the movement patterns. Neural adaptations come before muscle growth. Form improvement is your main goal right now.
WEEK 3-4: Strength Phase
→ You’ll feel: Exercises getting noticeably easier, ready to add weight, less soreness after workouts
→ What’s happening: Your muscle recruitment is improving. Your glutes are learning to fire more efficiently. This is when you should start increasing weights.
WEEK 5-6: Growth Phase
→ You’ll feel: Glutes feeling firmer to the touch, clothes fitting differently around your backside, increased confidence
→ What’s happening: Visible muscle development begins. The protein you’re eating is being used to build new muscle tissue. Your hard work is paying off.
WEEK 7-8: Transformation Phase
→ You’ll feel: Noticeably stronger, visible shape changes in photos, compliments from others, exercises that felt impossible in Week 1 now feel manageable
→ What’s happening: Significant strength and size gains. Your glutes have adapted to the training stimulus. You’re ready to start a new eight-week cycle with heavier weights.
Your Path to Stronger Glutes Starts Now
Building a stronger, sculpted backside doesn’t require expensive gym memberships or hours of your time. This 15-minute circuit hits all three glute muscles with exercises backed by research.
Here’s what you know now:
- 15 minutes, 3 times per week is enough to see real results
- 4 exercises targeting all three glute muscles for balanced development
- Results visible in 6-8 weeks with consistent training and proper nutrition
- Progression is key – increase weight every 2-3 weeks as you get stronger
- Recovery matters – rest days are when your muscles grow
You have everything you need right here. The workout plan. The progression strategy. The nutrition guidelines. The troubleshooting tips.
All that’s left is to grab your dumbbells and start. Do your first workout today. Not tomorrow. Not Monday. Today.
Your glutes don’t care about your excuses. They respond to consistent effort. Give them that effort three times a week for the next eight weeks.
FAQs
What weight should I use?
Start with lighter dumbbells than you think you need. Master the form first. You should be able to complete all reps with good technique while feeling challenged in the last few reps of each set.
For most people, that’s 10-20 pounds per dumbbell for hip thrusts and RDLs, 8-15 pounds for Bulgarian split squats, and 5-10 pounds for kickbacks. You can always add weight as you get stronger.
How do I know if I’m activating my glutes correctly?
Focus on the mind-muscle connection. During each exercise, think about squeezing your glutes. You should feel the work primarily in your backside, not your lower back or quads.
If you feel hip thrusts in your lower back, you’re overextending. If you feel Bulgarian split squats only in your quads, shift your weight back toward your heel. Small adjustments make a big difference.
Try this test: Place your hand on your glute during an exercise. You should feel it contract and harden. If you don’t, adjust your form until you do.
Can I do this workout more than 3 times a week?
Stick to three times per week. Your muscles need rest to recover and grow. That’s when the actual strengthening happens.
On your off days, you can add light activity like walking, yoga, or stretching. These help with recovery without overtaxing your glutes. Active recovery actually speeds up muscle repair by increasing blood flow.
How soon will I see results?
You’ll likely feel stronger within two to three weeks. Your glutes will feel firmer, and exercises that used to be hard will get easier.
Visible changes usually appear after six to eight weeks of consistent training. But this assumes you’re also eating enough protein and getting adequate sleep. Your body needs fuel and rest to build muscle.
Be patient. The results are worth it.
Should I feel sore after every workout?
Not necessarily. Soreness (delayed onset muscle soreness or DOMS) decreases as your body adapts to the exercises. This is normal and doesn’t mean the workout is less effective.
Focus on feeling muscle fatigue during the workout rather than soreness the next day. If you feel a good burn in your glutes during the last few reps of each exercise, you’re doing it right.
Can I combine this with other lower body workouts?
Yes, but allow at least 48 hours between glute-focused sessions. Your muscles need time to repair and grow stronger.
You can do upper body workouts, cardio, or core work on alternate days. Just avoid exercises that heavily tax your glutes (like heavy squats or deadlifts) on your rest days.
What if I only have one dumbbell?
You can still do an effective workout. Use your single dumbbell for hip thrusts and Bulgarian split squats (complete all reps on one side, then switch the dumbbell to the other hand and do the other side).
For RDLs, do single-arm variations, or use household items like filled water jugs for light resistance. You can even do bodyweight RDLs by focusing on a slow tempo and really squeezing at the top.
I feel this in my quads more than glutes. What’s wrong?
This is a common issue with a simple fix. Focus on pushing through your heels, not your toes. This simple cue shifts the work from your quads to your glutes.
For hip thrusts and Bulgarian split squats, try leaning your torso slightly back. This puts more emphasis on your glutes and less on your quads.
Also check your stance width. A slightly wider stance often helps people feel their glutes working better.
Can men do this workout too?
Absolutely. Strong glutes benefit everyone regardless of gender. They improve athletic performance, reduce back pain, support better posture, and help prevent knee injuries.
Men often neglect glute training in favor of quads and hamstrings, but balanced lower body development requires strong glutes. This workout is just as effective for men as it is for women.
Do I need to do cardio too?
This workout will strengthen and build your glutes, but it won’t burn significant calories or improve cardiovascular fitness. If fat loss is a goal, add two to three cardio sessions per week on your off days.
Walking, cycling, swimming, or light jogging work well. Keep cardio moderate intensity so it doesn’t interfere with your recovery.


