If you spend your day sitting at a desk or are active in sports like running and cycling, you’re likely familiar with the persistent tightness in the back of your legs.
Your hamstrings are three muscles that run along the back of your thigh. When you sit for hours, these muscles stay in a shortened position. Over time, they adapt to this posture and lose their natural length. Athletes face a different problem. Running, cycling, and jumping create tiny tears in the muscle fibers. If you don’t stretch after these activities, the muscles heal in a shortened state.
Tight hamstrings don’t just cause leg discomfort. They pull on your pelvis and change your posture. This can lead to lower back pain and even knee problems. A study published in the International Journal of Yoga found that a 6-week yoga stretching program significantly increased hamstring and lower-back flexibility in healthy adults. The best part? You only need 10 minutes a day.
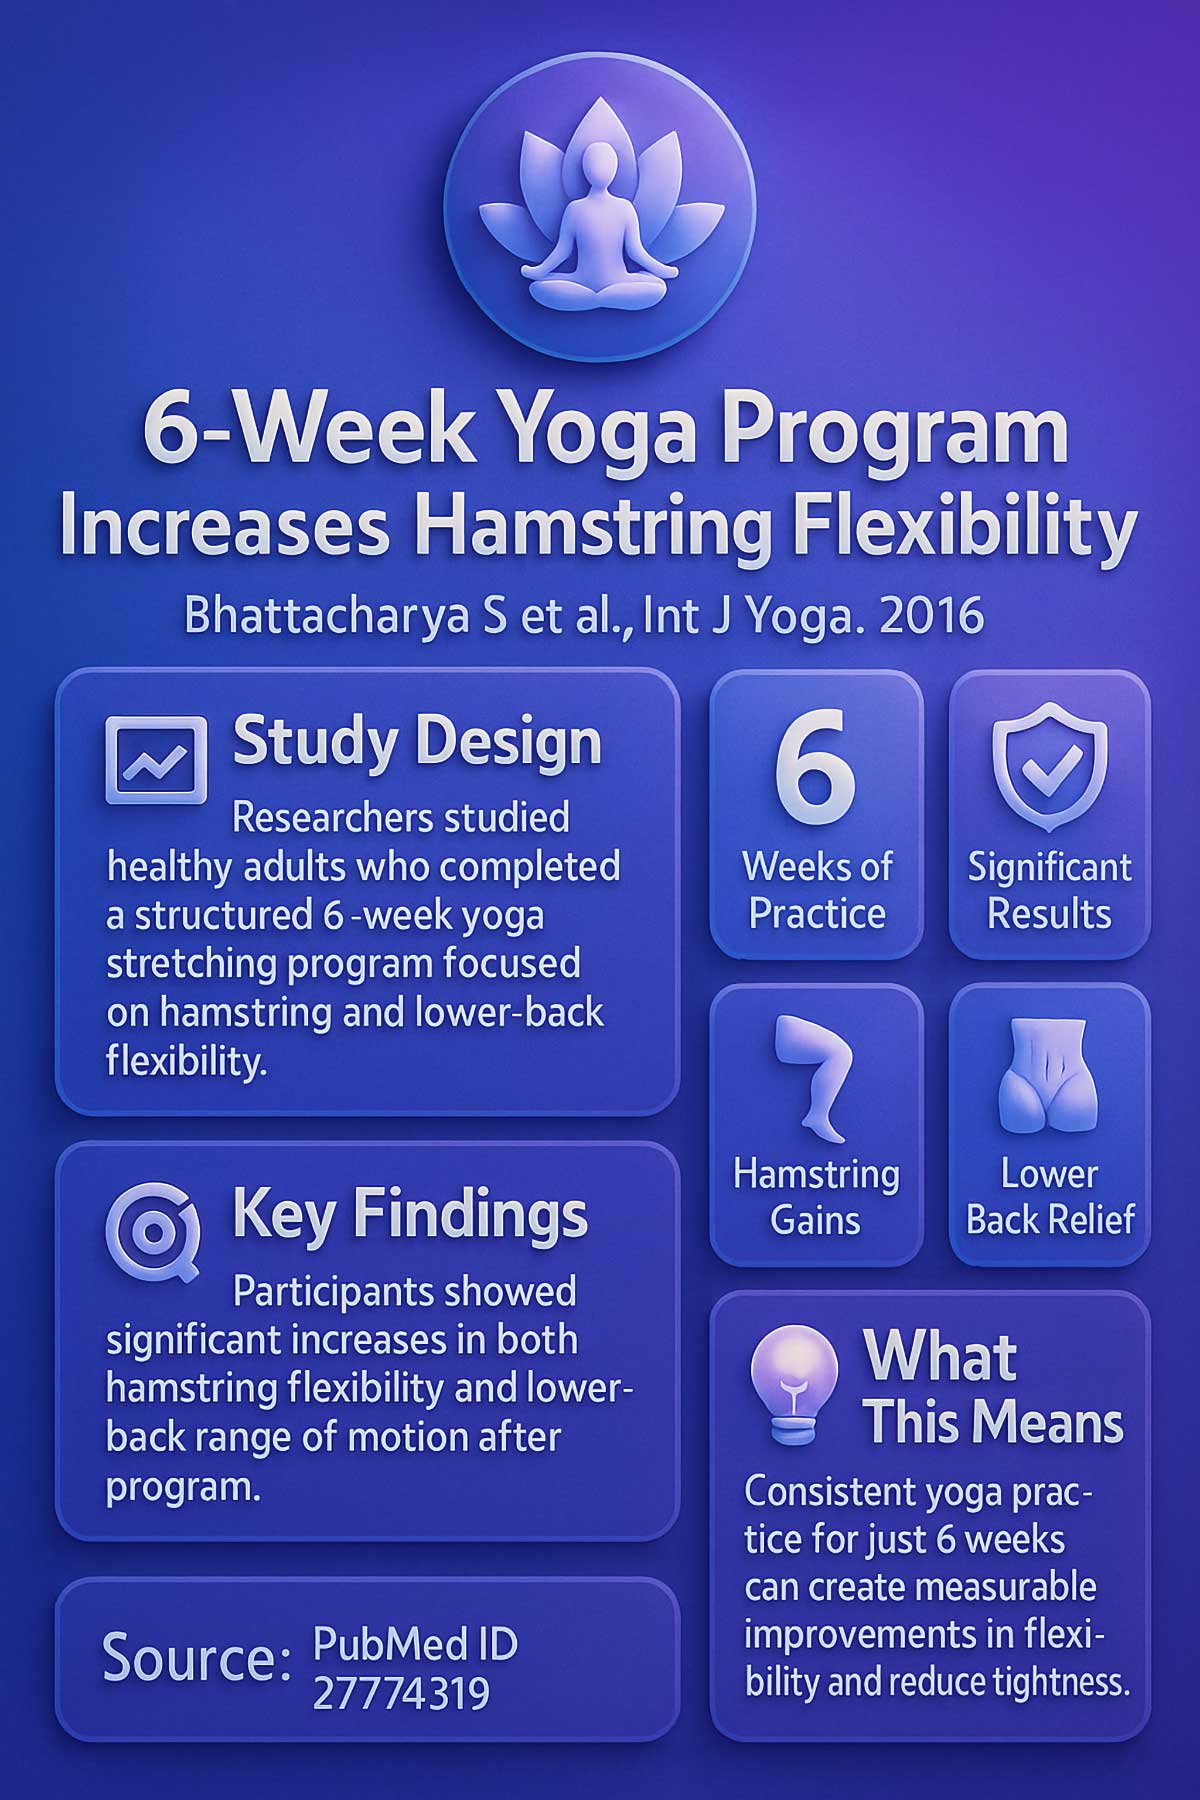
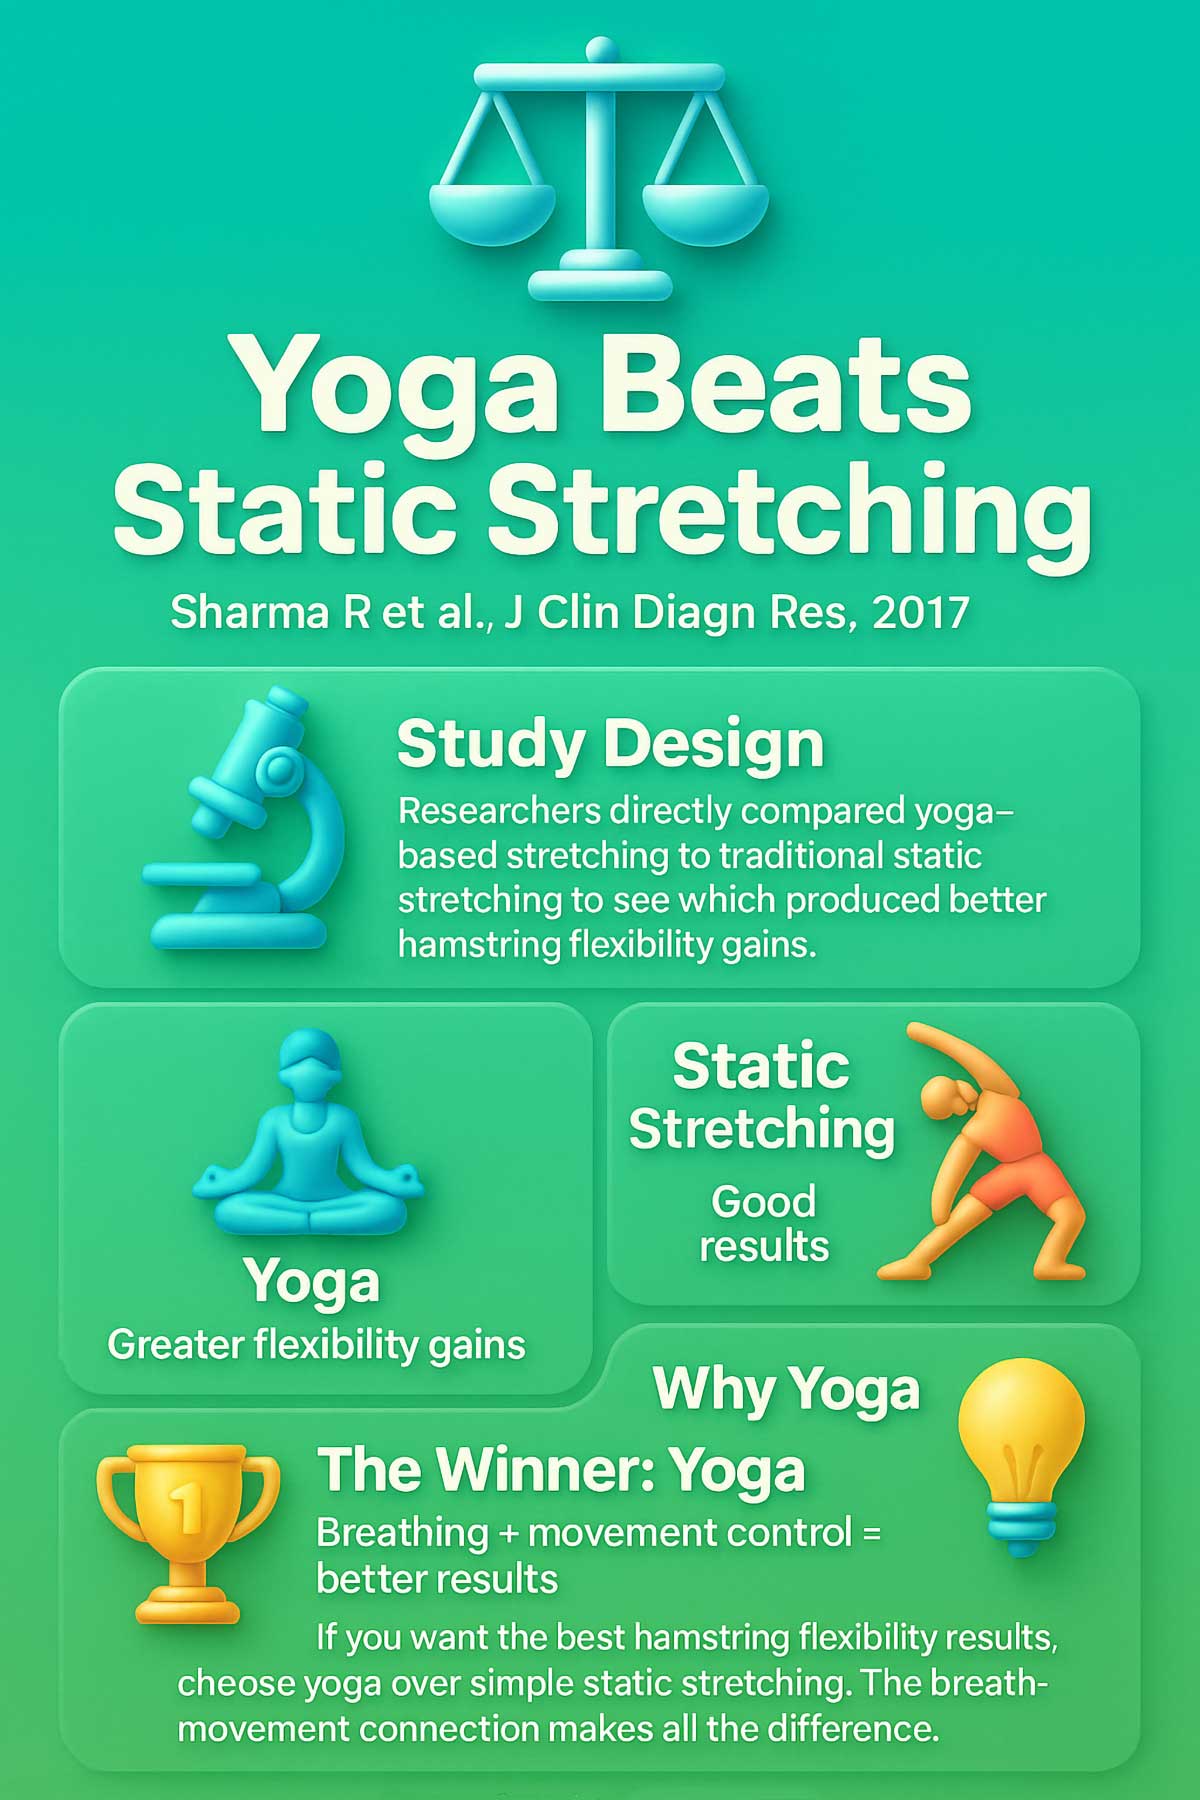
This simple routine combines breathing with controlled movement. Researchers compared yoga to static stretching and discovered that yoga produces greater hamstring flexibility gains. The reason? Deep breathing helps your muscles relax while you stretch. Let’s get started.
Understanding Your Hamstrings: The Three Muscles That Matter
Your hamstrings aren’t just one muscle. They’re a group of three distinct muscles working together. Knowing what you’re stretching helps you do it better.
| Muscle | Location | Main Function | Everyday Movement |
|---|---|---|---|
| Biceps Femoris | Outer back of thigh | Bends knee, extends hip | Walking, climbing stairs, standing up |
| Semimembranosus | Inner back of thigh | Bends knee, extends hip | Running, jumping, squatting |
| Semitendinosus | Middle back of thigh | Bends knee, extends hip | Cycling, kicking, sitting down |
All three muscles work together to bend your knee and extend your hip. They also play a key role in slowing down your leg during walking and running. This means they’re active almost every time you move.
Here’s what most people don’t know: these muscles don’t just flex your knee. They work to slow down knee extension when you walk or run. This eccentric action puts tremendous stress on the muscle fibers. Without proper stretching, this stress builds up and creates tightness.
Who Gets Tight Hamstrings? Risk Factors You Should Know
Some people are more likely to develop tight hamstrings than others. Understanding your risk helps you take action before problems start.
| Risk Factor | Why It Causes Tightness | Affected Activities |
|---|---|---|
| Office Workers | 6-8 hours daily sitting shortens muscles | Bending, tying shoes, picking up objects |
| Runners & Cyclists | Repetitive flexion without adequate stretching | Getting out of bed, climbing stairs |
| Soccer & Basketball Players | Explosive movements create micro-tears | Sudden direction changes, sprinting |
| Older Adults (40+) | Natural loss of muscle elasticity with age | All daily movements become harder |
| Previous Hamstring Injury | Scar tissue forms and limits flexibility | Return to sports, preventing re-injury |
| Anterior Pelvic Tilt | Pulls hamstrings into constant tension | Standing, walking with proper posture |
Sports injuries are more common than you might think. Studies show that hamstring injuries make up about 19% of all sports injuries. Athletes who get hurt miss an average of 24 days from their sport. Even more concerning? Nearly one-third of people who suffer hamstring injuries will hurt themselves again within one year.
This is why prevention matters so much. Once you injure your hamstrings, you’re fighting an uphill battle. The good news? Regular stretching can keep you in that healthy two-thirds who avoid re-injury.
🧘 Hamstring Flexibility Assessment
Answer 8 quick questions to get your personalized flexibility profile
Before You Start: The Golden Rules of Safe Stretching
Listen to Your Body
Stretching should create a mild pulling sensation in your muscles. You should feel gentle tension, not sharp pain. If something hurts, back off. Pain is your body’s way of saying you’ve gone too far.
Use this guide to know what’s normal and what’s not:
| Stop Immediately | Normal Stretch Sensation |
|---|---|
| Sharp, stabbing pain | Gentle pulling or tension |
| Pain that gets worse with breathing | Mild discomfort that eases with breath |
| Numbness or tingling down your leg | Warmth spreading through the muscle |
| Popping or tearing sound | Gradual release of tightness |
| Pain that lingers after you stop | Feeling of relief when you finish |
Warm Up First
Never stretch cold muscles. Spend 2-3 minutes doing light movement before you begin. March in place, swing your legs gently, or do some easy walking. This gets blood flowing to your muscles and prepares them for stretching.
Think of your muscles like taffy. Cold taffy breaks when you pull it. Warm taffy stretches smoothly. Your muscles work the same way.
Breathe Deeply
Your breath is the key to better stretches. Take slow, deep breaths through your nose. Exhale fully through your mouth. This signals your nervous system to relax. When your body relaxes, your muscles can stretch more safely.
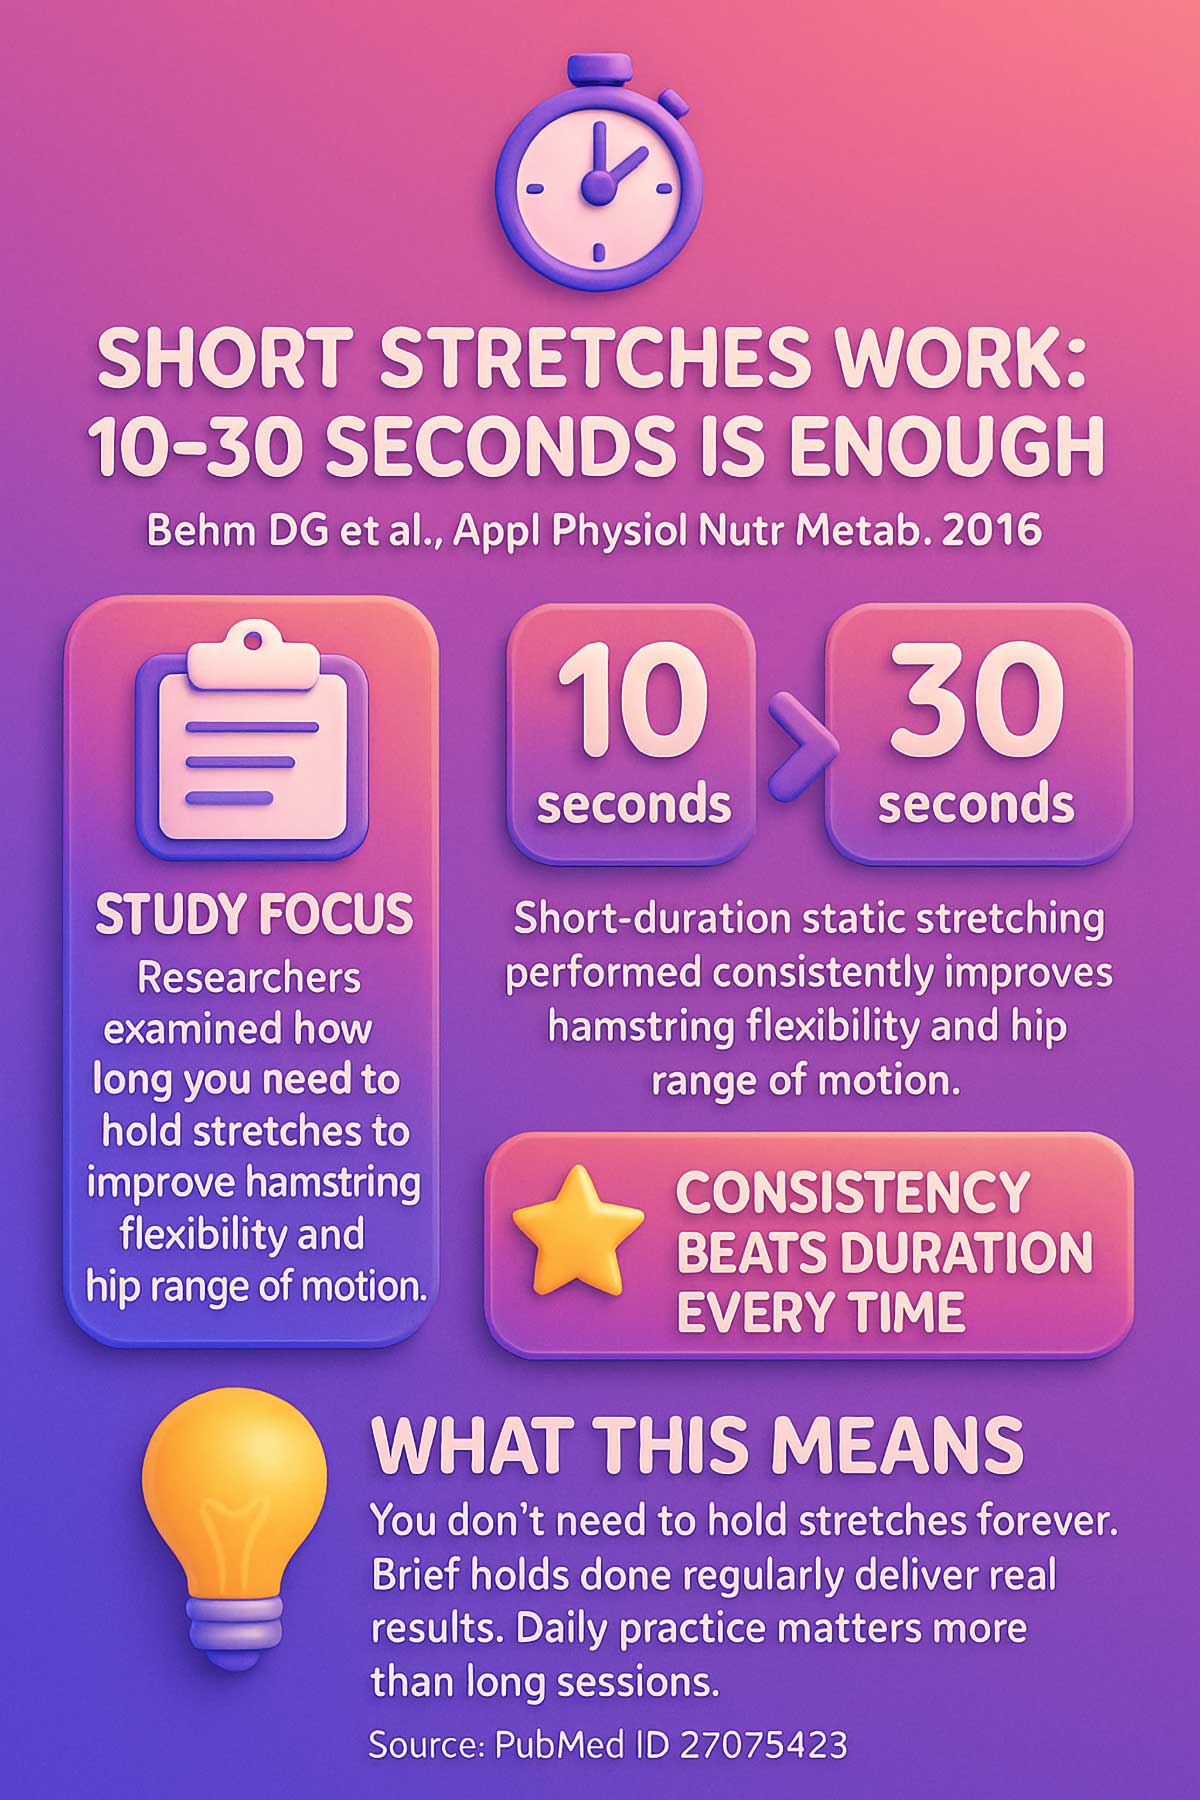
Research published in Applied Physiology, Nutrition, and Metabolism examined short-duration static stretching. Scientists found that holding stretches for just 10-30 seconds, when done consistently, improves hamstring flexibility and hip range of motion. You don’t need to hold stretches forever. You just need to do them regularly.
Common Mistakes to Avoid
Even with the best intentions, people make stretching mistakes that limit results or cause injury. Here are the most common ones:
Bouncing While Stretching This creates a reflex that makes your muscles contract, not relax. It also increases your risk of tearing muscle fibers. Keep all movements slow and controlled.
Holding Your Breath When you hold your breath, your muscles tense up. This works against your stretching goals. Make breathing your priority in every pose.
Pushing Through Sharp Pain Mild discomfort is okay. Sharp pain is not. If you feel a stabbing sensation, you’ve gone too far. Back off and approach the stretch more gently.
Skipping the Warm-Up Cold muscles don’t stretch well. They’re more likely to strain or tear. Those 2-3 minutes of light movement aren’t optional. They’re essential.
Comparing Your Flexibility to Others Your flexibility is yours alone. It depends on your bone structure, muscle fiber type, age, and history. Trying to match someone else’s range of motion can lead to injury.
Only Stretching When Pain Appears By the time you feel pain, the problem is already there. Regular stretching prevents tightness. It doesn’t just fix it after it happens.
Rushing Through the Routine Quality beats speed every time. Ten focused minutes beats 20 distracted minutes. Stay present with each stretch.
Your 10-Minute Daily Hamstring Reset: The Poses
Pose 1: Downward-Facing Dog (Adho Mukha Svanasana)
Target Area: Entire back body, hamstrings, calves, shoulders
Difficulty Level: Beginner to Intermediate
Hold Time: 60 seconds
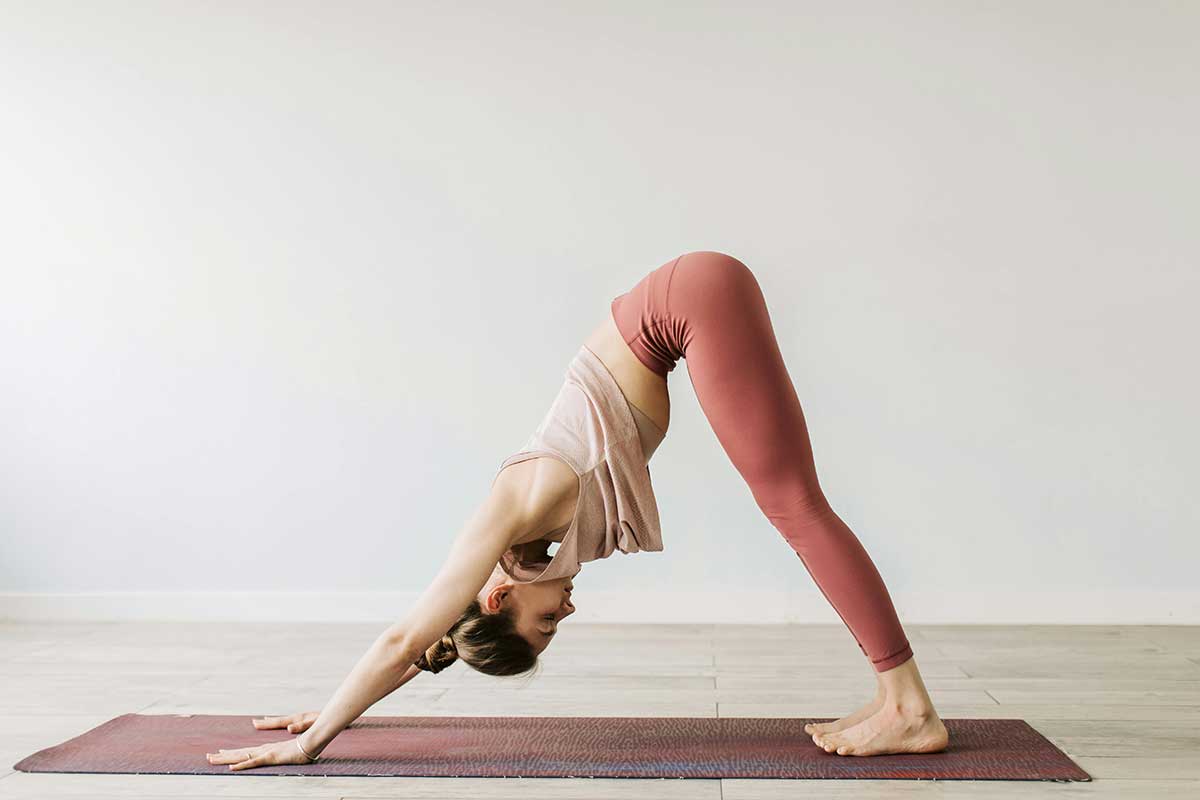
This pose is a full-body stretch that targets the entire back line of your body. It creates gentle, consistent length in your hamstrings and calves.
How to Do It:
Start on your hands and knees. Place your hands shoulder-width apart and your knees hip-width apart. Spread your fingers wide and press firmly through your palms. Lift your hips up and back, forming an inverted “V” shape with your body. Press your palms firmly into the floor. Gently “pedal” your feet, bending one knee and then the other. This helps you ease into the stretch slowly.
Common Mistakes:
- Rounding your back to get heels down
- Locking your elbows
- Letting your shoulders creep up toward your ears
- Holding your breath
Pro-Tip: Don’t worry about getting your heels to the floor! It’s more effective to keep your spine long and a soft bend in your knees. This protects your lower back and keeps the focus on your hamstrings.
| Beginner | Intermediate | Advanced |
|---|---|---|
| Knees bent, heels lifted high | Pedal feet, alternating heels | Both heels down, legs straight |
Pose 2: Standing Forward Bend (Uttanasana)
Target Area: Hamstrings, lower back, calves
Difficulty Level: Beginner
Hold Time: 60 seconds
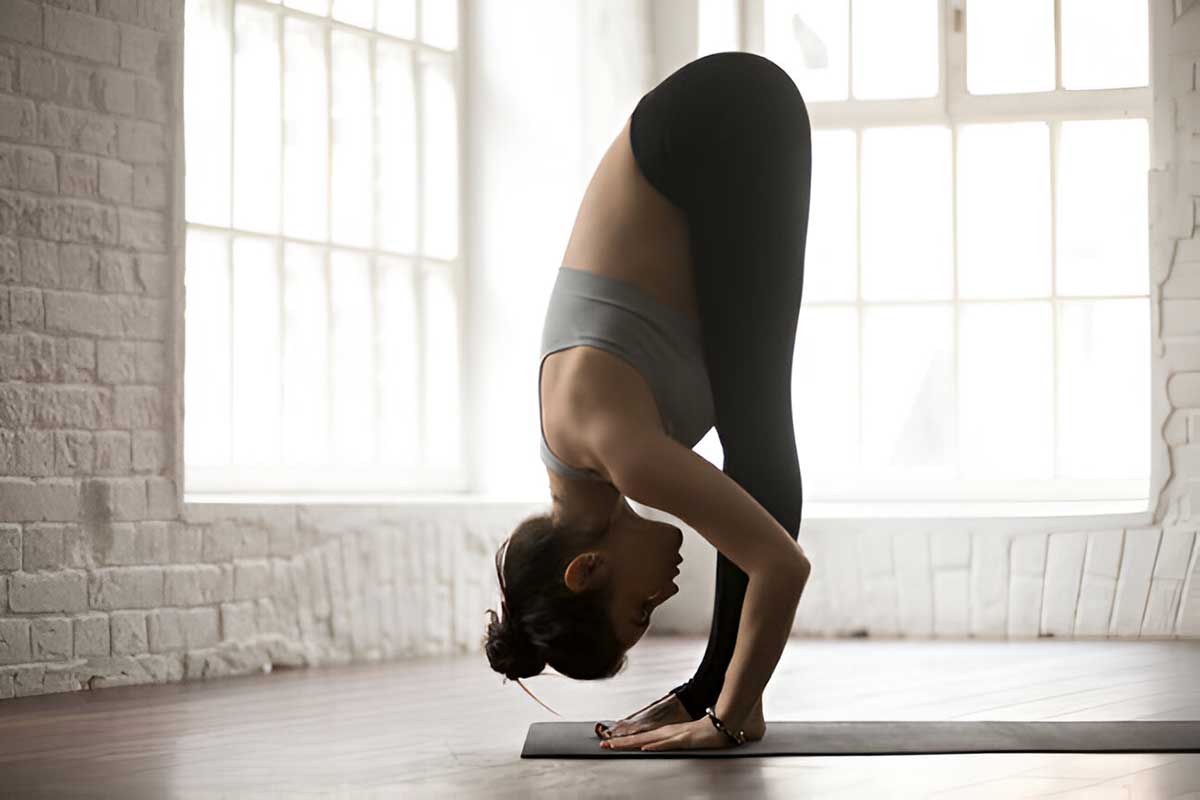
Gravity becomes your friend in this pose. It helps release your hamstrings and lower back without any effort. A study in the Journal of Bodywork and Movement Therapies confirmed that forward-fold based yoga postures like this one provide safe and effective hamstring lengthening without any equipment needed.
How to Do It:
Stand with your feet hip-width apart. Take a deep breath in. As you exhale, hinge forward from your hips, not your waist. Let your head and neck hang heavy. Rest your hands on yoga blocks, your shins, or the floor. Whatever feels comfortable. Let gravity do the work.
Common Mistakes:
- Forcing your hands to touch the floor
- Bending from your waist instead of your hips
- Tensing your neck and shoulders
- Locking your knees
Pro-Tip: Bend your knees generously to protect your lower back. This keeps the stretch focused on your hamstrings where you want it. Straight legs aren’t the goal here. A safe, effective stretch is.
| Beginner | Intermediate | Advanced |
|---|---|---|
| Hands on blocks, knees very bent | Hands on shins, slight knee bend | Palms flat on floor, minimal knee bend |
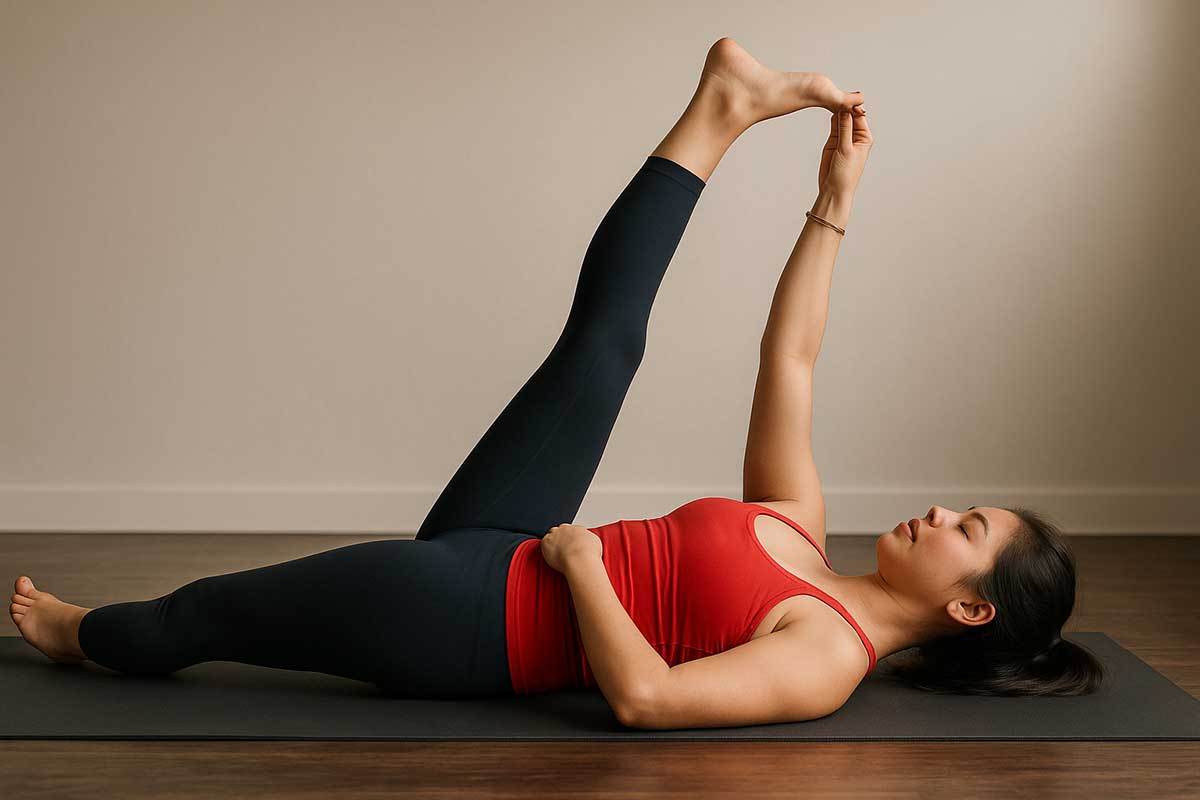
Pose 3: Reclining Hand-to-Big-Toe Pose (Supta Padangusthasana)
Target Area: One hamstring at a time, hip flexors
Difficulty Level: Beginner to Intermediate
Hold Time: 60 seconds per side (2 minutes total)
This pose isolates one hamstring at a time. You get a deep, controlled stretch without any strain on your back. Your lower back stays protected against the floor while one leg works.
How to Do It:
Lie on your back with both knees bent. Your feet should be flat on the floor. Loop a yoga strap, towel, or belt around the ball of your right foot. Hold the ends of the strap with both hands. Slowly extend your right leg toward the ceiling. Keep your head and shoulders relaxed on the floor. Hold for several breaths. Switch sides.
Common Mistakes:
- Lifting your opposite hip off the floor
- Pulling too hard on the strap
- Tensing your upper body
- Forgetting to breathe
Pro-Tip: For a deeper stretch, straighten your left leg along the floor. This adds a bit more intensity. But only do this if your back stays comfortable and flat against the ground.
| Beginner | Intermediate | Advanced |
|---|---|---|
| Both knees bent, gentle pull | Bottom leg straight, moderate pull | Bottom leg straight, hold foot without strap |
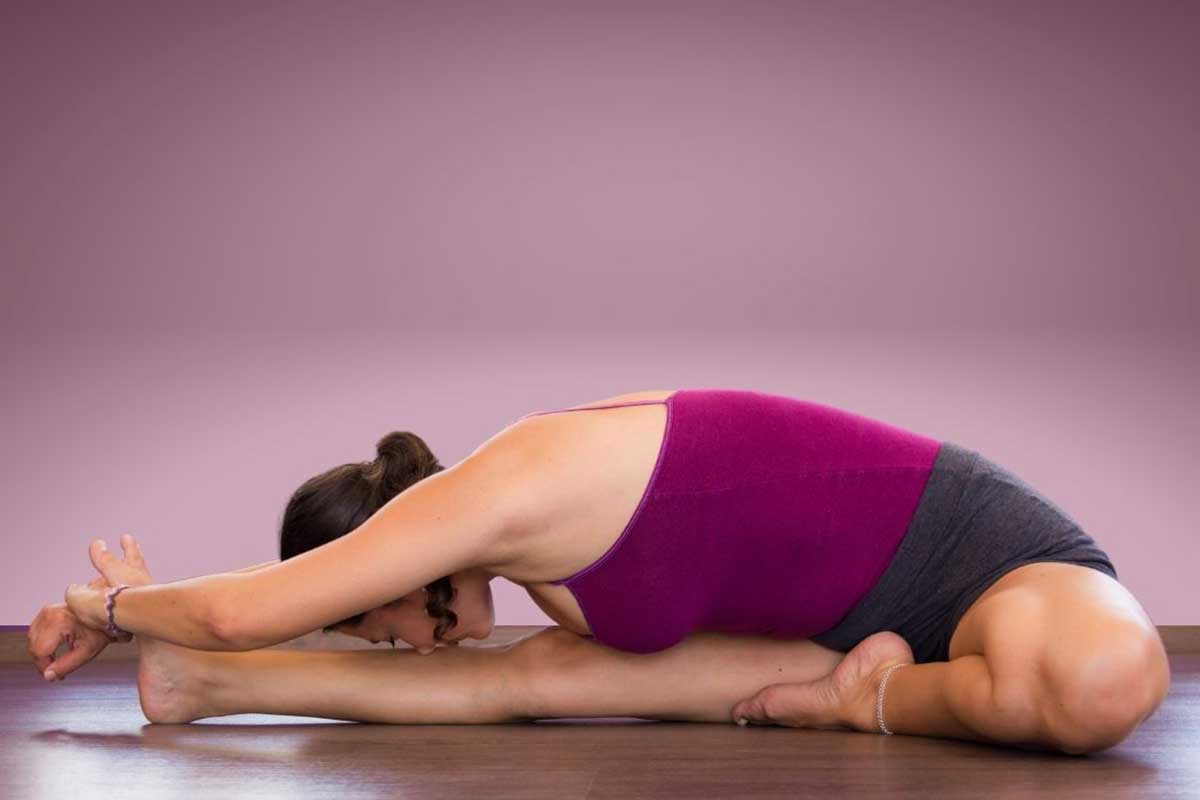
Pose 4: Head-to-Knee Pose (Janu Sirsasana)
Target Area: One hamstring, hip, side body
Difficulty Level: Intermediate
Hold Time: 60 seconds per side (2 minutes total)
This seated pose stretches one hamstring deeply. It also opens up your hip and side body at the same time. The combination makes this pose especially effective for people who sit all day.
How to Do It:
Sit on the floor and extend your left leg straight in front of you. Bend your right knee and place your right foot against your inner left thigh. Your right knee should fall out to the side. Sit up tall and inhale to lengthen your spine. As you exhale, hinge forward from your hips and fold over your left leg. Reach for your foot, ankle, or shin. Whatever you can reach without rounding your back.
Common Mistakes:
- Rounding your back to reach farther
- Forcing your bent knee down
- Holding tension in your shoulders
- Twisting your torso
Pro-Tip: Sit on the edge of a folded blanket. This helps tilt your pelvis forward, making the stretch more accessible. You’ll feel less pulling in your lower back and more in your hamstring.
| Beginner | Intermediate | Advanced |
|---|---|---|
| Sit on blanket, hands on knee | Hands on shin or ankle | Hands holding foot, chest to thigh |
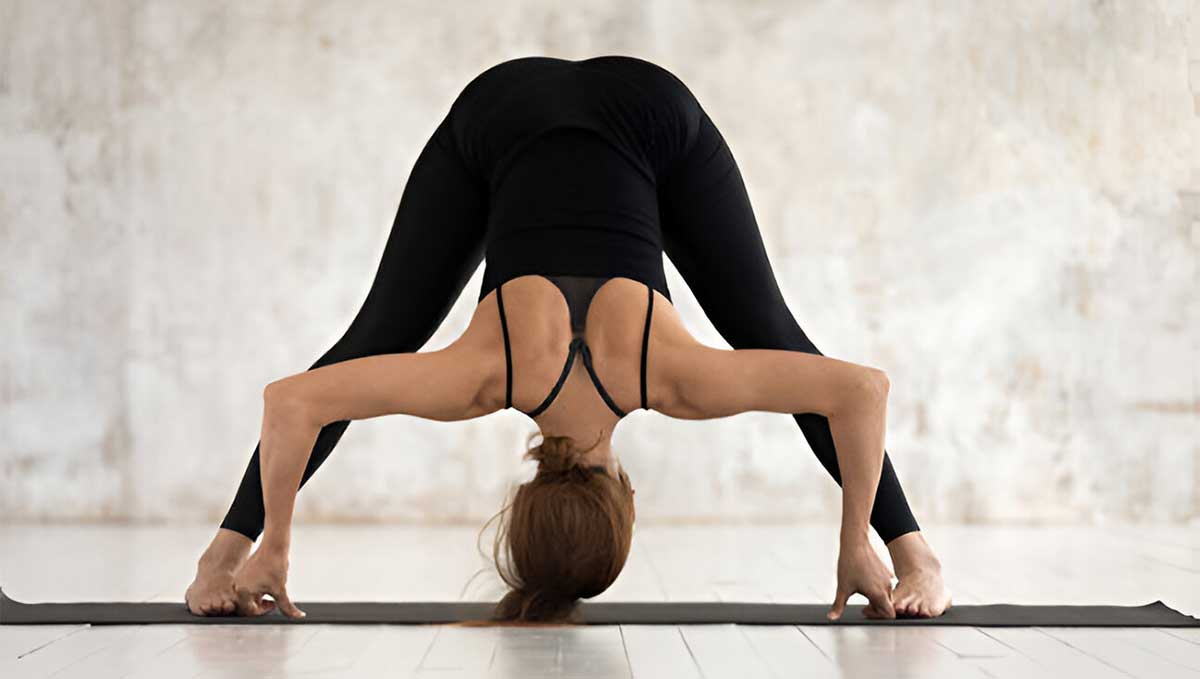
Pose 5: Wide-Legged Standing Forward Bend (Prasarita Padottanasana)
Target Area: Hamstrings from different angle, inner thighs
Difficulty Level: Beginner to Intermediate
Hold Time: 60 seconds
This pose stretches your hamstrings from a different angle. It also targets your inner thighs, giving you a two-for-one benefit. The wide stance changes how your muscles engage.
How to Do It:
Stand with your feet wide apart, about 3-4 feet. Keep your feet parallel to each other, toes pointing forward. Place your hands on your hips. Hinge forward from your hips, keeping your back straight. Place your hands on the floor or on blocks directly under your shoulders. Let your head hang naturally. Feel the stretch spread across the backs of both legs.
Common Mistakes:
- Feet turning out instead of staying parallel
- Collapsing through your chest
- Locking your knees
- Shifting weight forward onto your toes
Pro-Tip: Gently sway from side to side. This helps you explore the stretch in each leg. You might notice one side feels tighter than the other. That’s totally normal.
| Beginner | Intermediate | Advanced |
|---|---|---|
| Hands on blocks, knees soft | Hands on floor, slight knee bend | Crown of head touching floor |
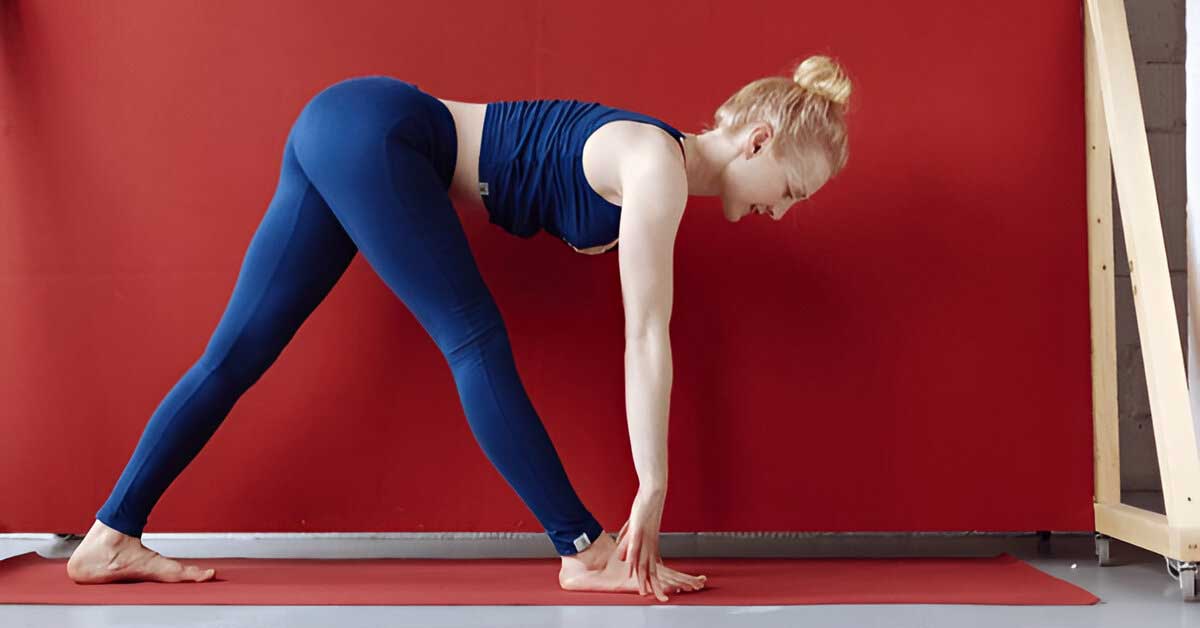
Pose 6: Pyramid Pose (Parsvottanasana) with Blocks
Target Area: Front leg hamstring (intense focus)
Difficulty Level: Intermediate to Advanced
Hold Time: 60 seconds per side (2 minutes total)
This is an intense, focused stretch for your front leg’s hamstring. Using blocks makes it accessible and safe for everyone. This pose gives you the deepest stretch of the entire routine.
How to Do It:
From standing, step your left foot back about three feet. Keep both feet flat on the floor. Square your hips toward the front. Both hip bones should point forward. Place yoga blocks on either side of your front foot. Take a breath in to lengthen your spine. As you exhale, hinge forward from your hips. Rest your hands on the blocks for support. Keep your back leg strong and active.
Common Mistakes:
- Hips twisted to the side
- Back heel lifted off the floor
- Hyperextending your front knee
- Collapsing your chest
Pro-Tip: Keep a micro-bend in your front knee. This prevents hyperextension and keeps your knee joint safe. A tiny bend makes a big difference. You’ll feel more stretch and less strain.
| Beginner | Intermediate | Advanced |
|---|---|---|
| Hands on high blocks, back knee slightly bent | Hands on low blocks or shins | Hands on floor beside front foot |
What the Research Shows
Multiple studies confirm that yoga works for hamstring flexibility. Here’s what the science tells us:
Duration Matters Less Than Consistency You don’t need hour-long sessions. Research shows that 10-30 second holds, repeated consistently, deliver results. Your 10-minute daily routine beats a 30-minute weekly session every time.
Yoga Outperforms Static Stretching A study published in the Journal of Clinical and Diagnostic Research compared yoga to traditional static stretching. Yoga produced greater hamstring flexibility gains. The combination of breathing and movement control makes the difference.
Results Appear Quickly A randomized trial found that yoga improved hip flexion range of motion and hamstring flexibility after just 4-8 weeks of regular practice. That’s less than two months to feel a real difference.
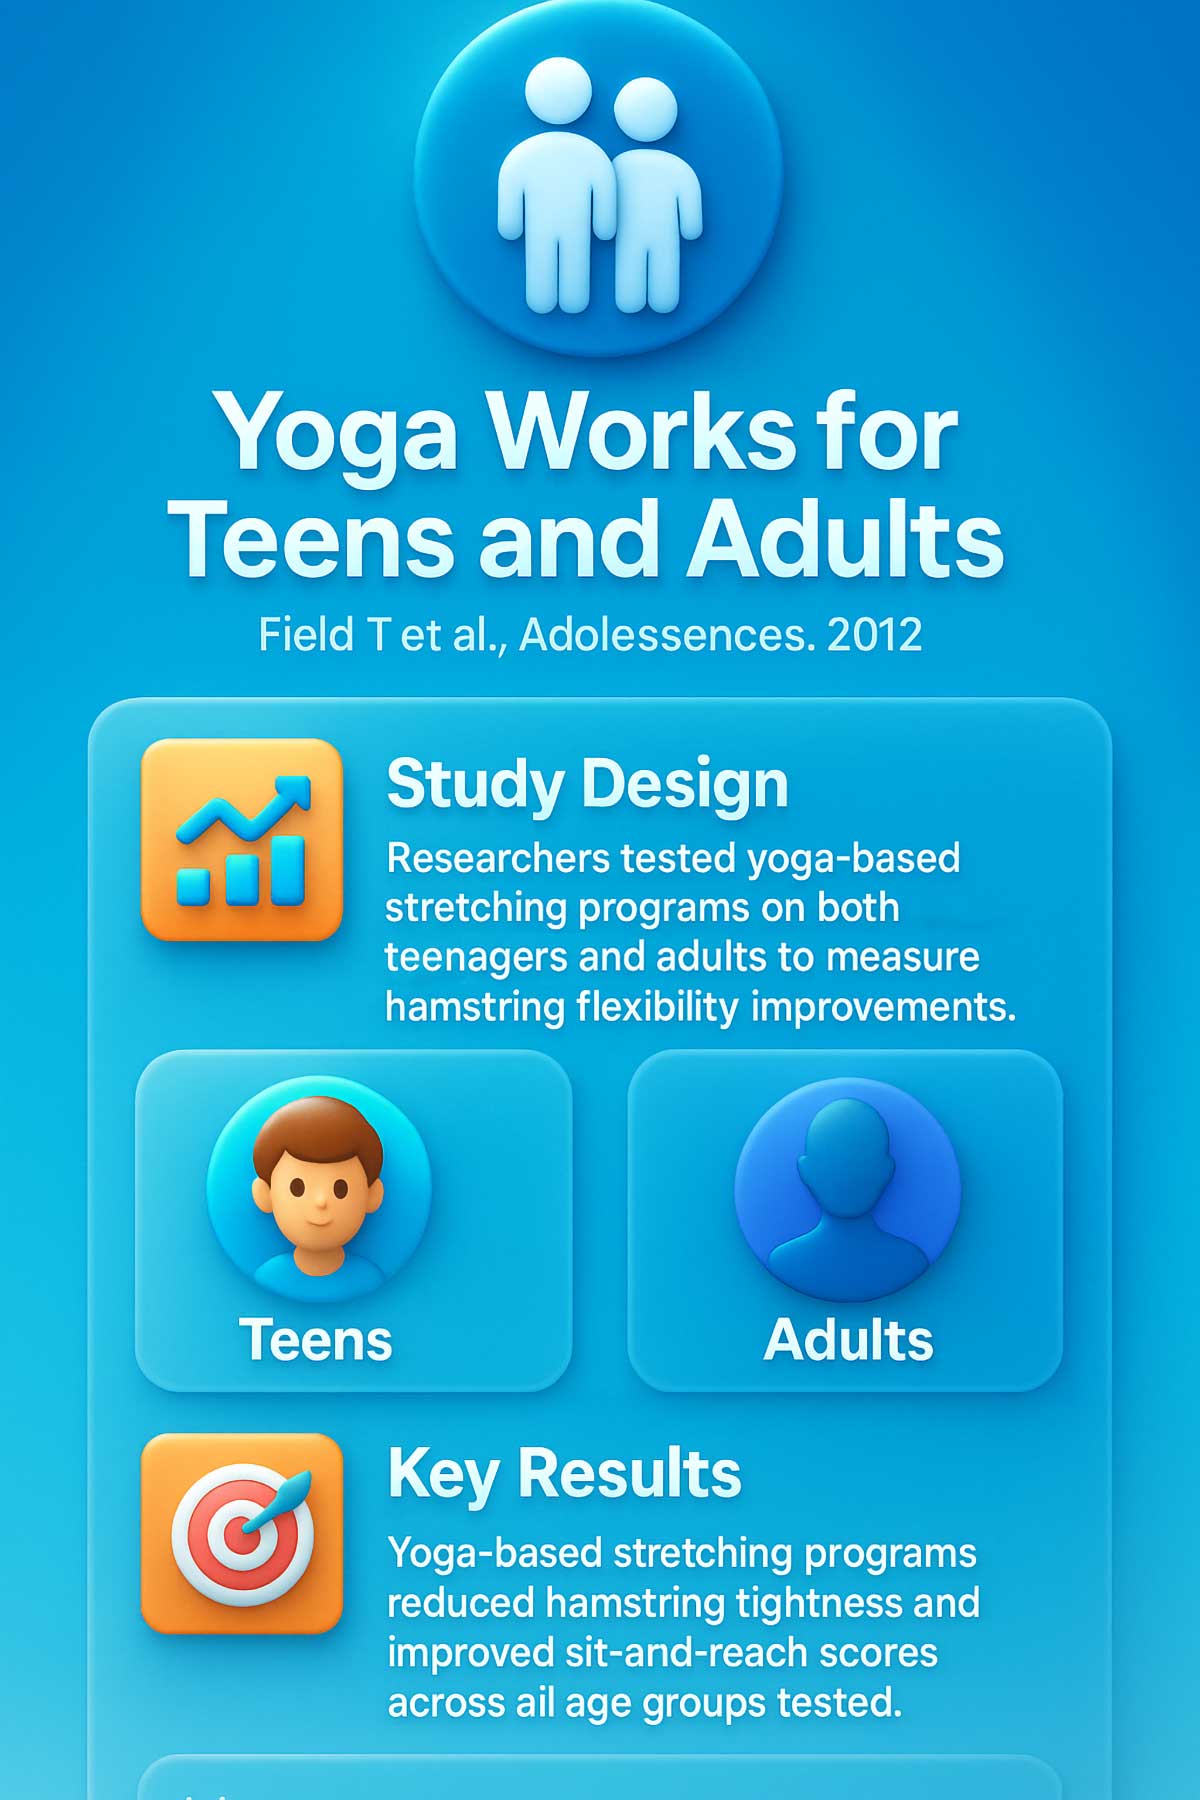
Age Doesn’t Matter Research with both teens and adults showed that yoga-based stretching programs reduced hamstring tightness across all age groups. Whether you’re 18 or 80, your muscles can adapt.
Putting It All Together: Your Daily Sequence
Now that you know each pose, here’s how to do them in order. This sequence takes exactly 10 minutes. You can do it in the morning to start your day or in the evening to unwind.
Total Time: 10 minutes (not counting warm-up)
Set a timer for each pose. This takes the guesswork out of your practice. You don’t have to think about how long you’ve been holding. Just breathe and stretch.
⏱️ 10-Minute Hamstring Routine
Follow along with timed guidance for each pose
Customize Your Session
Excellent Work!
You completed your hamstring routine
Beyond the Mat: Daily Habits for Hamstring Health
Yoga helps, but your habits between sessions matter too. These simple changes protect your hamstrings all day long.
Desk Setup Adjustments
- Keep your knees at a 90-degree angle when sitting
- Place your feet flat on the floor or a footrest
- Stand up and walk for 2 minutes every hour
- Consider a standing desk for part of your day
Movement Breaks at Work Try these quick stretches at your desk:
- Seated forward fold (30 seconds every 2 hours)
- Standing quad stretch (15 seconds each leg)
- Gentle leg swings (10 each leg)
Pre-Run Protocol Don’t stretch cold muscles before running. Instead:
- Walk for 3-5 minutes
- Do leg swings and hip circles
- Start running at an easy pace
- Save your yoga routine for after your run
Post-Run Recovery This is when stretching matters most:
- Cool down with 5 minutes of walking
- Do your yoga routine within 30 minutes of finishing
- Stay hydrated to help muscles recover
- Use a foam roller on your hamstrings for 2 minutes
Sitting Posture Tips
- Sit on your sitting bones, not your tailbone
- Keep a slight curve in your lower back
- Don’t cross your legs for long periods
- Use a lumbar support cushion if needed
Foam Rolling Technique Place the roller under your thigh. Roll slowly from knee to hip. Spend extra time on tender spots. Do this for 1-2 minutes per leg, 2-3 times per week.
For Busy Days: The 3-Minute Emergency Routine
Some days, 10 minutes feels impossible. On those days, do these two poses:
Standing Forward Bend: 90 seconds
Reclining Hand-to-Big-Toe Pose: 45 seconds per side
These two give you the most benefit in the least time. They’re also perfect for:
- Travel (hotel rooms)
- Office breaks (close your door)
- Before bed (when you forgot earlier)
This mini-routine isn’t ideal, but it beats doing nothing. Your hamstrings will thank you for any attention you give them.
Tracking Your Progress: Measure Your Gains
You can’t improve what you don’t measure. Use this simple tracking method to see your progress over time.
How to Do the Sit-and-Reach Test:
- Sit on the floor with legs straight
- Place a ruler beside your leg, zero at your hip
- Reach forward with both hands
- Measure how far past (or before) your toes you can reach
- Record the number
Do this test the same time of day each week. Your flexibility changes throughout the day. Morning measurements will be different from evening ones.
What to Expect:
- Weeks 1-2: You might feel more soreness as your body adjusts
- Weeks 3-4: Tightness starts to ease, movements feel smoother
- Weeks 5-6: Clear improvement in range of motion
- Weeks 7-8: New baseline flexibility established
A study in the journal Adolescence found that yoga-based stretching programs reduced hamstring tightness and improved sit-and-reach scores in both teens and adults. The key was consistent practice over several weeks.
Troubleshooting: What If You’re Not Getting More Flexible?
You’ve been consistent for 4-6 weeks, but you’re not seeing results. Here’s what might be happening:
Problem: Your Hip Flexors Are Too Tight Tight hip flexors pull your pelvis forward. This makes your hamstrings feel tight even when they’re not. Try adding hip flexor stretches to your routine.
Problem: You’re Not Breathing Properly Shallow breathing keeps your nervous system on alert. Your muscles can’t fully relax. Focus on slow, deep breaths that move your belly, not just your chest.
Problem: Your Form Needs Work Small alignment issues limit your progress. Consider taking one or two classes with a yoga teacher. They can spot problems you can’t see yourself.
Problem: You’re Overdoing It More isn’t always better. If you’re stretching multiple times a day or holding poses for 3-5 minutes, you might be overworking the muscles. Stick to the 10-minute routine once daily.
Problem: You Have Nerve Involvement If you feel tingling, numbness, or pain that shoots down your leg, you might have nerve issues, not just muscle tightness. See a healthcare provider before continuing.
Problem: You Need Professional Help Some people need more than stretching. Physical therapists can identify specific imbalances and create personalized programs. Don’t hesitate to seek help if home practice isn’t working.
Equipment You’ll Need (and Affordable Alternatives)
You don’t need expensive gear to do yoga. Here’s what helps and what you can use instead:
Yoga Strap ($8-15)
- Alternative: Old belt, bathrobe tie, or resistance band
- Length needed: 6-8 feet
- Look for: Non-slip material with a buckle
Yoga Blocks ($10-20 for a pair)
- Alternative: Thick hardcover books, sturdy cardboard boxes
- Height needed: 3-4 inches for beginners, 6-9 inches for more flexibility
- Look for: Foam (light), cork (stable), or wood (durable)
Yoga Mat ($20-50)
- Alternative: Thick towel on carpet, exercise mat
- Thickness needed: 5-6mm for comfort
- Look for: Non-slip surface, easy to clean
Clothing
- Comfortable clothes that allow full range of motion
- Nothing so loose it falls over your head in forward folds
- Bare feet work best (better grip)
Blanket or Bolster
- Alternative: Folded bath towel, firm couch cushion
- Use for: Sitting support, under knees for comfort
Conclusion
Tight hamstrings don’t improve overnight. But with daily practice, you’ll notice changes within weeks. Your body adapts to what you ask it to do. Ask it to stretch every day, and it will respond.
The key is showing up every day. Even if you’re tired. Even if you only have 10 minutes. Those 10 minutes add up. Before you know it, bending down won’t feel like a chore. Your lower back will thank you. Your knees will move more freely. And you’ll wonder why you didn’t start sooner.
Your Action Plan:
- Choose your time (morning or evening)
- Set a daily phone reminder
- Gather your equipment (or alternatives)
- Start with beginner modifications
- Track your progress weekly
- Adjust as you get more flexible
Studies confirm what consistent practitioners already know: regular yoga changes your body. That 6-week yoga program that increased flexibility? Those participants did exactly what you’re about to do. They showed up, did the work, and saw results.
You have everything you need right now. A small space, 10 minutes, and your own body. That’s all it takes.
FAQs
How long does it take to see results?
Most people notice improvement in 4-6 weeks with daily practice. You’ll feel less tightness after 2-3 weeks. Measurable flexibility gains take 4-8 weeks. Remember, you’re reversing months or years of tightness. Give your body time to adapt.
Can I do yoga for hamstrings every day?
Yes! This routine is designed for daily use. Your hamstrings recover quickly from stretching. Daily practice creates lasting change faster than sporadic longer sessions. Think of it like brushing your teeth. You do it every day for best results.
Should hamstrings feel sore after stretching?
Mild soreness the next day is normal, especially when you start. This is called delayed onset muscle soreness. It should feel like you used your muscles, not like you injured them. Sharp pain during or after stretching means you pushed too hard.
What if one leg is tighter than the other?
This is extremely common. Most people have one side tighter than the other. It comes from how you sit, which leg you favor, or old injuries. Don’t try to force the tight side to match the flexible side. Work both sides equally and let the tight side catch up slowly.
Can tight hamstrings cause back pain?
Absolutely. Tight hamstrings pull on your pelvis. This flattens the natural curve in your lower back. Over time, this creates stress on your spine and surrounding muscles. Many people find that their back pain improves when they stretch their hamstrings regularly.
Is yoga better than regular stretching for hamstrings?
Research says yes. Studies comparing yoga to static stretching found that yoga produces better flexibility gains. The combination of breathing, movement, and holding poses works better than just holding a stretch. Yoga also strengthens muscles while stretching them.
Can I do this routine if I have a hamstring injury?
Not right away. If you currently have a hamstring strain or tear, you need rest and possibly physical therapy first. Once your doctor or physical therapist clears you to stretch, this routine can help prevent re-injury. Start with the beginner modifications and progress slowly.


