Millions of people deal with lower back pain every single day. The good news is that you don’t need hours at the gym or expensive treatments to find relief. A simple 10-minute yoga routine, designed specifically for beginners, can make a real difference. And we’re not just saying this based on feel-good stories.
Major medical organizations have taken notice. The American College of Physicians now recommends yoga as a first-line treatment for chronic low back pain. Recent research from Cleveland Clinic involving 140 participants over 24 weeks found that virtual yoga programs are a “safe and effective therapeutic option for the treatment of chronic low back pain.” Studies have found that yoga can be just as effective as physical therapy for reducing pain and improving function. One large study of 320 people found that participants who did yoga saw similar improvements to those who went through traditional physical therapy sessions.
A comprehensive systematic review of 967 chronic low back pain patients showed “strong evidence for short-term effects on pain” with specific effect sizes indicating meaningful improvements. The research is clear: 12 weeks of consistent yoga practice can help reduce pain and improve daily function.
This routine is different from what you might expect. It’s gentle, focuses on releasing tension and building foundational strength, and you can do it every single day without worry. No complicated poses, no need for special equipment, and definitely no need to be flexible to start.
How Yoga Heals Your Back: The Science Behind the Relief
Your back pain isn’t just about tight muscles. It’s a complex interaction between your nervous system, inflammation levels, muscle strength, and pain perception. Here’s how yoga addresses each piece:
Nervous System Reset: Yoga activates your parasympathetic nervous system – your body’s “rest and repair” mode. This helps break the cycle of muscle tension and pain that keeps your back locked up.
Inflammation Reduction: Regular yoga practice has been shown to reduce inflammatory markers in the blood. Less inflammation means less pain and faster healing.
Muscle Balance: Most back pain comes from muscle imbalances. Yoga strengthens weak muscles (like your glutes and deep core) while stretching tight ones (like your hip flexors and hamstrings).
Pain Perception: The mind-body connection in yoga actually changes how your brain processes pain signals. Studies using brain imaging show that yoga practitioners have different neural responses to pain compared to non-practitioners.
Research Summary: Why Medical Experts Trust Yoga
| Study | Participants | Duration | Key Finding |
|---|---|---|---|
| Cleveland Clinic 2024 | 140 | 24 weeks | Virtual yoga as effective as in-person sessions |
| Cochrane Review 2022 | 1,000+ | 3-6 months | Yoga better than no exercise for pain relief |
| Systematic Review 2013 | 967 | Various | Strong evidence for short-term pain relief (SMD=-0.48) |
| RCT Comparison Study | 320 | 12 weeks | Yoga equally effective as physical therapy |
Is This Yoga Routine Right for You?
Take this quick assessment to get personalized recommendations for your back pain yoga journey.
Part 1: Your First 2 Minutes – Gentle Awakening
Cat-Cow (Marjaryasana-Bitilasana)
Think of your spine like a rusty door hinge. Before you can move it smoothly, you need to work the joints gently. That’s exactly what Cat-Cow does – it lubricates your spine and gets everything moving.
Why it Works: This gentle movement warms up your spine, increases flexibility between your vertebrae, and relieves tension that builds up from sitting or sleeping in one position. Each movement sends fresh blood and nutrients to your spinal discs.
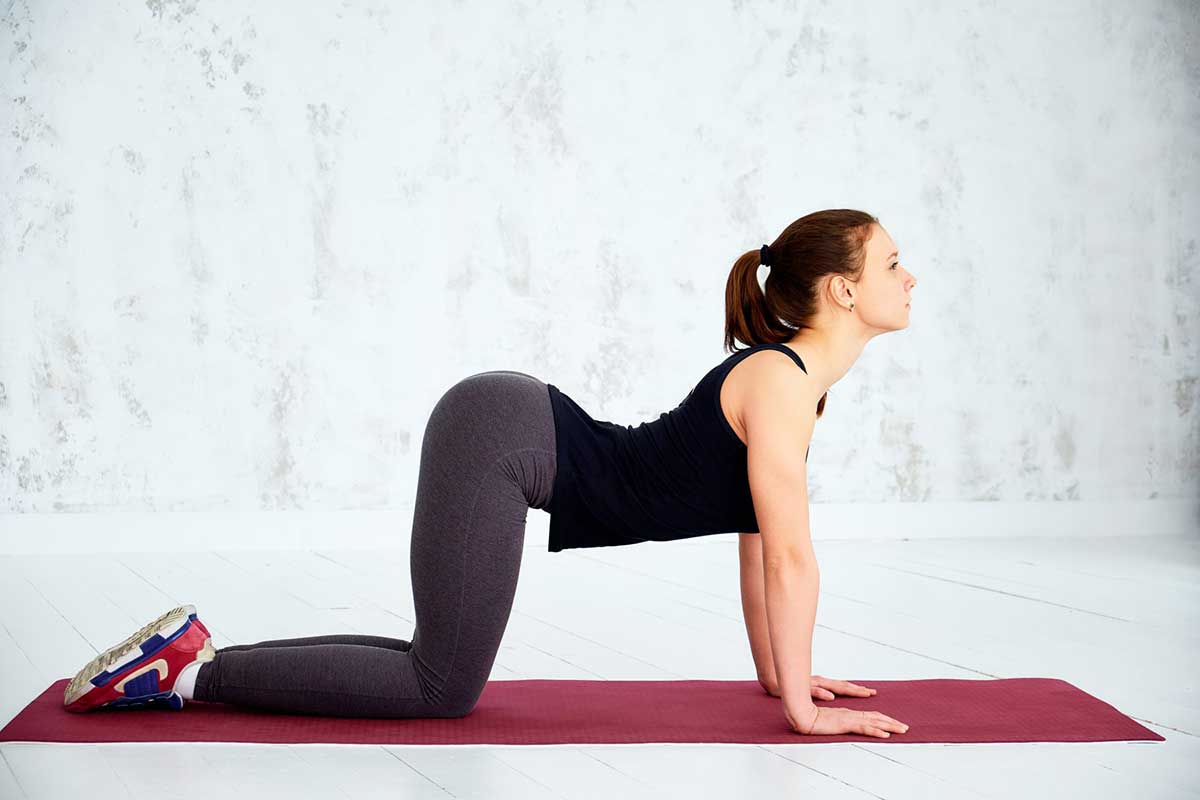
How-To in 3 Simple Steps:
- Start on your hands and knees, with your wrists under your shoulders and knees under your hips
- As you breathe in, drop your belly down and lift your chest and tailbone up (Cow pose)
- As you breathe out, round your spine up toward the ceiling like an angry cat
Beginner Tip: Place a folded blanket under your knees for extra comfort. Move slowly and smoothly – this isn’t about how far you can bend, but about gentle, controlled movement. Do this for 8-10 breaths.
Part 2: The Core 6 Minutes – Release and Lengthen
Child’s Pose (Balasana)
After waking up your spine, it’s time to give it a gentle, restorative stretch. Child’s Pose is like giving your back a warm hug from the inside out.
Why it Works: This pose actively stretches your entire back, hips, and thighs while calming your nervous system. It’s a natural way to decompress your spine after a day of gravity pulling everything downward.
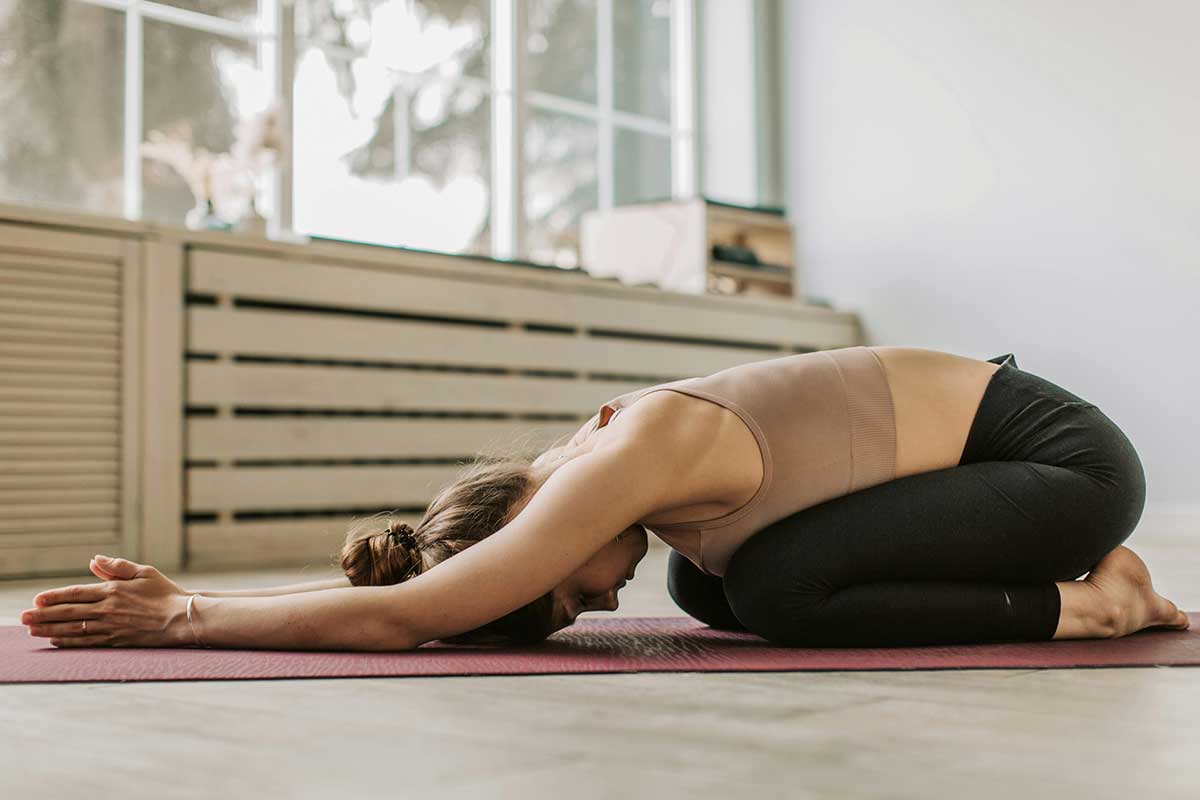
How-To in 3 Simple Steps:
- From your hands and knees, sit back so your hips rest on your heels
- Fold forward, extending your arms in front of you and resting your forehead on the floor
- Breathe deeply and let your back muscles soften and release
Modification for Tight Hips: If sitting back on your heels feels uncomfortable, place a cushion between your thighs and calves. You can also put a folded towel under your forehead for support.
Knees-to-Chest (Apanasana)
Now we’re moving to the floor for some targeted lower back relief. This pose is like getting a gentle massage for your spine.
Why it Works: Pulling your knees toward your chest decompresses your lumbar spine and provides a gentle massage for your lower back muscles. It’s particularly helpful if you spend a lot of time sitting, as it reverses the forward hip position.
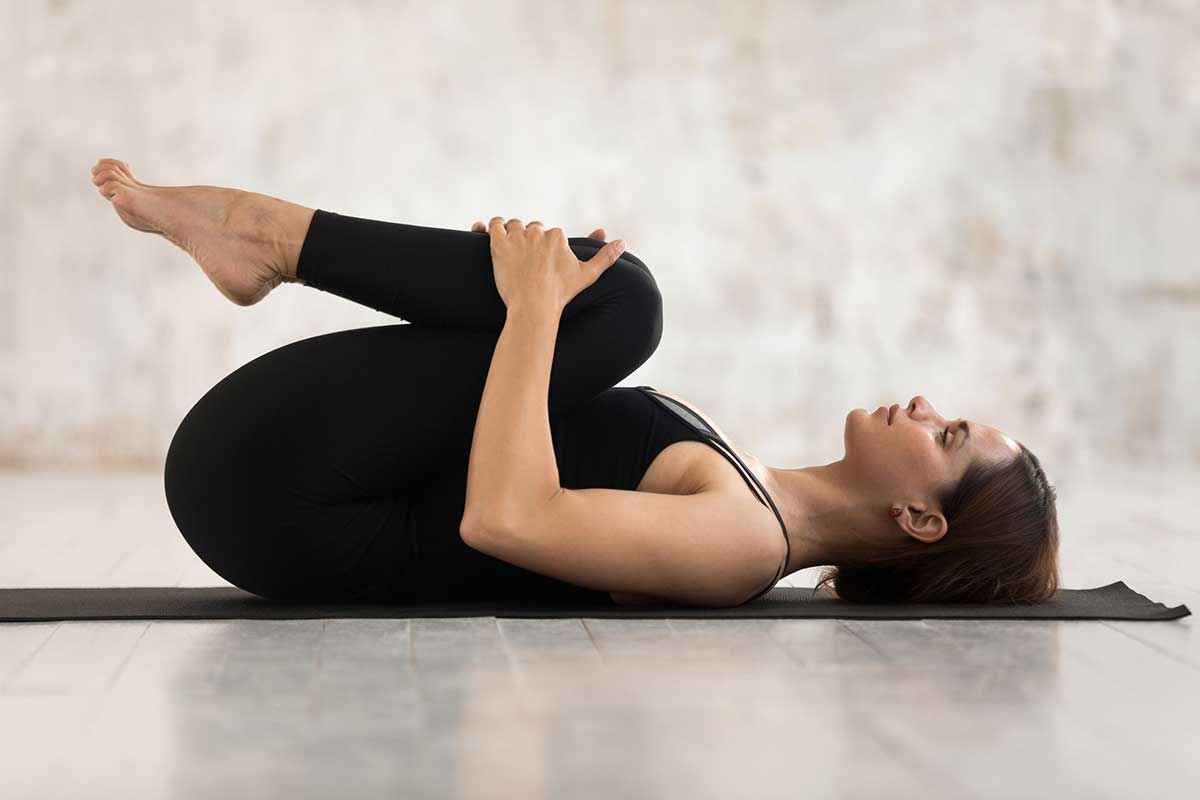
How-To in 3 Simple Steps:
- Lie on your back and draw both knees toward your chest
- Wrap your arms around your legs, hugging them close
- Gently rock side-to-side, massaging your lower back against the floor
Hold this for 30-60 seconds, breathing deeply and letting your back muscles relax.
Supine Spinal Twist (Supta Matsyendrasana)
Your spine is designed to move in multiple directions, but most of us only move forward and backward during our daily activities. This gentle twist helps restore your spine’s natural mobility.
Why it Works: Twisting increases spinal mobility and stretches your back muscles and glutes, which often contribute to lower back tightness. It’s like wringing out a wet towel – you’re helping release stored tension.

How-To in 3 Simple Steps:
- From Knees-to-Chest, extend your arms out to the sides in a T-shape
- Slowly drop both knees to your right side, keeping your left shoulder on the floor
- Turn your head to the left and breathe deeply for 30 seconds, then repeat on the other side
Beginner Tip: Don’t force this twist. Focus on keeping both shoulders pressed into the floor. If your knees don’t reach the ground, that’s perfectly fine – just let gravity do the work.
Bridge Pose (Setu Bandhasana)
Here’s where we start building the strength your back needs for long-term health. Weak glutes are often the hidden culprit behind lower back pain.
Why it Works: Bridge Pose strengthens your glutes and core muscles, which are essential for supporting your lower back and maintaining good posture. When these muscles are strong, they take pressure off your spine.
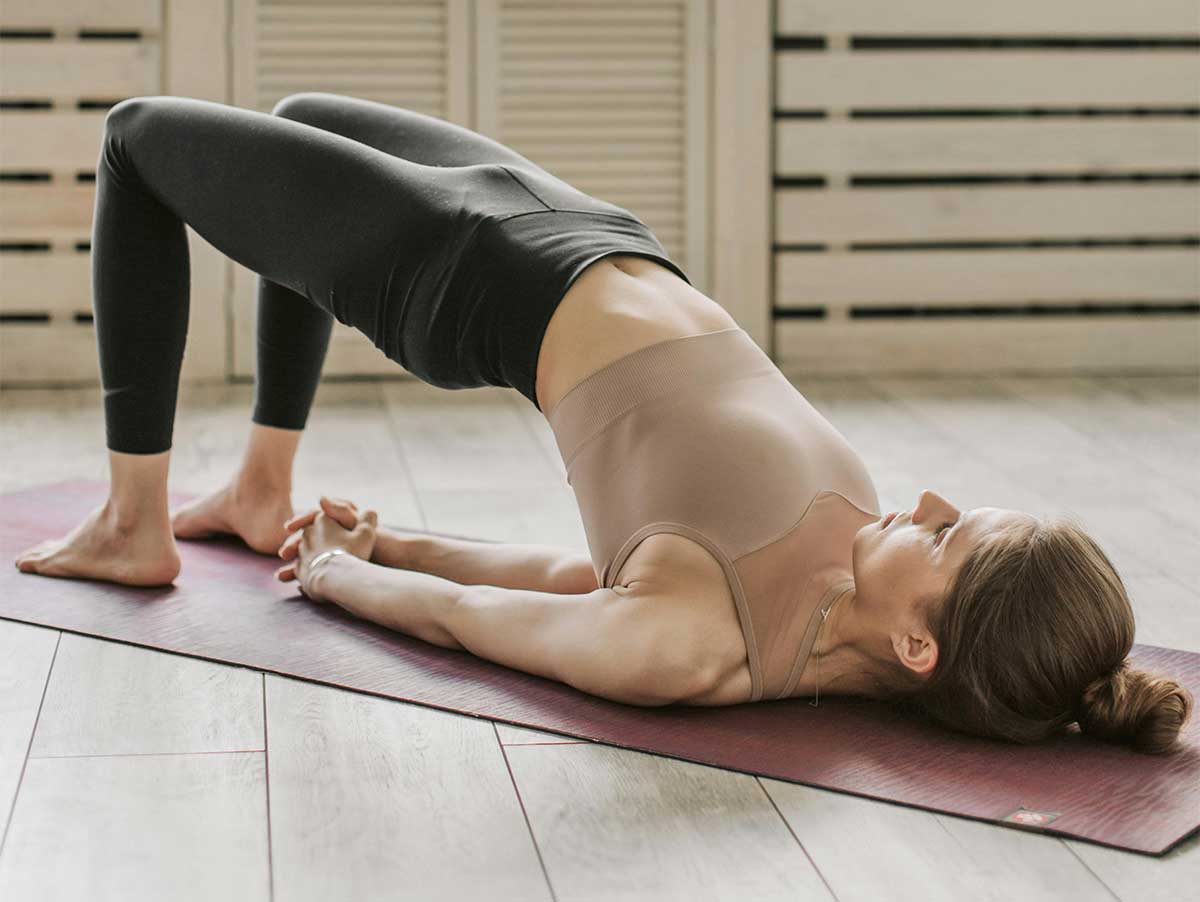
How-To in 3 Simple Steps:
- Lie on your back with your knees bent and feet flat on the floor, hip-width apart
- Press through your heels and lift your hips up, creating a straight line from your knees to your shoulders
- Hold for 15-30 seconds, then slowly lower down
Safety Cue: Keep your head still and avoid turning your neck while in this pose to protect your cervical spine. If you feel any discomfort in your lower back, lower your hips slightly.
Part 3: Your Final 2 Minutes – Strengthen and Settle
Sphinx Pose (Salamba Bhujangasana)
Most of us spend our days hunched forward, which weakens the muscles along our spine. Sphinx Pose gently strengthens these muscles without straining your lower back.
Why it Works: This gentle backbend strengthens your spinal muscles and opens your chest, counteracting the effects of poor posture. Unlike more intense backbends, Sphinx Pose won’t put pressure on your lower back when done correctly.
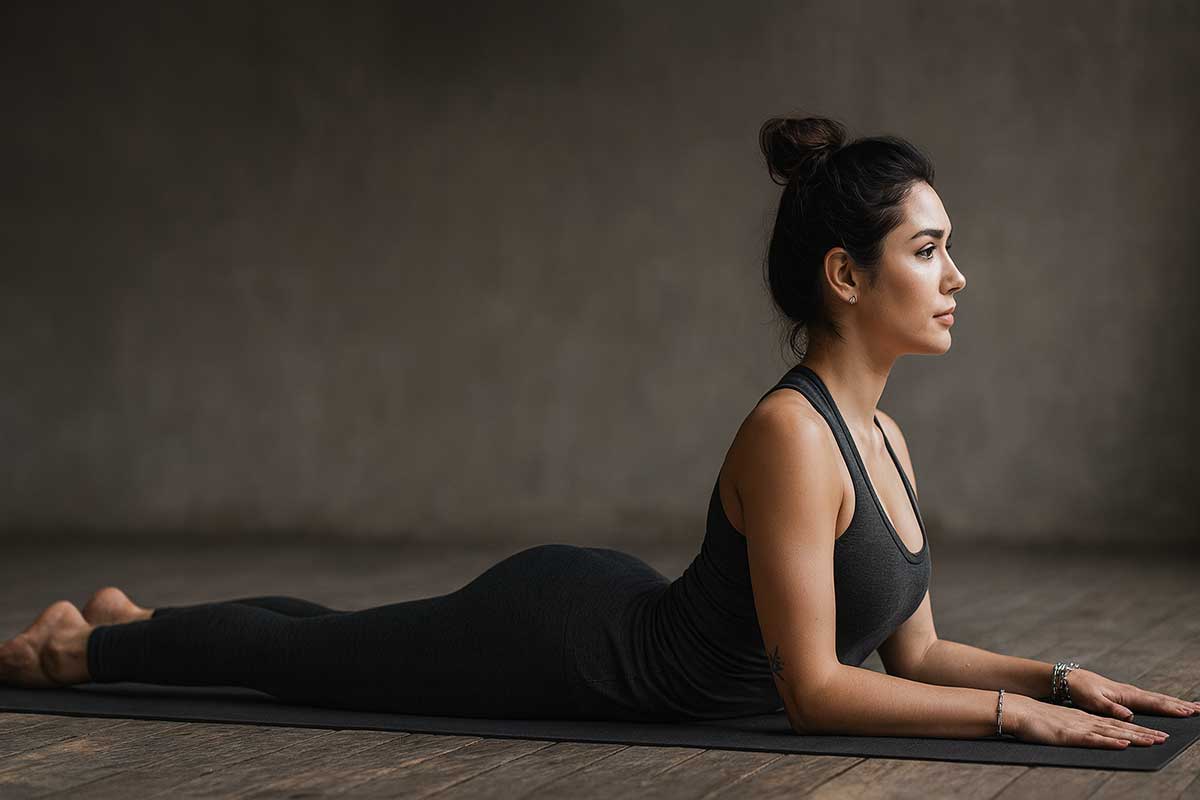
How-To in 3 Simple Steps:
- Lie on your stomach with your forearms flat on the floor, elbows under your shoulders
- Press your forearms down and lift your chest, keeping your lower ribs on the floor
- Lengthen your tailbone toward your heels to protect your lower back
Key Action: Focus on lifting from your upper back, not pushing your hips into the floor. Hold for 30-60 seconds, breathing steadily.
Corpse Pose (Savasana)
Don’t skip this final pose – it’s where the magic happens. Your body needs time to integrate all the good work you just did.
Why it Works: Savasana allows your body to absorb the benefits of your practice while teaching your nervous system to relax. This helps release any residual muscle tension and promotes healing.
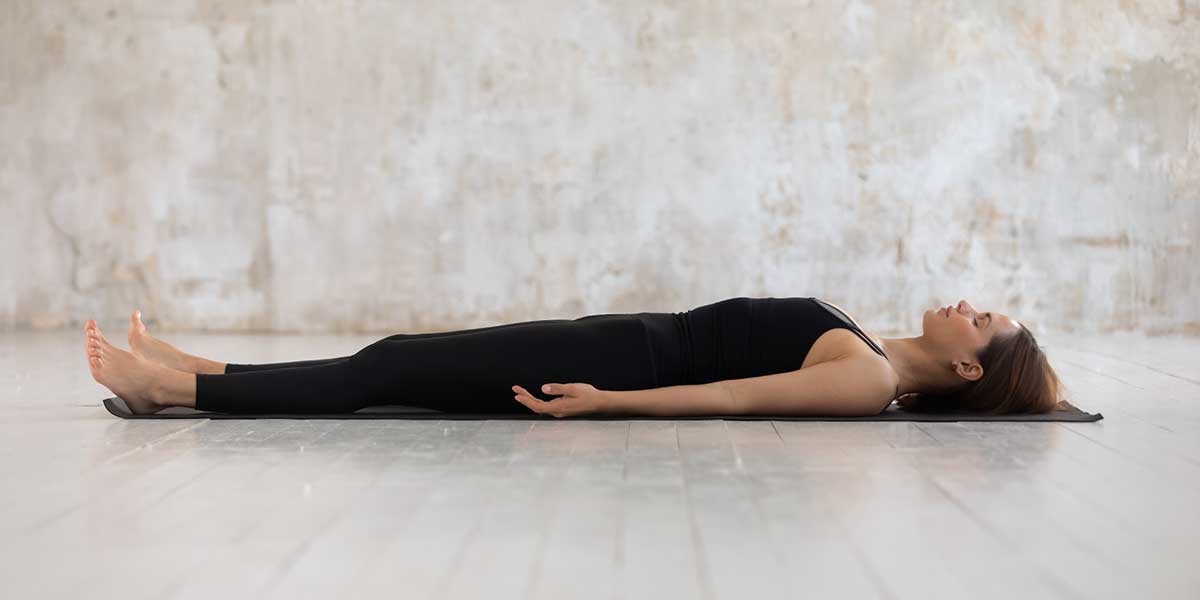
How-To in 3 Simple Steps:
- Lie flat on your back with your legs extended and arms by your sides, palms facing up
- Let your feet fall open naturally and close your eyes
- Focus on your breath and let your entire body sink into the floor
Pro Tip: Place a rolled-up blanket or pillow under your knees to provide extra support and release for your lower back. Rest here for 2-3 minutes.
Pose Timing & Breathing Reference
| Pose | Hold Time | Breath Count | Repetitions |
|---|---|---|---|
| Cat-Cow | 8-10 breaths | 1 breath per movement | N/A |
| Child’s Pose | 1-2 minutes | Natural breathing | 1 |
| Knees-to-Chest | 30-60 seconds | Natural breathing | 1 |
| Spinal Twist | 30 seconds each side | Natural breathing | 1 each side |
| Bridge | 15-30 seconds | 3-5 breaths | 2-3 times |
| Sphinx | 30-60 seconds | Natural breathing | 1 |
| Savasana | 2-3 minutes | Natural breathing | 1 |
10-Minute Back Pain Relief Yoga Timer
Pose Modifications by Physical Limitation
| If you have… | Try this instead… |
|---|---|
| Knee pain | Use thick cushions under knees in all floor poses |
| Tight hips | Sit on a block or cushion in Child’s Pose |
| Neck issues | Keep head neutral in Bridge; use towel support |
| Wrist pain | Do Cat-Cow on forearms instead of hands |
| Very tight hamstrings | Keep knees slightly bent in forward folds |
No Equipment? No Problem!
| Recommended | Alternative |
|---|---|
| Yoga mat | Carpet, thick towel, or blanket |
| Yoga block | Stack of thick books |
| Bolster | Couch cushions or firm pillows |
| Strap | Belt, towel, or scarf |
When NOT to Do Yoga: Important Safety Guidelines
While yoga is generally safe for most people with back pain, there are times when you should avoid this routine:
Seek Medical Clearance First:
- Recent back surgery (within 6 months)
- Active herniated disc with severe symptoms
- Spinal fracture or injury
- Severe osteoporosis
Stop and Consult a Doctor if You Experience:
- Shooting pain down your leg
- Numbness or tingling in legs or feet
- Loss of bladder or bowel control
- Pain that gets significantly worse after yoga
Modify or Skip if You Have:
- Active inflammation or swelling
- Fever or infection
- Severe muscle spasms
- Recent injury flare-up
Troubleshooting Common Concerns
“What if I feel worse after yoga?” Some mild soreness is normal when starting any new movement practice. If pain increases significantly or you feel worse the next day, you may have pushed too hard. Scale back the intensity and hold poses for shorter periods.
“How long before I see results?” Most people notice some improvement in stiffness within the first week. Significant pain reduction typically occurs after 2-4 weeks of consistent practice. Remember, research shows the most benefits come after 12 weeks of regular practice.
“Can I do this with other treatments?” Yes! Yoga works well alongside physical therapy, chiropractic care, and medical treatment. Always inform your healthcare providers that you’re doing yoga so they can coordinate your care.
“Is it normal to feel emotional during yoga?” Absolutely. The body stores emotional tension, especially in the hips and back. It’s common to feel emotional release during or after practice. This is a sign that your nervous system is processing and releasing stored stress.
Beyond the Basics: Weeks 2-4 Progressive Routine
Week 2 Additions:
- Hold poses 15-30 seconds longer
- Add a second round of Bridge Pose
- Include gentle neck rolls in Cat-Cow
Week 3 Enhancements:
- Try lifting one leg at a time in Bridge Pose
- Add arm circles in Child’s Pose
- Extend Sphinx Pose hold time to 1 minute
Week 4 Progressions:
- Add Downward Dog transition from Child’s Pose
- Try single-knee-to-chest variations
- Include gentle side bends
Integration with Daily Life
2-Minute Desk Versions:
- Seated spinal twist in your chair
- Shoulder blade squeezes
- Seated Cat-Cow (flex and extend spine)
Travel-Friendly Modifications:
- All poses can be done in a hotel room
- Use luggage as props when needed
- Focus on breath work during long flights
Partner/Family Variations:
- Take turns guiding each other through poses
- Practice breathing together in Child’s Pose
- Share progress tracking and celebrate improvements
Signs You’re Ready for More Advanced Practice
After 4-6 weeks of consistent practice, look for these indicators:
- You can hold all poses comfortably for the recommended time
- Your pain levels have decreased by at least 30%
- You feel energized rather than tired after practice
- Basic poses feel easy and natural
- You’re sleeping better and moving more freely during the day
Making This a Daily Habit
In just 10 minutes, you’ve warmed up your spine, released built-up tension, and started building the supportive strength your back needs. That’s a pretty good return on investment for less time than it takes to scroll through social media.
The key to seeing real results is consistency. Try to do this routine at the same time each day – maybe first thing in the morning to start your day pain-free, or in the evening to unwind from daily stress. Your back will thank you.
Start with a one-week commitment. Notice how you feel after just seven days of this gentle practice. Many people report sleeping better, moving more easily, and feeling less stiff throughout the day.
Cleveland Clinic research confirms that consistency matters more than intensity. Their study showed that participants who practiced regularly, even with virtual instruction, achieved the same benefits as those attending in-person classes. This gentle daily practice is a powerful tool for long-term back health.
The Evidence: Why Medical Experts Trust Yoga
Level 1 Evidence (Strongest): Systematic reviews and meta-analyses consistently show yoga’s effectiveness for chronic low back pain, with effect sizes indicating clinically meaningful improvements.
Level 2 Evidence (Strong): Multiple randomized controlled trials, including the landmark 320-participant study, demonstrate yoga’s equality to physical therapy for pain reduction and functional improvement.
Level 3 Evidence (Good): Clinical practice guidelines from the American College of Physicians and other major medical organizations now include yoga as a recommended first-line treatment.
As one Cleveland Clinic researcher noted, “Yoga offers a comprehensive approach to managing low back pain, a condition for which traditional treatments often fall short.” The research is clear: this isn’t just alternative medicine anymore – it’s evidence-based healthcare.
Your journey to a pain-free back starts with just 10 minutes a day. The science backs it up, your body will thank you for it, and you have nothing to lose except the pain that’s been holding you back.
FAQs
How often should I do yoga for back pain?
Daily practice is ideal for back pain relief. Even 5-10 minutes daily is more beneficial than longer sessions done sporadically. This routine is designed to be safe for everyday use.
What’s the best time of day for back pain yoga?
Morning practice helps reduce stiffness from sleeping. Evening practice helps release tension from the day. Choose whatever time you can be most consistent with.
Can yoga replace physical therapy?
Research shows yoga can be as effective as physical therapy for many people with chronic low back pain. But if you have acute injury or complex issues, work with a healthcare provider to determine the best approach.
Is yoga safe during back pain flares?
Gentle yoga can actually help during mild flares by promoting blood flow and reducing muscle tension. Skip the routine if you’re experiencing severe pain, and focus on gentle breathing and relaxation instead.
Do I need to be flexible to start?
Not at all! Flexibility is a result of yoga, not a requirement. This routine is designed for complete beginners and people with limited mobility.


