Research shows that 80% of adults experience flexibility issues, with the average person losing 1% of their flexibility each year after age 30.
Many people struggle with tight muscles and limited range of motion, especially if they spend long hours sitting at desks or living sedentary lifestyles. The human body is designed to move, but modern life often keeps us stuck in the same positions for hours.
The good news is that yoga offers a powerful solution. It’s not just about twisting yourself into pretzel shapes or chanting in a dimly lit room. Yoga is a practical, accessible tool that can help anyone improve their flexibility, regardless of where they’re starting from.
This article doesn’t just give you a random list of poses. You’ll get 12 essential yoga poses plus a complete 15-minute routine that you can follow daily. We’ll also cover common mistakes, progress tracking, and how to adapt the practice for different fitness levels. Think of it as your roadmap to a more flexible, mobile you.
Why flexibility matters
Flexibility isn’t just about touching your toes or impressing friends with your splits. It’s about giving your body the freedom to move through life with ease and confidence.
Enhanced range of motion in daily life
Better flexibility means simple tasks become easier. Reaching for items on high shelves, bending down to tie your shoes, or looking over your shoulder while driving all require good mobility. When your muscles are tight, these everyday movements can become uncomfortable or even painful.
Reduced risk of injury in physical activities
Tight muscles are like overstretched rubber bands – they’re more likely to snap under pressure. Flexible muscles can handle sudden movements and unexpected stresses much better. This means fewer pulled muscles during weekend soccer games or gardening sessions.
Improved posture and alleviation of back pain
Hours of hunching over computers creates tight chest muscles and weak back muscles. This imbalance pulls your shoulders forward and rounds your spine. Regular stretching can help reverse this pattern, leading to better posture and less back pain.
Increased blood flow and reduced muscle soreness
Stretching improves circulation, which helps deliver oxygen and nutrients to your muscles. This enhanced blood flow can reduce muscle soreness after workouts and help you recover faster from physical activity.
The science behind flexibility
Your flexibility depends on several factors: muscle length, joint mobility, and nervous system response. When you stretch regularly, you’re actually training your nervous system to allow greater range of motion. This process, called neuroplasticity, means your flexibility can improve at any age.
How long does it take to see results?
Most people notice improvements in their flexibility within 2-4 weeks of consistent practice. However, individual results vary based on starting flexibility, age, and consistency of practice.
| Timeframe | Expected Changes |
|---|---|
| Week 1-2 | Reduced muscle tension, better sleep |
| Week 3-4 | Noticeable range of motion improvements |
| Week 5-8 | Significant flexibility gains, easier daily movements |
| Week 9-12 | Established habit, continued progress |
Common flexibility myths debunked
Myth: “I’m too old to become flexible” Truth: Flexibility can improve at any age with consistent practice.
Myth: “Stretching should hurt to be effective” Truth: Effective stretching feels like mild tension, never sharp pain.
Myth: “You need to stretch for hours to see results” Truth: Short, daily sessions are more effective than long, infrequent ones.
The 12 best yoga poses for ultimate flexibility
Each pose targets different muscle groups and offers unique benefits. Don’t worry if you can’t do them perfectly right away – flexibility is a journey, not a destination.
Quick reference guide
| Pose | Primary Muscles Targeted | Difficulty Level | Hold Time |
|---|---|---|---|
| Cat-Cow | Spine, core | Beginner | 5-8 breaths |
| Downward Dog | Hamstrings, calves, shoulders | Beginner | 5-8 breaths |
| Low Lunge | Hip flexors, quads | Beginner | 30-60 seconds |
| Standing Forward Bend | Hamstrings, lower back | Beginner | 30-60 seconds |
| Triangle Pose | Side body, hips, hamstrings | Intermediate | 30-60 seconds |
| Seated Forward Bend | Back body, hamstrings | Intermediate | 1-2 minutes |
| Bound Angle | Inner thighs, groin | Beginner | 1-2 minutes |
| Cow Face | Hips, shoulders | Intermediate | 30-60 seconds |
| Pigeon Pose | Hip flexors, glutes | Advanced | 1-2 minutes |
| Spinal Twist | Spine, obliques | Beginner | 1-2 minutes |
| Happy Baby | Hips, inner groins | Beginner | 1-2 minutes |
| Child’s Pose | Hips, back | Beginner | 1-3 minutes |
1. Cat-Cow stretch (Marjaryasana/Bitilasana)
This gentle flow warms up your spine and gets your body ready for deeper stretches.
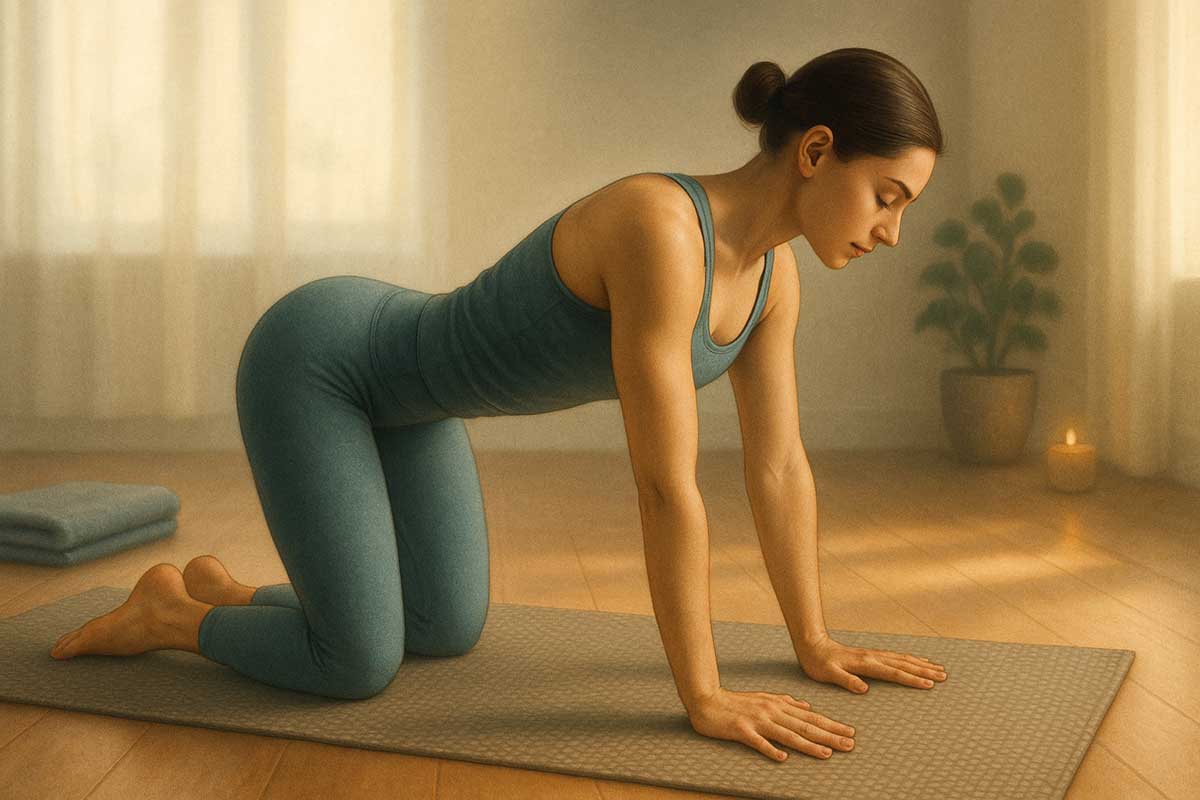
How to do it:
- Start on hands and knees with wrists under shoulders and knees under hips
- Inhale, arch your back and look up (Cow pose)
- Exhale, round your spine and tuck your chin to chest (Cat pose)
- Continue flowing between these positions for 5-8 breaths
Benefits:
Improves spinal flexibility and mobility while gently warming up the back muscles.
Beginner tip:
Move slowly and focus on the sensation in your spine rather than how far you can arch or round.
2. Downward-facing dog (Adho Mukha Svanasana)
This classic pose stretches multiple muscle groups at once, making it incredibly efficient for building flexibility.
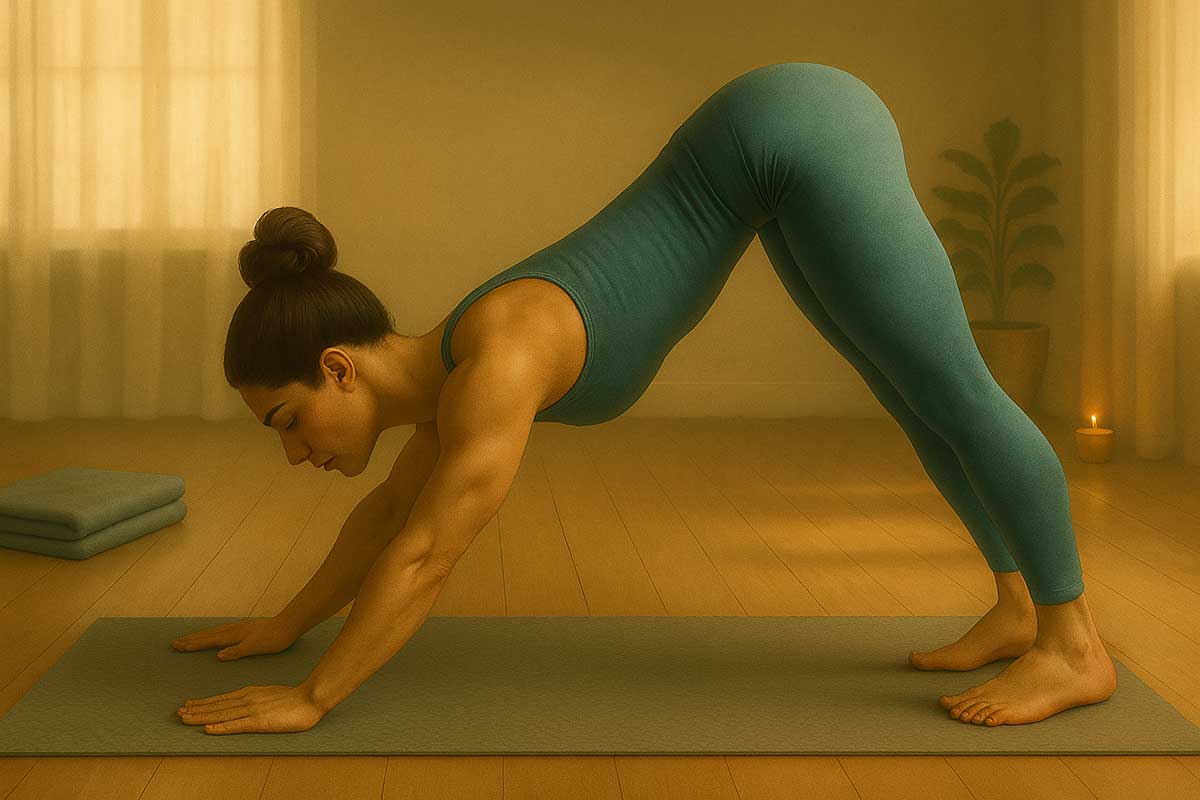
How to do it:
- Start on hands and knees
- Tuck toes under and lift hips up and back
- Straighten legs as much as possible
- Press hands firmly into the ground
- Hold for 5-8 breaths
Benefits:
Stretches hamstrings, calves, shoulders, and the entire back of the body.
Beginner tip:
Keep knees slightly bent if your hamstrings are tight. Focus on creating a straight line from hands to hips.
3. Low lunge (Anjaneyasana)
This pose targets the hip flexors, which are notoriously tight in people who sit a lot.
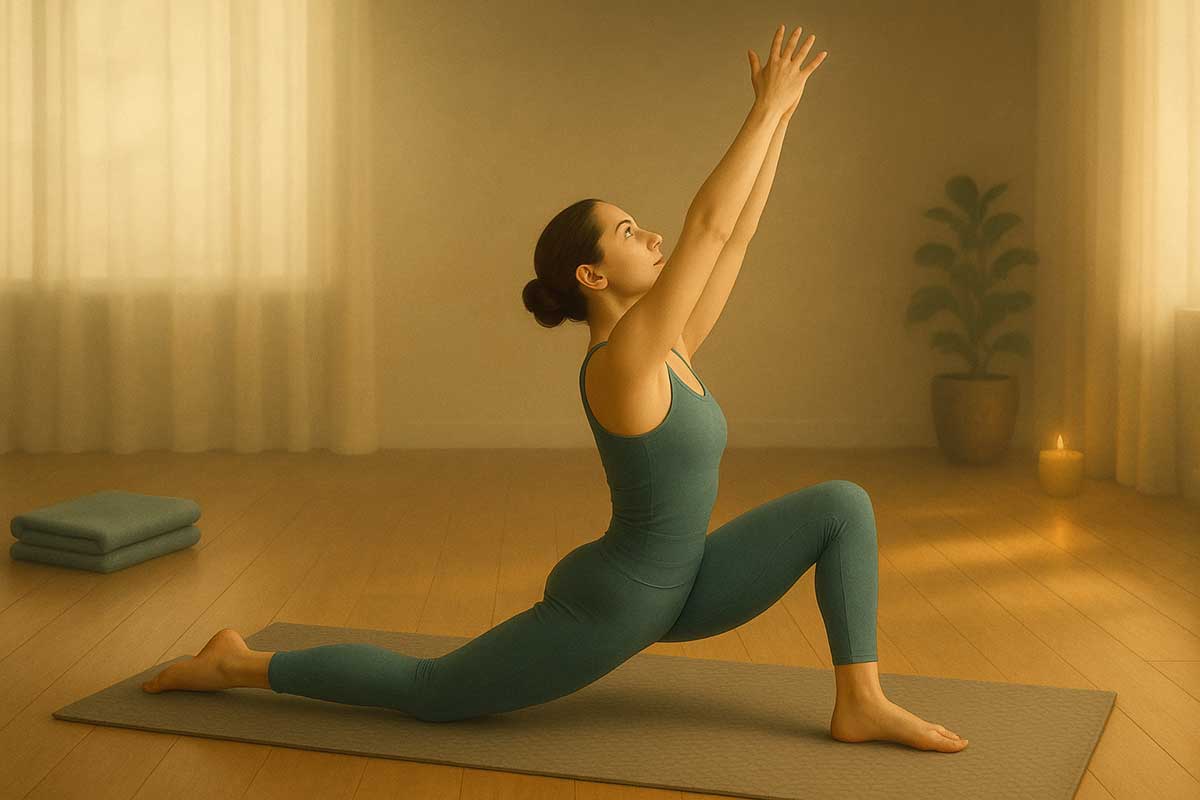
How to do it:
- Step right foot forward into a lunge position
- Lower left knee to the ground
- Place hands on right thigh or reach arms overhead
- Hold for 30-60 seconds, then switch sides
Benefits:
Opens hip flexors and stretches the front of the legs while also engaging the core.
Beginner tip:
Place a blanket under your back knee for cushioning. Don’t force the stretch – let gravity do the work.
Common mistake:
Pushing the front knee past the ankle. Keep your front shin vertical to protect your knee joint.
4. Standing forward bend (Uttanasana)
This pose gives your hamstrings and lower back a deep, satisfying stretch.
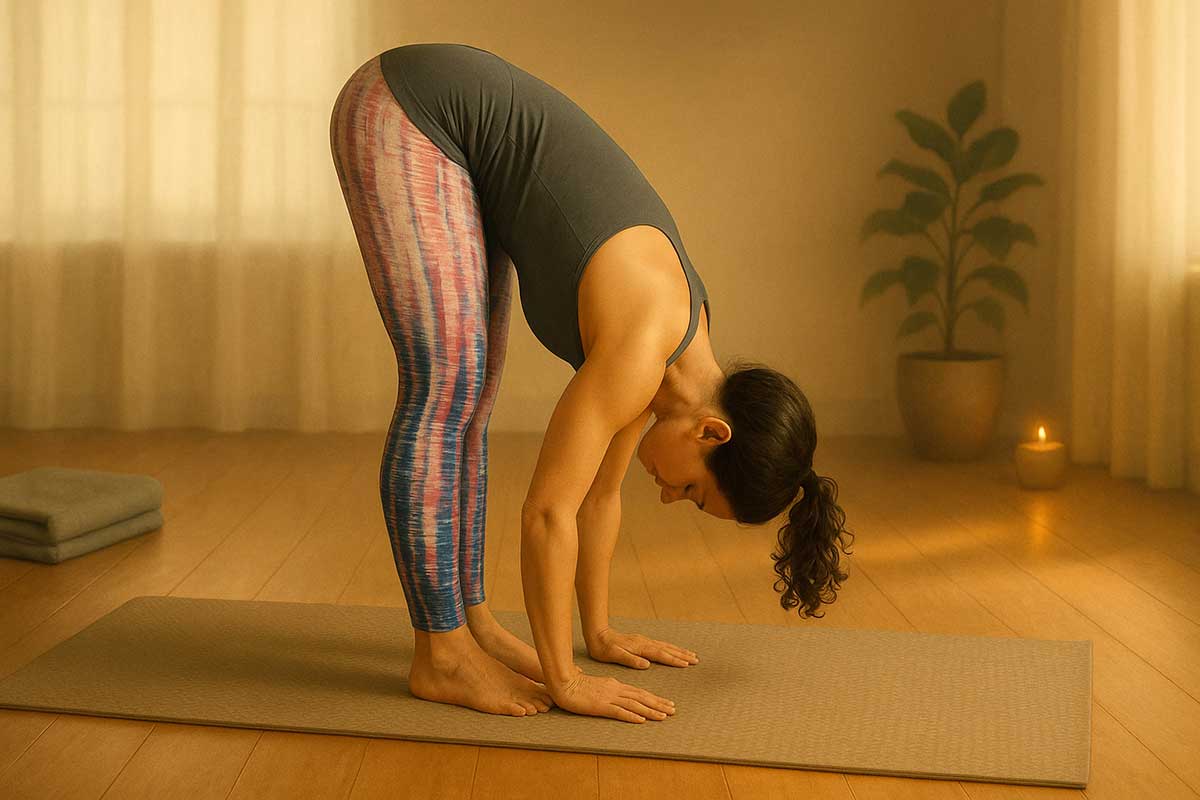
How to do it:
- Stand with feet hip-width apart
- Hinge at hips and fold forward
- Let arms hang or grab opposite elbows
- Hold for 30-60 seconds
Benefits:
Stretches hamstrings, calves, and lower back while also calming the nervous system.
Beginner tip:
Bend knees slightly if you feel strain in your back. The goal is to feel the stretch in your hamstrings, not stress in your spine.
5. Triangle pose (Trikonasana)
This pose creates length through the entire side body while strengthening the legs.
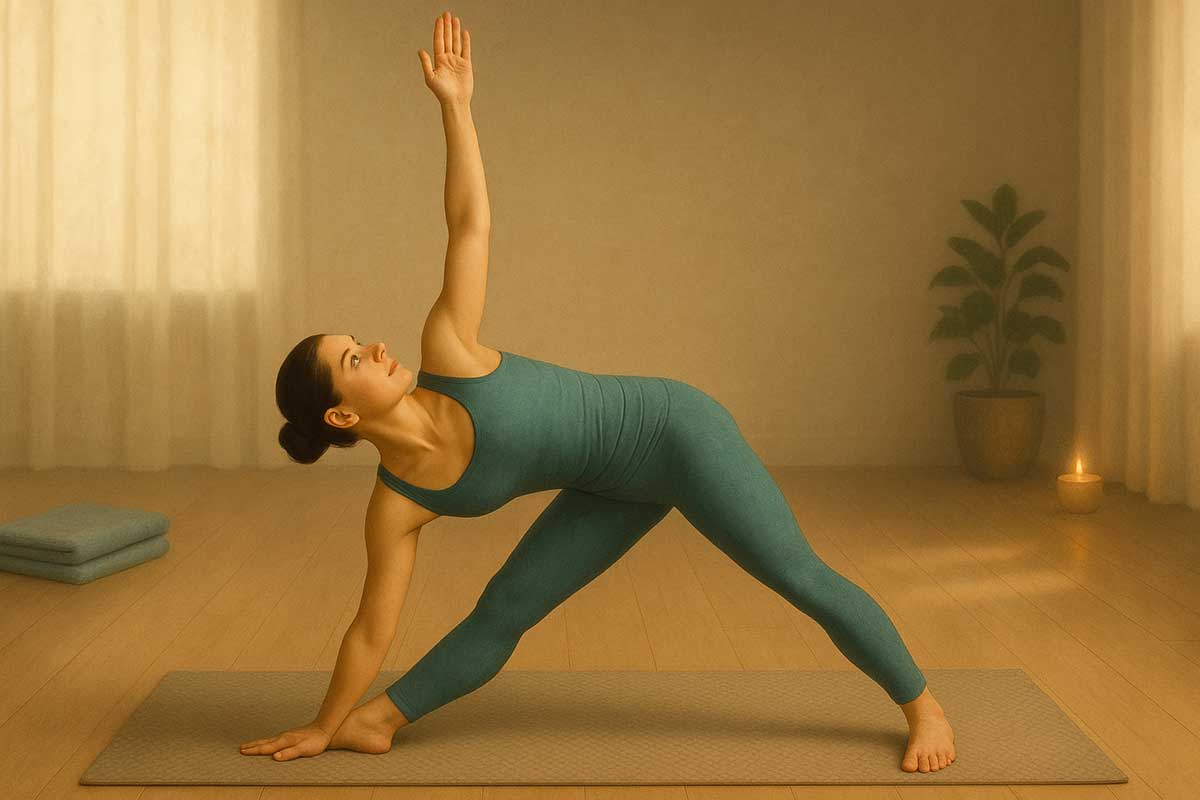
How to do it:
- Stand with feet about 3-4 feet apart
- Turn right foot out 90 degrees
- Reach right hand toward ground and place on shin, ankle, or a block
- Extend left arm toward ceiling
- Hold for 30-60 seconds, then switch sides
Benefits:
Stretches the hips, groin, hamstrings, and side body while improving balance and stability.
Beginner tip:
Use a yoga block under your hand for support. Don’t worry about touching the ground – focus on creating length through your spine.
6. Seated forward bend (Paschimottanasana)
This pose provides an intense stretch for the entire back of your body.
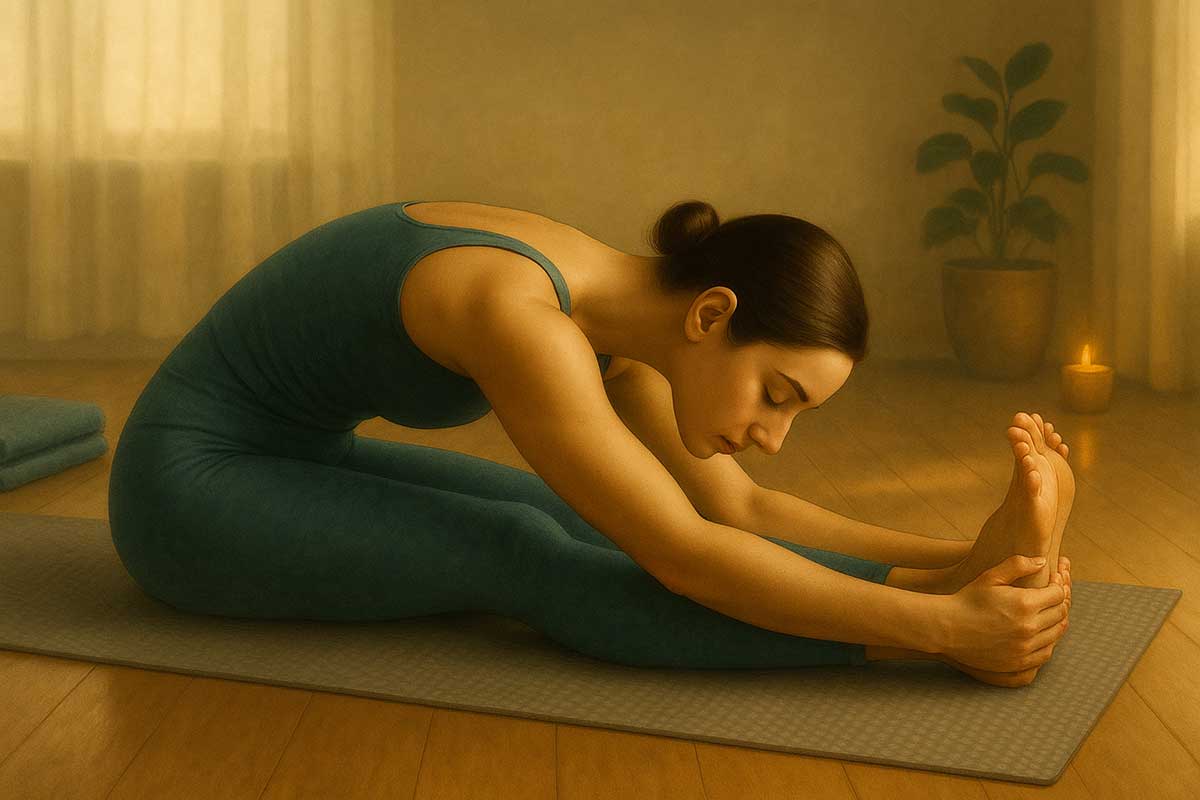
How to do it:
- Sit with legs extended straight in front of you
- Inhale and lengthen spine
- Exhale and fold forward over legs
- Reach for feet, shins, or wherever you can comfortably reach
- Hold for 1-2 minutes
Benefits:
Stretches hamstrings, calves, spine, and shoulders while also promoting introspection and calm.
Beginner tip:
Sit on a blanket or pillow to elevate your hips. This makes the forward fold much easier and more comfortable.
7. Bound angle pose (Baddha Konasana)
This hip opener is perfect for people who sit a lot and have tight inner thighs.
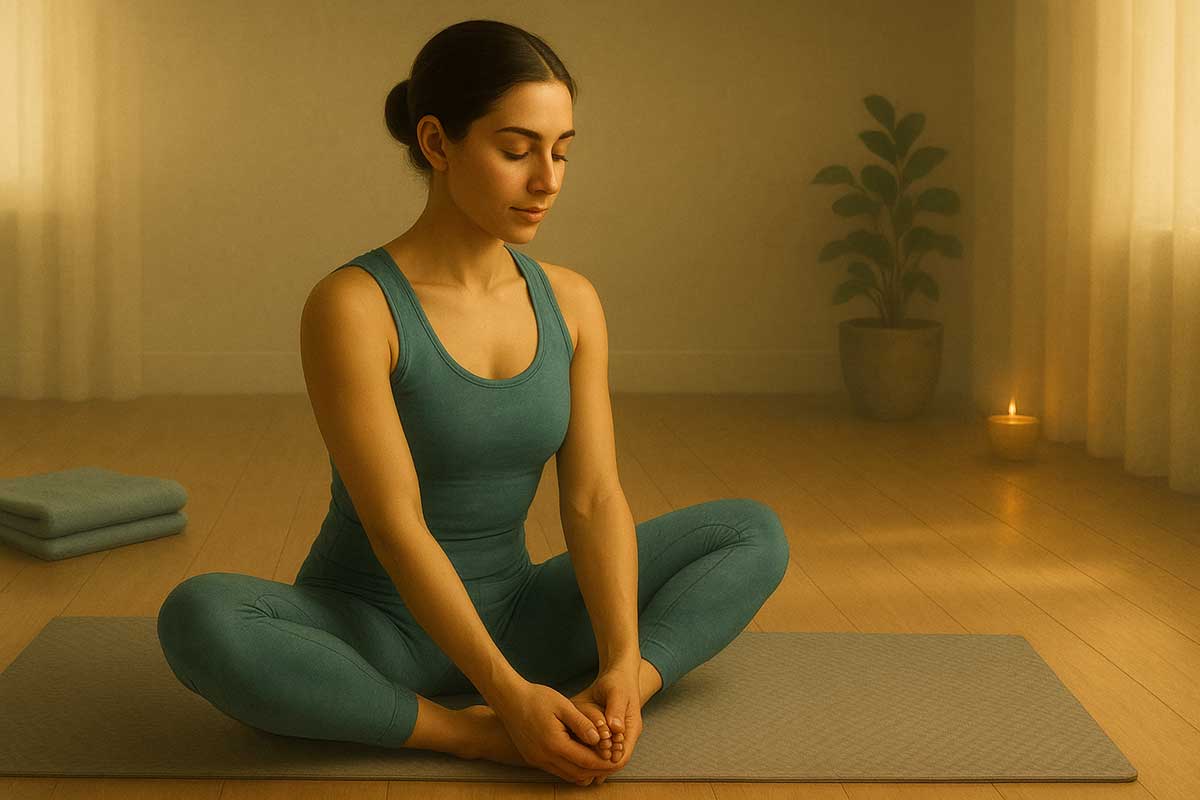
How to do it:
- Sit with soles of feet together
- Hold feet with hands
- Gently draw heels toward pelvis
- Fold forward slightly if comfortable
- Hold for 1-2 minutes
Benefits:
Opens inner thighs, groin, and knees while improving hip flexibility.
Beginner tip:
Sit on a blanket or cushion and place blocks or pillows under your knees for support.
8. Cow face pose (Gomukhasana)
This pose tackles multiple tight areas at once, making it incredibly effective for overall flexibility.
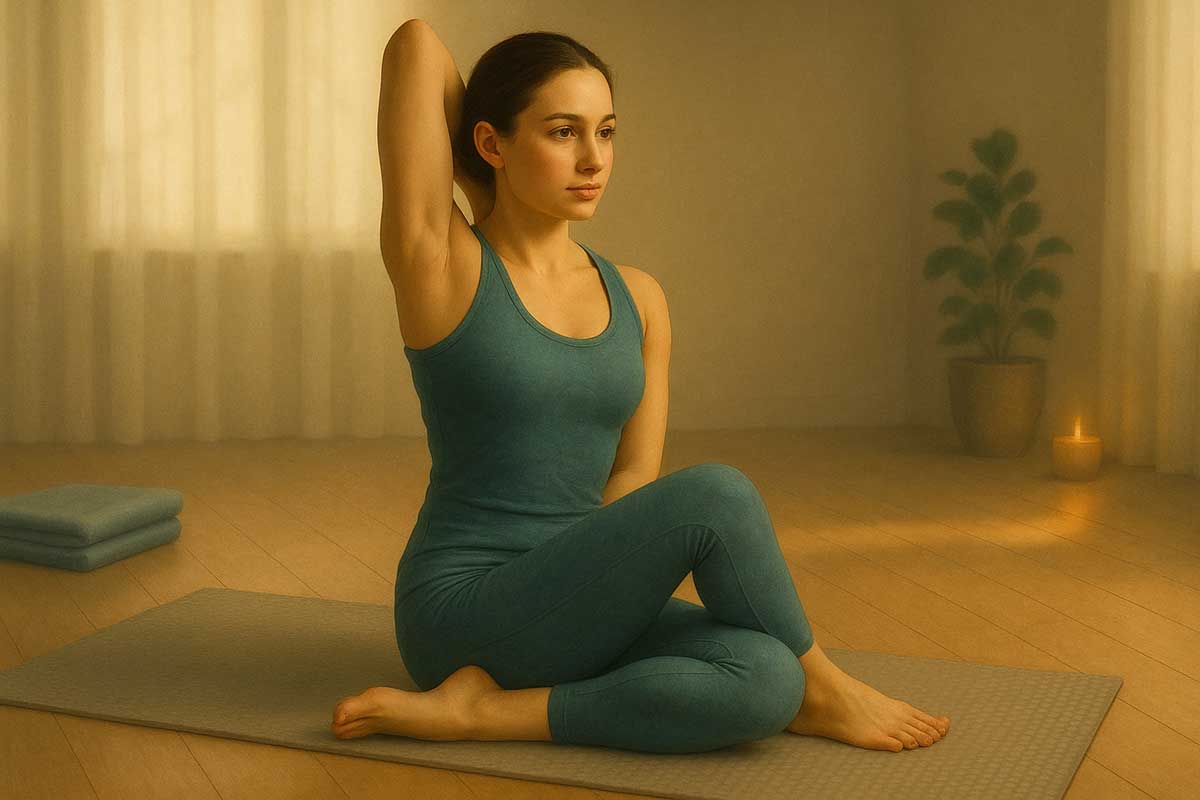
How to do it:
- Sit with right leg crossed over left
- Try to stack knees on top of each other
- Reach right arm overhead, bend elbow, and let hand fall behind back
- Reach left arm behind back from below and try to clasp hands
- Hold for 30-60 seconds, then switch sides
Benefits:
Stretches hips, ankles, shoulders, and chest while improving posture.
Beginner tip:
Use a strap between your hands if you can’t clasp them together. Sit on a blanket if the hip position is uncomfortable.
9. Pigeon pose (Eka Pada Rajakapotasana)
This deep hip opener is one of the most effective poses for releasing tight hips.
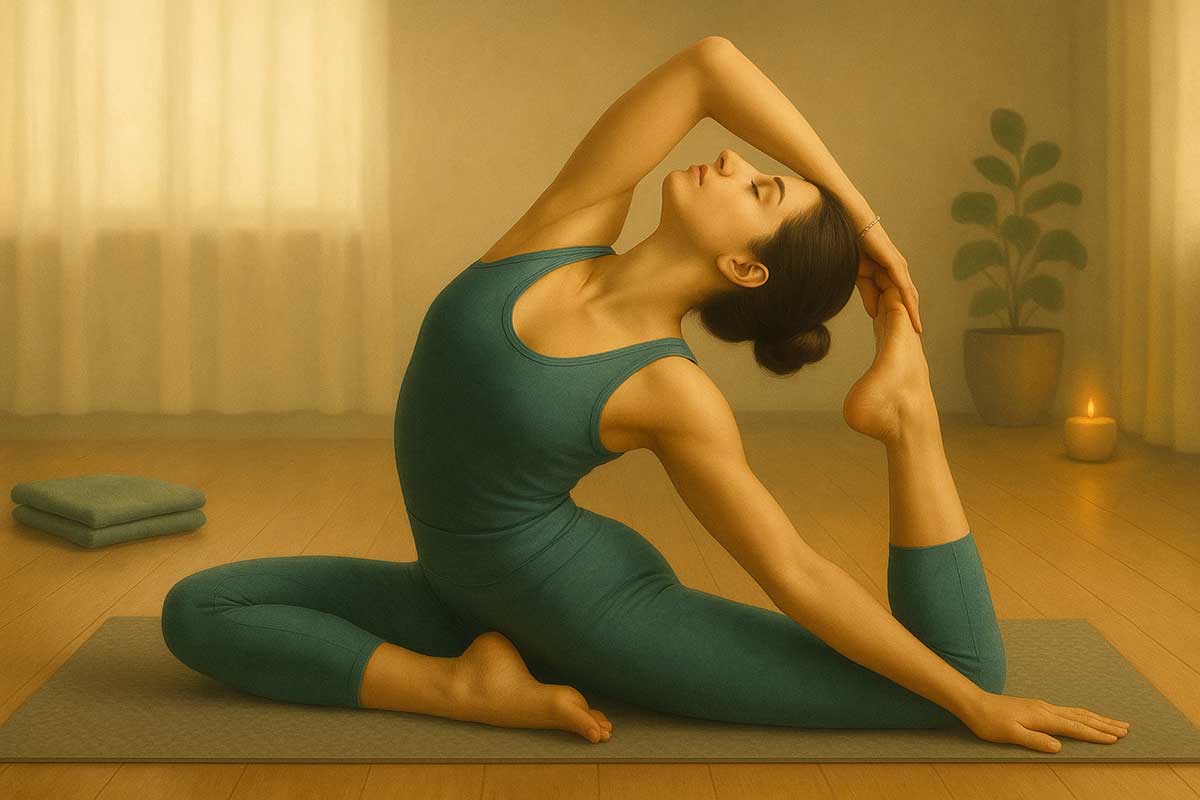
How to do it:
- From hands and knees, bring right knee toward right wrist
- Extend left leg straight back
- Lower down onto forearms or rest head on hands
- Hold for 1-2 minutes, then switch sides
Benefits:
Deeply stretches hip flexors, rotators, and glutes while also opening the chest and shoulders.
Beginner tip:
Place a blanket or pillow under your front hip for support. This pose can be intense, so back off if you feel any sharp pain.
10. Supine spinal twist (Supta Matsyendrasana)
This gentle twist helps release tension in the spine and promotes relaxation.
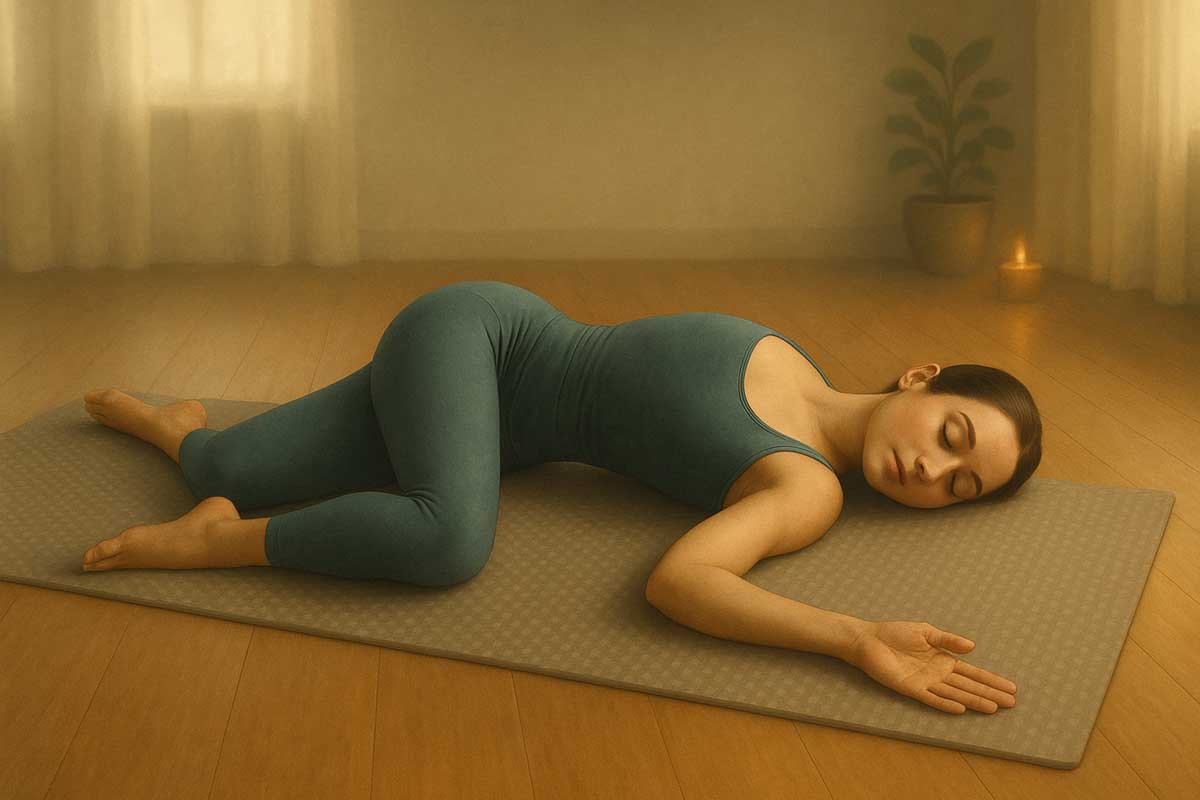
How to do it:
- Lie on your back with arms in a T-shape
- Draw right knee to chest, then cross it over to the left side
- Keep shoulders grounded and look to the right
- Hold for 1-2 minutes, then switch sides
Benefits:
Improves spinal mobility, aids digestion, and helps release lower back tension.
Beginner tip:
Place a pillow between your legs for extra support and comfort.
11. Happy baby pose (Ananda Balasana)
This playful pose helps open the hips while also providing a gentle back massage.
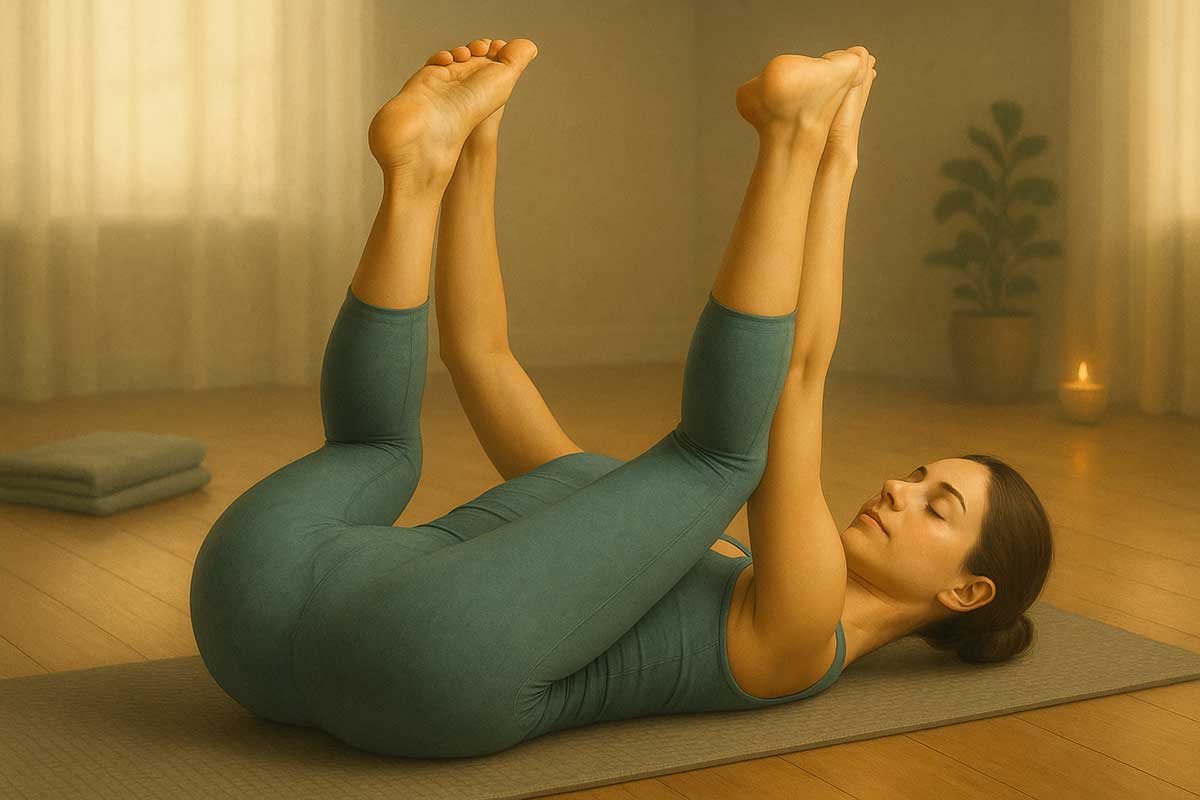
How to do it:
- Lie on your back
- Draw knees toward chest
- Grab outsides of feet with hands
- Gently pull knees toward armpits
- Rock side to side if it feels good
- Hold for 1-2 minutes
Benefits:
Opens hips and inner groins while gently massaging the spine.
Beginner tip:
If you can’t reach your feet, grab behind your thighs or use a strap around your feet.
12. Child’s pose (Balasana)
This restorative pose helps you relax and gently stretch the hips and back.
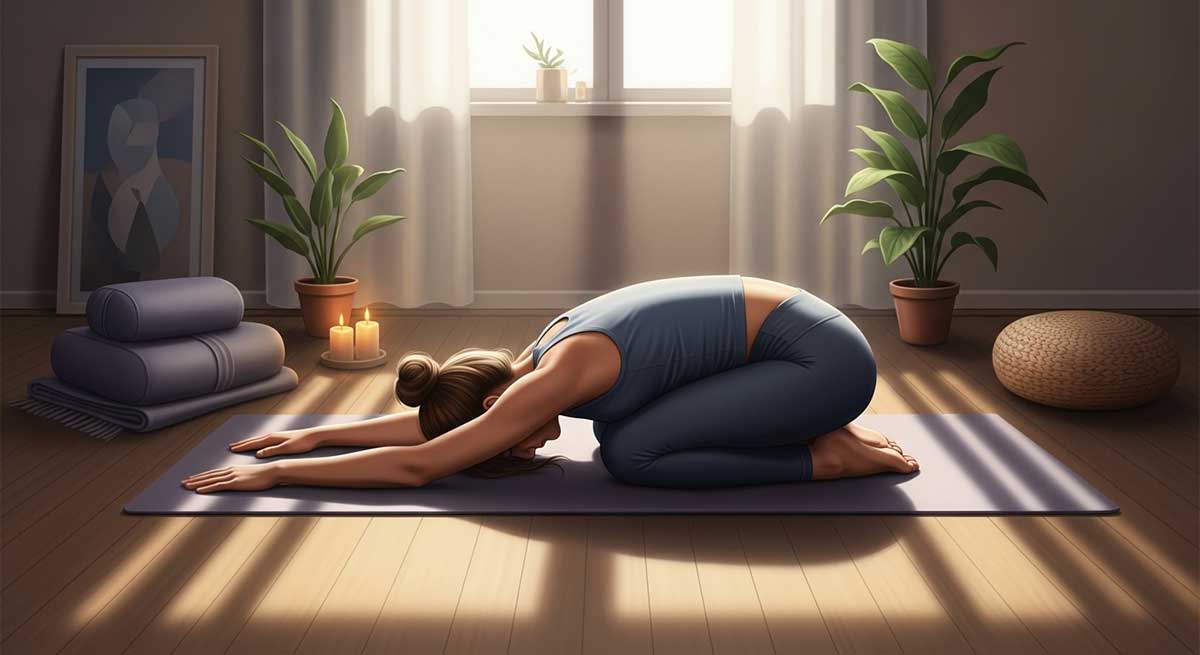
How to do it:
- Kneel on the ground with big toes touching
- Sit back on heels and separate knees
- Fold forward and rest forehead on ground
- Extend arms forward or rest them alongside body
- Hold for 1-3 minutes
Benefits:
Gently stretches hips, thighs, and ankles while promoting relaxation and stress relief.
Beginner tip:
Place a pillow under your forehead or between your calves and thighs for extra comfort.
Your 15-minute daily flexibility routine
Now that you know the poses, here’s how to put them together into a flowing sequence that you can do every day.
Routine options by experience level
| Experience Level | Routine Length | Poses to Focus On | Weekly Frequency |
|---|---|---|---|
| Complete Beginner | 10-15 minutes | Cat-Cow, Downward Dog, Child’s Pose, Forward Bend | 3-4 times per week |
| Some Experience | 15-20 minutes | Add Triangle, Low Lunge, Bound Angle | 4-5 times per week |
| Regular Practitioner | 20-30 minutes | Include Pigeon, Cow Face, deeper holds | 5-6 times per week |
Warm-up (2 minutes)
Start with Cat-Cow Stretch to warm up your spine. Do 8-10 slow, mindful repetitions. Add some gentle neck rolls and shoulder shrugs to wake up your upper body.
Main sequence (10 minutes)
Flow through these poses, spending about 30-60 seconds in each:
- Downward-Facing Dog (1 minute) – Take several deep breaths and pedal your feet to warm up your legs
- Low Lunge (30 seconds each side) – Step forward from Downward Dog into your lunge
- Standing Forward Bend (1 minute) – Step back foot forward to meet the front foot
- Triangle Pose (30 seconds each side) – From standing, step one foot back wide
- Seated Forward Bend (1-2 minutes) – Sit down and extend legs forward
- Bound Angle Pose (1 minute) – Bring soles of feet together
- Cow Face Pose (30 seconds each side) – Cross legs and work on shoulder flexibility
Cool-down (3 minutes)
Finish with these restorative poses:
- Pigeon Pose (1 minute each side) – Deep hip release
- Supine Spinal Twist (30 seconds each side) – Lie down and twist gently
- Happy Baby Pose (1 minute) – Playful hip opener
- Child’s Pose (1 minute) – Rest and integrate the practice
15-Minute Yoga Flexibility Timer
Follow along with guided poses and timing
Alternative routines for different needs
Morning Energizer (10 minutes): Focus on standing poses and gentle backbends to wake up your body.
Evening Wind-Down (15 minutes): Emphasize seated poses and twists to release tension from the day.
Desk Worker Special (12 minutes): Target hip flexors, shoulders, and spine with poses like Low Lunge, Cow Face, and Spinal Twist.
Progress tracking and modifications
How to track your flexibility progress
| Measurement Method | How to Do It | Frequency |
|---|---|---|
| Photos | Take side-view photos in key poses | Weekly |
| Flexibility Tests | Touch-your-toes test, shoulder mobility | Bi-weekly |
| Daily Comfort | Rate stiffness levels 1-10 | Daily |
| Range of Motion | Measure how far you can reach | Monthly |
Modifications for common limitations
Tight hamstrings:
- Keep knees bent in forward folds
- Use a strap in seated poses
- Sit on a blanket to elevate hips
Limited shoulder mobility:
- Use a strap between hands in Cow Face Pose
- Practice arm stretches against a wall
- Focus on gentle, pain-free movement
Sensitive knees:
- Place blankets under knees in kneeling poses
- Avoid deep twists that stress knees
- Use blocks for support in seated poses
Lower back issues:
- Bend knees in forward folds
- Support yourself with props
- Avoid deep backbends until cleared by healthcare provider
📚 Yoga Pose Library
Explore 30+ beginner-friendly poses
Tips for a safe and effective flexibility practice
Listen to your body
Your body talks to you during stretches. Good sensations include mild tension, warmth, and a feeling of release. Stop immediately if you feel sharp pain, electrical sensations, or numbness. These are warning signs that you’ve gone too far.
Consistency over intensity
Doing 10-15 minutes of gentle stretching daily will give you better results than an intense 2-hour session once a week. Your muscles respond better to regular, gentle encouragement than occasional force.
The power of breath
Deep breathing helps relax your muscles and allows you to stretch deeper. Try to inhale to prepare for a stretch and exhale to gently deepen it. If you’re holding your breath, you’re probably pushing too hard.
Props are your friends
Don’t be afraid to use blocks, straps, blankets, or pillows. These tools aren’t signs of weakness – they’re smart ways to make poses more accessible and comfortable. A supported stretch that you can hold comfortably is much more effective than an unsupported one that causes strain.
Conclusion
Flexibility isn’t about being able to do Instagram-worthy poses or impressing others with your range of motion. It’s about giving your body the freedom to move through life with ease and confidence.
Some days you’ll feel like a graceful dancer flowing through poses. Other days you might feel like a rusty robot. Both are normal parts of the journey. The key is showing up consistently and treating your body with patience and kindness.
Remember that flexibility is deeply personal. Your hamstrings might be tight while your shoulders are mobile, or vice versa. Work with what you have, celebrate small improvements, and trust that regular practice will gradually unlock your body’s natural flexibility.
Your next steps
- Week 1: Start with the beginner routine 3 times this week. Focus on proper form rather than depth.
- Week 2-4: Increase to 4-5 sessions per week. Begin tracking your progress with photos or measurements.
- Month 2: Add more challenging poses and longer hold times as your body adapts.
- Month 3 and beyond: Experiment with different routine variations and continue building your practice.
Additional resources for your journey
- Consider joining a beginner yoga class for personalized guidance
- Use yoga apps or online videos for variety in your practice
- Connect with other practitioners for motivation and support
- Keep a flexibility journal to track your progress and celebrate wins
Your future self will thank you for the time you invest in flexibility today. Every stretch, every breath, every moment of mindful movement is an investment in a more mobile, comfortable, and confident you.
Remember: consistency beats perfection. A short, regular practice will transform your body and your life more than occasional intense sessions.
FAQs
Which type of yoga is best for flexibility?
Hatha and Yin yoga are excellent choices for flexibility. Hatha yoga focuses on holding poses longer, which gives muscles time to relax and stretch. Yin yoga involves very long holds (3-5 minutes) that target deep connective tissues. For this routine, we use a Hatha-style approach with moderate holds.
How long does it take to get flexible from yoga?
Most people see noticeable improvements within 3-4 weeks of consistent practice. However, this varies based on your starting point, age, and how often you practice. Some feel less stiff after just one week, while deeper flexibility changes take 2-3 months.
Can I improve flexibility with yoga?
Yes, absolutely. Yoga is one of the most effective ways to improve flexibility because it combines stretching with breath work and mindful movement. The key is consistency – regular short sessions work better than occasional long ones.
Is 20 minutes of yoga daily enough?
Yes, 20 minutes daily is enough to see significant flexibility improvements. Our 15-minute routine can produce great results when done consistently. Quality and regularity matter more than duration.
Can 15 minute yoga improve flexibility?
Definitely. A focused 15-minute routine that targets major muscle groups can improve flexibility effectively. The routine provided in this article covers all essential areas and provides balanced stretching when practiced regularly.
Which yoga is the king of all yoga?
Sirsasana (headstand) is often called the “king of all yoga poses” for its many benefits. However, for flexibility specifically, poses like Pigeon Pose and Seated Forward Bend are more directly beneficial.
Does yoga actually increase flexibility?
Yes, yoga increases flexibility through multiple mechanisms. It lengthens muscles, improves joint mobility, and trains your nervous system to allow greater range of motion. Scientific studies confirm that regular yoga practice significantly improves flexibility measures.
Is it safe to do yoga every day?
Yes, gentle to moderate yoga is safe to practice daily. Listen to your body and take rest days if you feel overly sore or tired. The routine in this article is designed for daily use with proper form and modifications.
How long does it realistically take to become flexible?
For most people, basic flexibility improvements happen in 4-8 weeks. Achieving advanced flexibility (like splits) typically takes 6-12 months of consistent practice. Your individual timeline depends on genetics, age, current fitness level, and practice frequency.
Is yoga or Pilates better for flexibility?
Yoga generally provides better flexibility benefits than Pilates. Yoga focuses more on lengthening muscles and holding stretches, while Pilates emphasizes core strength and controlled movement. Both are valuable, but yoga wins for flexibility goals.
What is the fastest way to improve flexibility?
The fastest way combines daily yoga practice with proper breathing, adequate hydration, and patience. Avoid forcing stretches, which can cause injury and setbacks. Consistency with the 15-minute routine provided here will yield faster results than sporadic intense sessions.
Is yoga twice a week enough for flexibility?
Twice weekly provides some benefits, but 4-5 times per week produces much better results. If you can only manage twice weekly, make sure to incorporate light stretching on other days to maintain progress.
Can you do yoga if you are inflexible?
Absolutely! Yoga is perfect for inflexible people. The routine includes modifications for every pose, and props like blocks and straps make poses accessible. Everyone starts somewhere – your current flexibility level is your perfect starting point.
Why does it take so long to get flexible?
Flexibility changes require your nervous system to adapt, connective tissues to lengthen, and muscle fibers to develop new ranges. These physiological changes happen gradually. Rushing the process increases injury risk and can actually slow progress.
Is yoga good for tight muscles?
Yes, yoga is excellent for tight muscles. The combination of stretching, breathing, and mindful movement helps muscles relax and release tension. Many people notice reduced tightness after their first session.
How to start a daily yoga practice for flexibility?
Start with the 15-minute routine provided in this article. Pick a consistent time (morning or evening), set up a comfortable space, gather basic props, and commit to showing up 4-5 times weekly. Track your progress to stay motivated.
What is the best time of day to do yoga?
Morning yoga helps reduce stiffness from sleep and energizes you for the day. Evening yoga releases accumulated tension and promotes better sleep. Choose whatever time you’ll stick with consistently – that’s the best time for you.
Is hatha or vinyasa better for flexibility?
Hatha yoga is better for flexibility because it involves holding poses longer, giving muscles more time to stretch. Vinyasa focuses on flowing movement and builds strength alongside flexibility. For pure flexibility goals, choose Hatha-style practice.


