Yoga offers a simple way to get stronger. No weights needed. No gym membership required. Just you, a mat, and 10 minutes a day.
This article shows you 7 beginner-friendly poses that build strength across your entire body. You’ll learn a simple routine you can start today. And yes, science backs this up. Studies show that regular yoga practice improves muscle strength, endurance, and balance just as well as conventional exercises.
Why Yoga for Strength? The Science
Beyond Flexibility
Most people think yoga is just stretching. That’s only part of the story.
Yoga builds real strength. How? It uses your body weight as resistance. When you hold a plank or balance in warrior pose, your muscles work hard to support you. That’s strength training.
Bodyweight Resistance Works
Your body weighs enough to challenge your muscles. Each pose asks different muscle groups to engage, hold, and stabilize. Over time, this builds lean muscle and functional strength.
Think of it like this: a push-up uses your body weight to build arm and chest strength. Yoga poses work the same way, but they often engage more muscles at once.
What the Research Shows
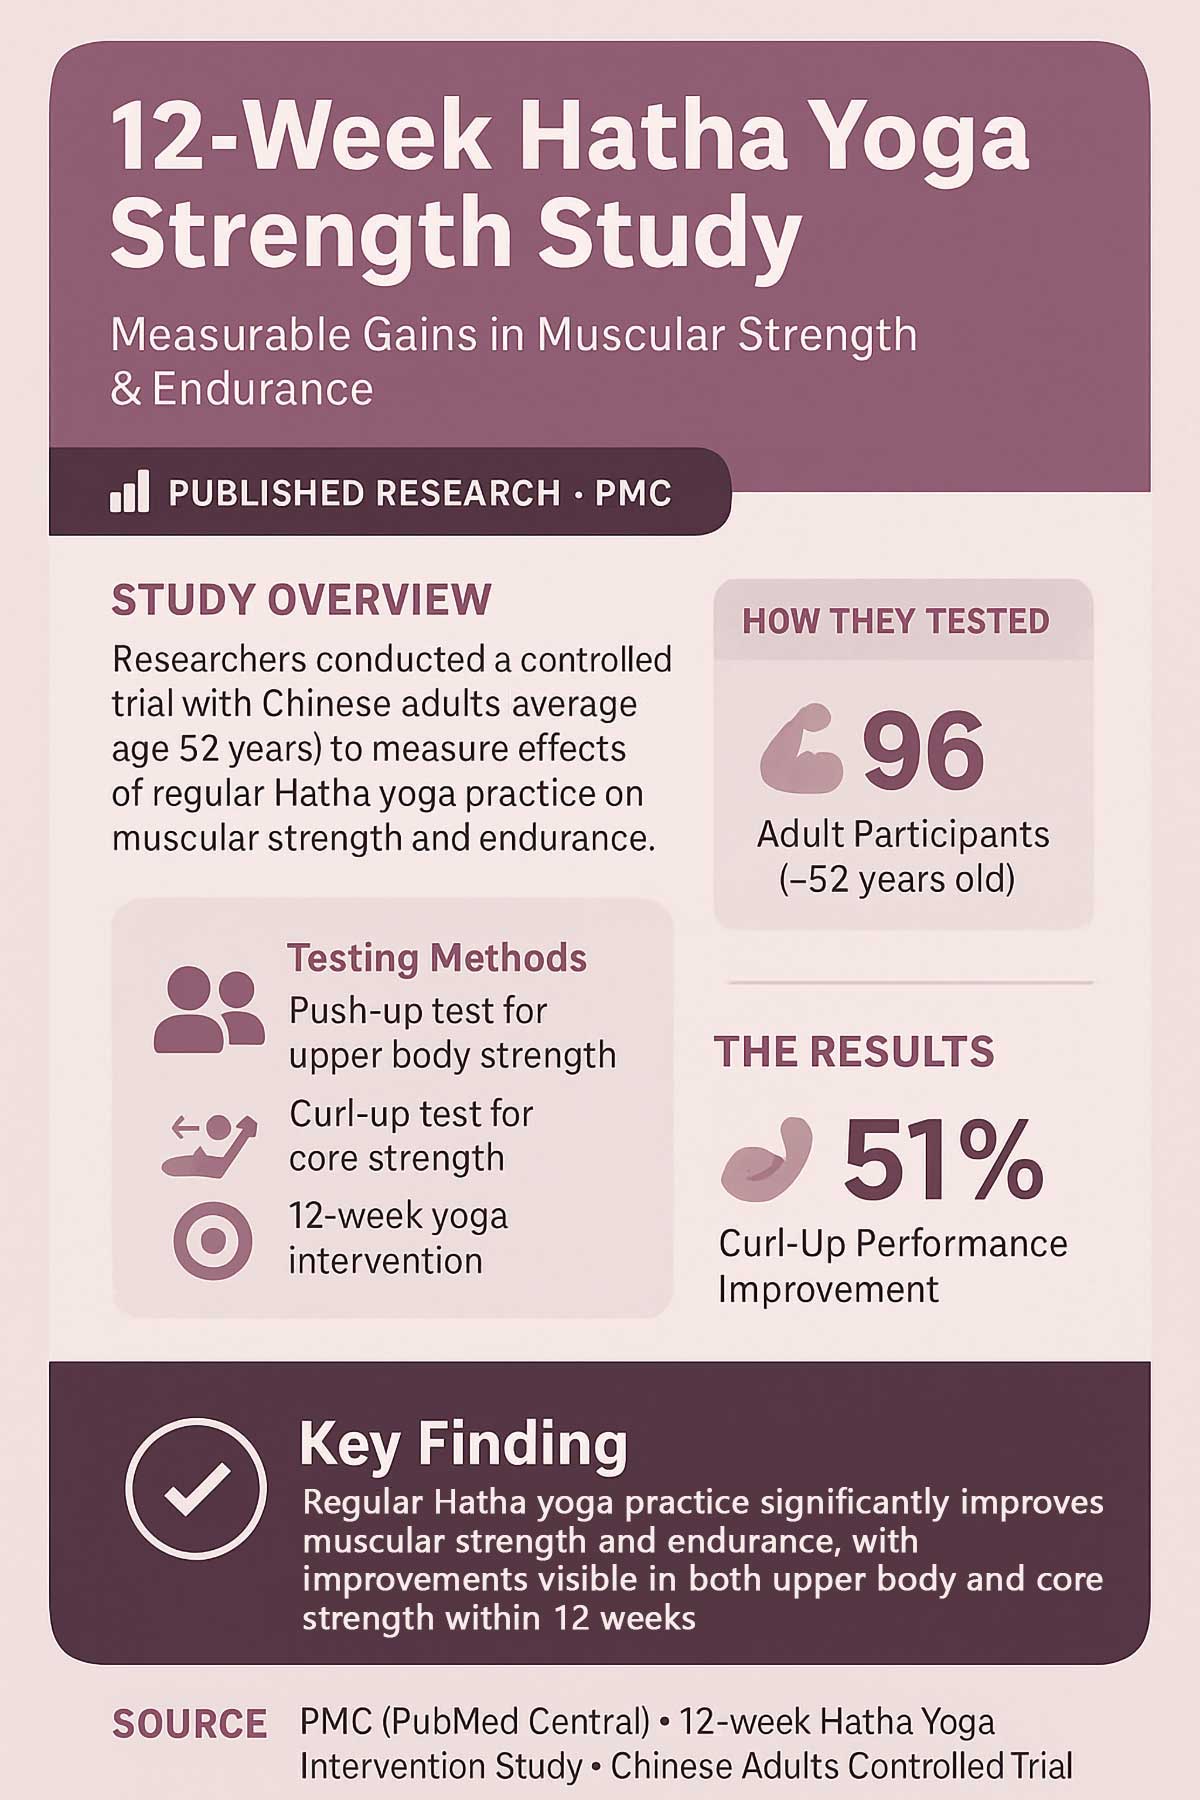
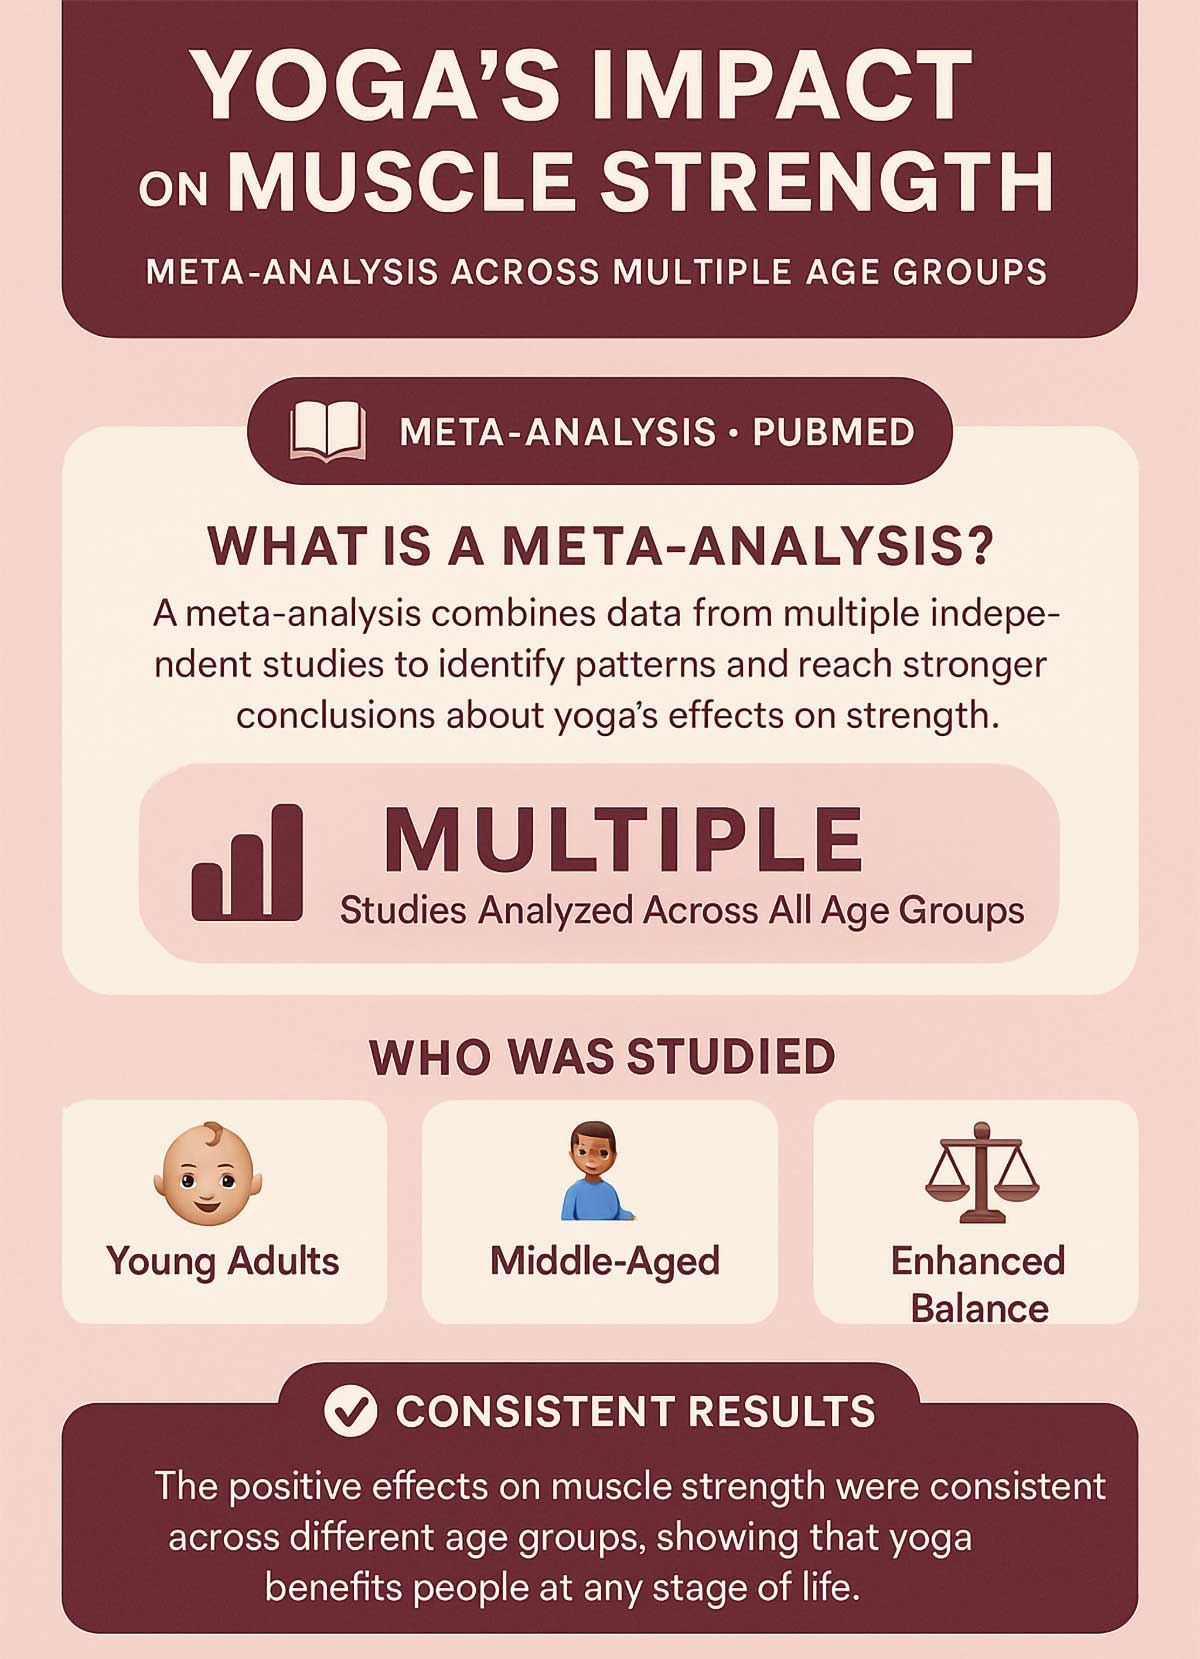
A study of Chinese adults tracked results from a 12-week Hatha yoga program. Participants improved their push-up performance by 31% and curl-up performance by 57% compared to a control group. These tests measure muscular strength and endurance in real-world terms.
Another analysis pooling data from multiple studies found that yoga produces moderate positive effects on muscle strength, especially in the lower body. The research compared yoga practitioners to inactive people and found significant improvements in leg strength, balance, and overall physical function.
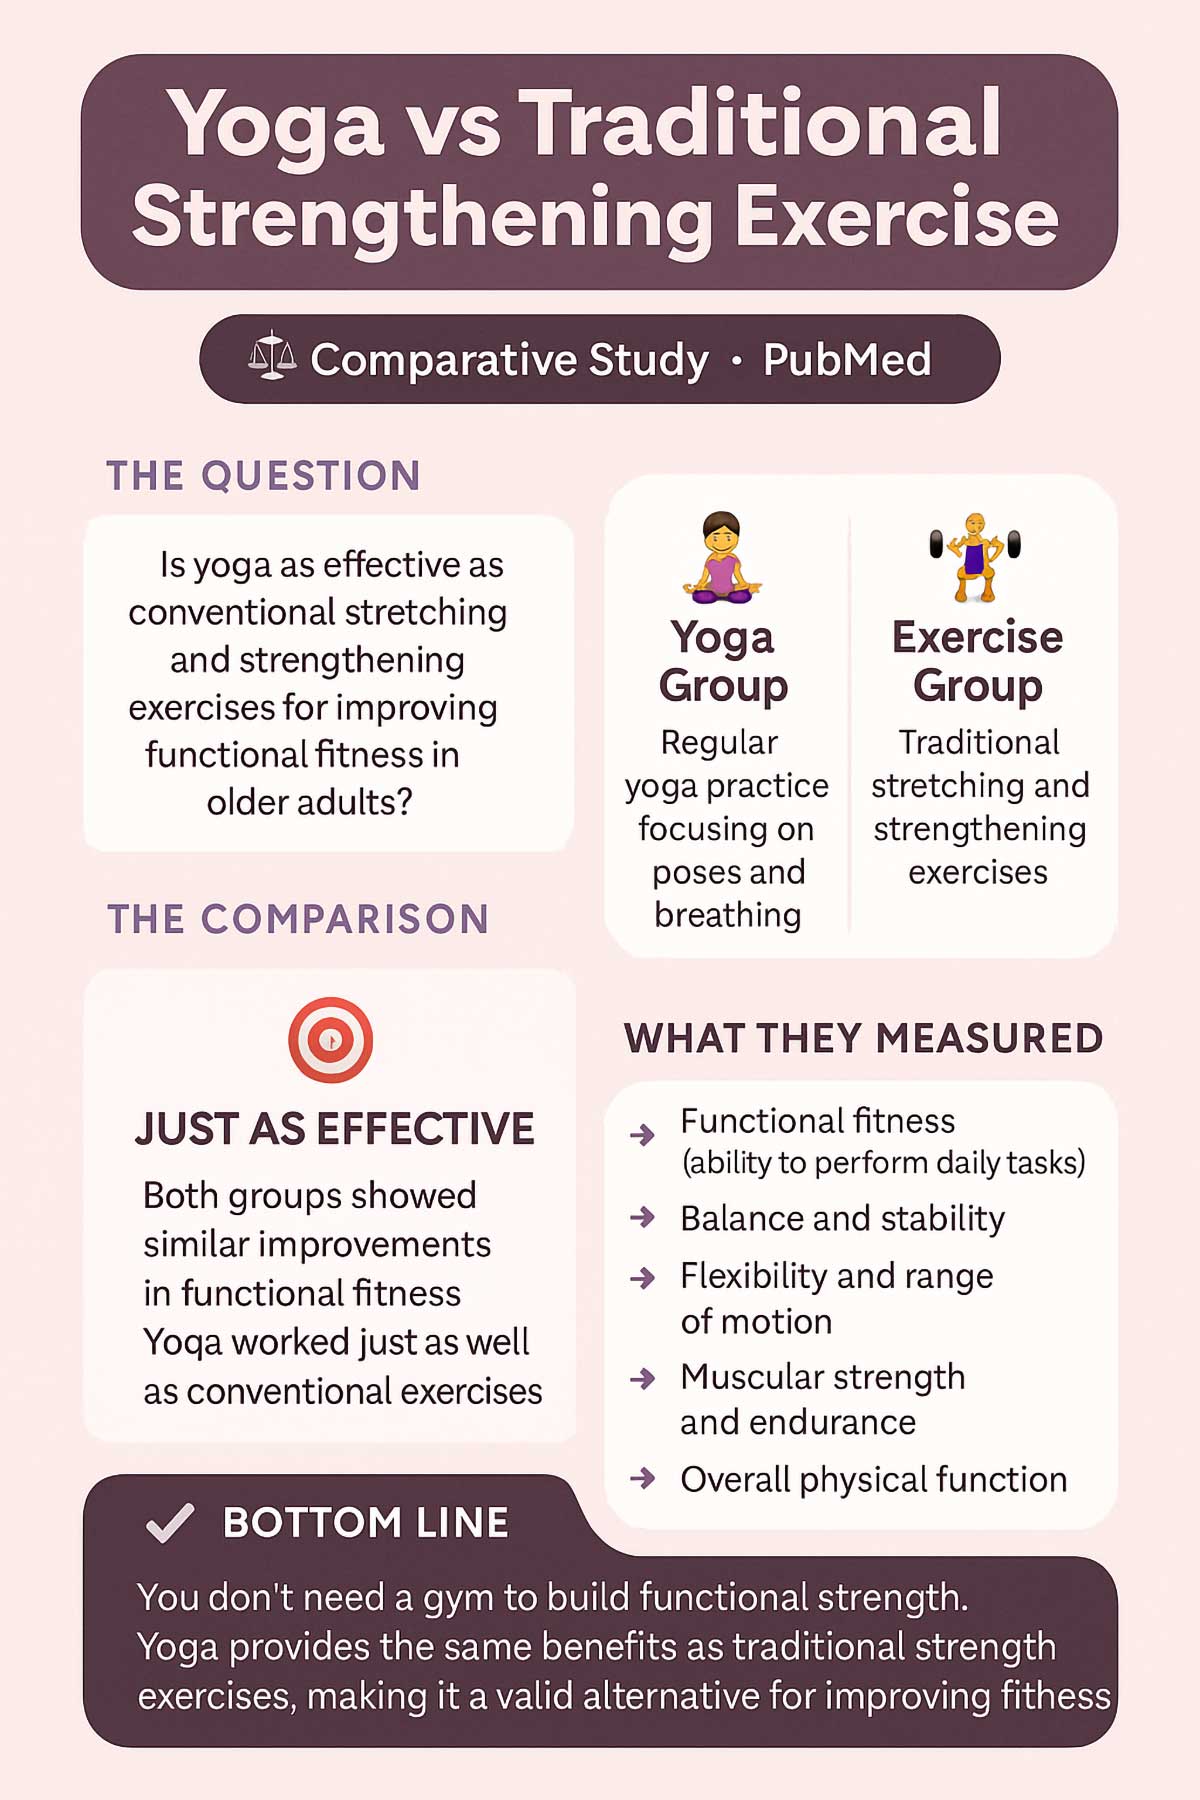
Perhaps most striking: one study found that yoga works just as well as traditional stretching and strengthening exercises for improving functional fitness in older adults. The yoga group and the exercise group showed similar gains. Both beat the inactive control group by a wide margin.
A recent study on complex yoga practice showed significant increases in core muscle strength, with participants demonstrating measurable improvements in abdominal and lower back strength after just 8 weeks.
The bottom line is that yoga isn’t just for flexible people. It’s a legit way to build strength.
The Muscle Groups You’ll Work
This routine hits every major muscle group. Here’s what each pose targets:
| Pose | Primary Muscles | Secondary Muscles |
|---|---|---|
| Mountain | Quads, Core, Erector Spinae | Calves, Glutes |
| Chair | Quads, Glutes, Hip Flexors | Core, Shoulders, Upper Back |
| Plank | Rectus Abdominis, Transverse Abdominis | Shoulders, Chest, Quads |
| Downward Dog | Shoulders, Triceps, Upper Back | Hamstrings, Calves, Core |
| Warrior II | Quads, Glutes, Hip Abductors | Core, Deltoids |
| Bridge | Glutes, Hamstrings, Erector Spinae | Core, Hip Flexors |
| Boat | Rectus Abdominis, Hip Flexors | Obliques, Quads |
Notice how these poses work together. You’ll strengthen your front body, back body, upper body, and lower body. Nothing gets left behind.
What You’ll Need
Good news: you don’t need much.
Essential:
- Yoga mat (or a towel on carpet works fine)
- Comfortable clothing that lets you move
- Water bottle
- Clear space about 6 feet by 3 feet
Optional but helpful:
- Yoga blocks or thick books for modifications
- A chair or wall for balance support
- Timer or phone to track holds
Cost: Zero if you already have a towel and space. A basic yoga mat costs $15-30.
Your 10-Minute Full-Body Strength Routine
We’ll move through 7 poses in a logical sequence. Hold each pose for the recommended time. Focus on your breath and form. Don’t rush.
This routine flows naturally from one pose to the next. You’ll warm up, build heat, and finish strong.
Breathing Guide: Use Your Breath
Breath powers your practice. Here’s how to breathe through the routine:
- Inhale during lengthening movements (raising arms, lifting chest, opening up)
- Exhale during deepening movements (folding forward, sinking lower, contracting)
- While holding poses: Breathe steadily – 4 counts in through your nose, 4 counts out through your nose
- Never hold your breath – if you can’t breathe smoothly, ease up on the pose
PRO TIP: Set a timer for each pose. Don’t watch the clock—focus on your breath.
Pose 1: Mountain Pose (Tadasana) – The Foundation (1 minute)
Focus: Grounding and full-body engagement
How-To:
- Stand with feet hip-width apart
- Ground all four corners of each foot into the mat
- Engage your quads by lifting your kneecaps (but don’t lock your knees)
- Tighten your core by drawing belly button toward spine
- Roll shoulders back and down
- Reach arms alongside your body, palms facing forward
- Lengthen through the crown of your head
- Breathe deeply and stand tall
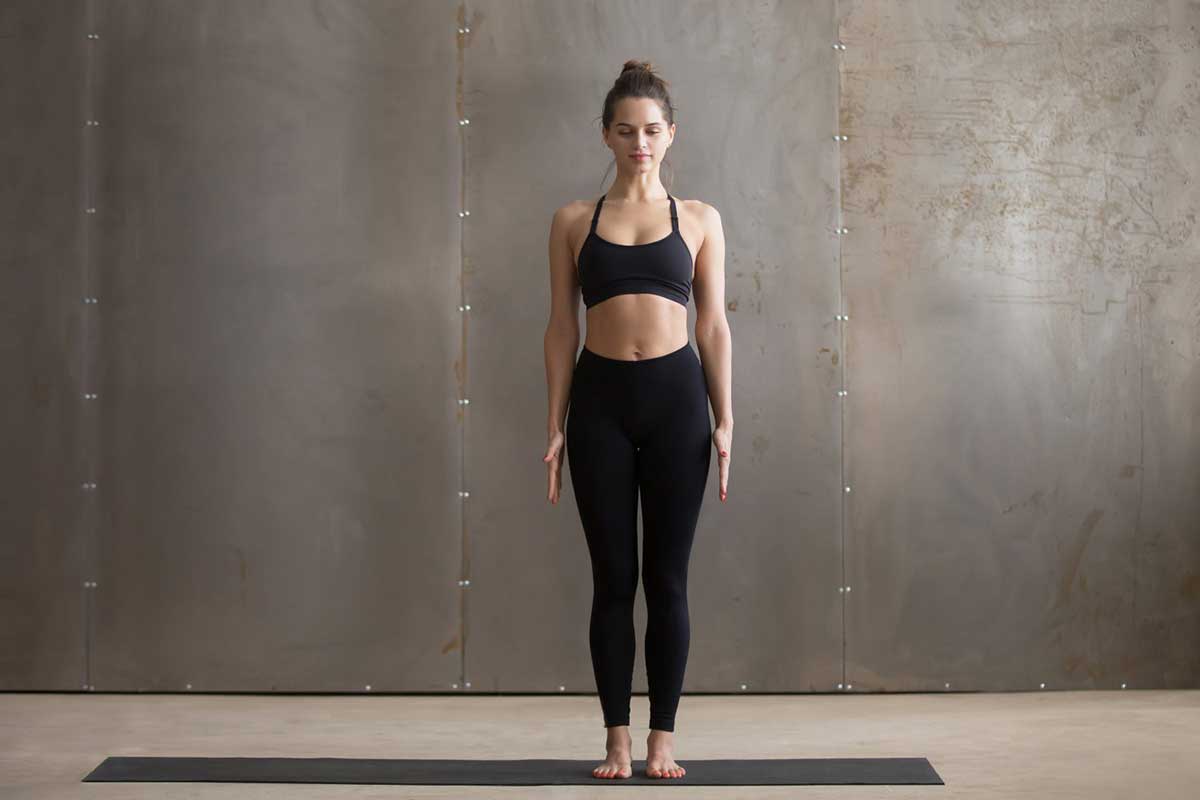
Strength Benefit: This isn’t just standing. It activates your legs, core, and back. You’re creating a stable base for all other poses.
Think of Mountain Pose as your reset button. It teaches your body what proper alignment feels like. Every muscle engages lightly but actively.
Pose 2: Chair Pose (Utkatasana) – The Lower Body (1 minute)
Focus: Quadriceps, glutes, and ankle strength
How-To:
- Start in Mountain Pose
- Bend your knees and sink your hips back, like sitting in an invisible chair
- Keep weight in your heels (you should be able to wiggle your toes)
- Raise arms overhead, palms facing each other or touching
- Keep your chest lifted and gaze forward
- Press thighs together for extra engagement
- Hold and breathe
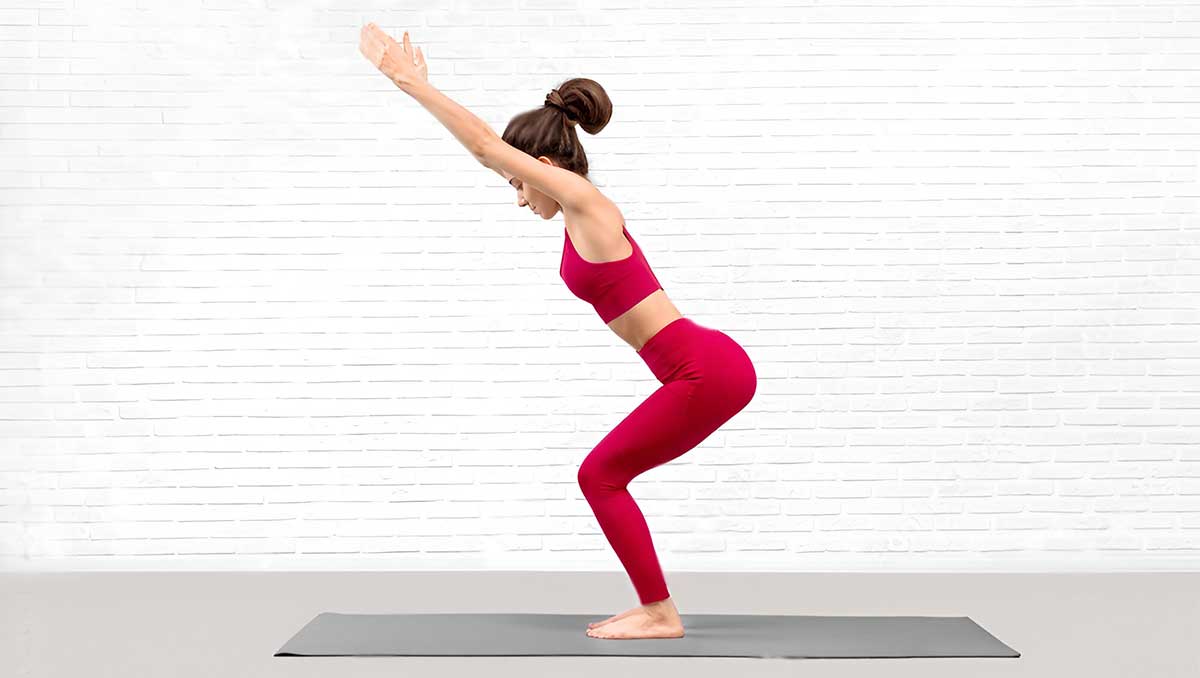
Modification: Don’t sink as deep if you’re just starting. Even a small bend works your muscles. Keep arms at chest height if shoulders feel strained.
Strength Benefit: Builds powerful legs and glutes while engaging your core and upper back. This pose fires up the same muscles you use to climb stairs or stand up from a chair.
Your thighs might burn. That’s normal. It means your muscles are working. Each breath helps you hold a bit longer.
Pose 3: Plank Pose (Phalakasana) – The Core Builder (1 minute)
Focus: Core, shoulders, and arm strength
How-To:
- Start on hands and knees
- Step feet back, one at a time
- Create a straight line from head to heels
- Stack shoulders directly over wrists
- Engage your core by pulling belly button toward spine
- Squeeze your glutes and quads
- Keep hips level—not sagging or piking up
- Gaze slightly forward, keeping neck neutral
- Breathe steadily
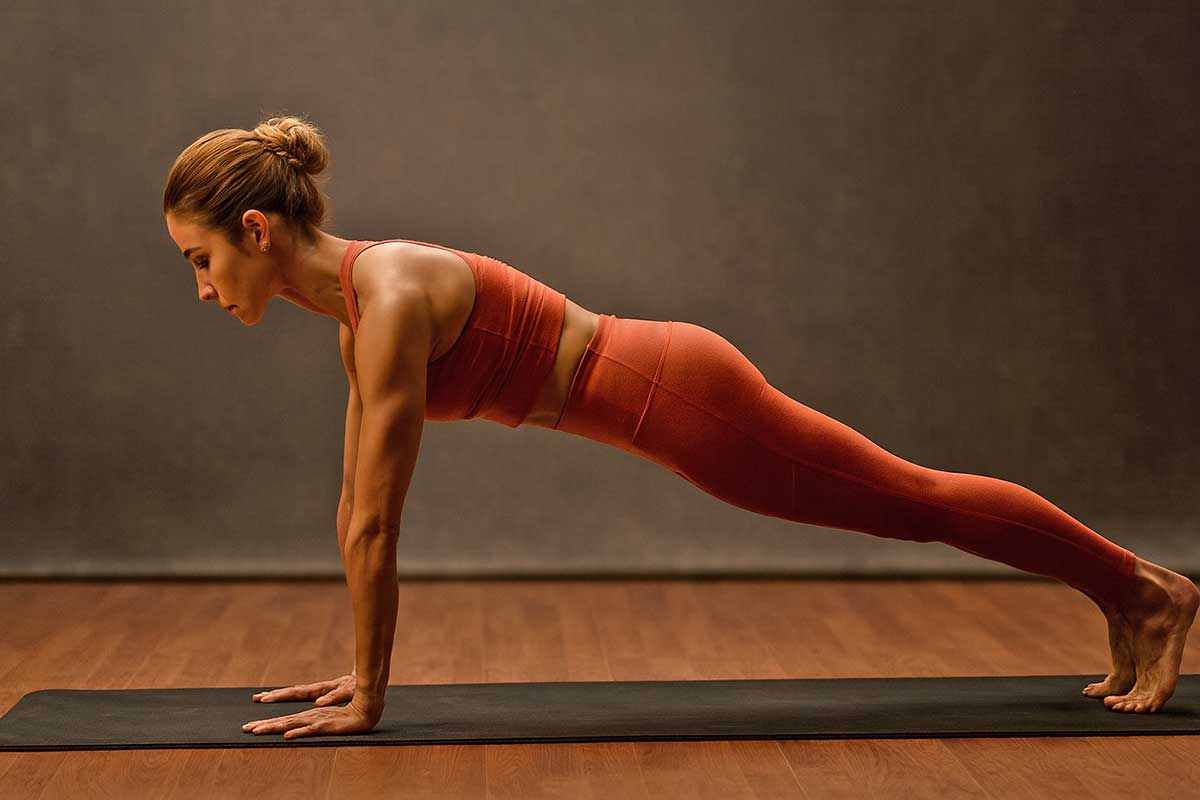
Modification: Drop to your knees to build strength without straining your lower back. Keep everything else the same—straight line from head to knees, core engaged.
Strength Benefit: A full-body exercise that strengthens your abs, back, shoulders, and glutes at the same time. Plank is an isometric hold that maintains a straight line against gravity, primarily working the anterior chain through static muscle contraction.
One minute might feel long. Break it into two 30-second holds if needed. Rest in child’s pose (knees down, hips to heels) between holds.
Pose 4: Downward-Facing Dog (Adho Mukha Svanasana) – Upper Body and Hamstrings (2 minutes)
Focus: Shoulder, arm, and back strength, plus hamstring flexibility
How-To:
- From Plank, lift your hips up and back
- Create an inverted ‘V’ shape with your body
- Spread fingers wide and press palms firmly into mat
- Rotate upper arms outward to broaden shoulders
- Bend knees generously if hamstrings are tight
- Pedal feet back and forth to warm up legs
- Let your head hang naturally between arms
- Press chest gently toward thighs
- Breathe deeply
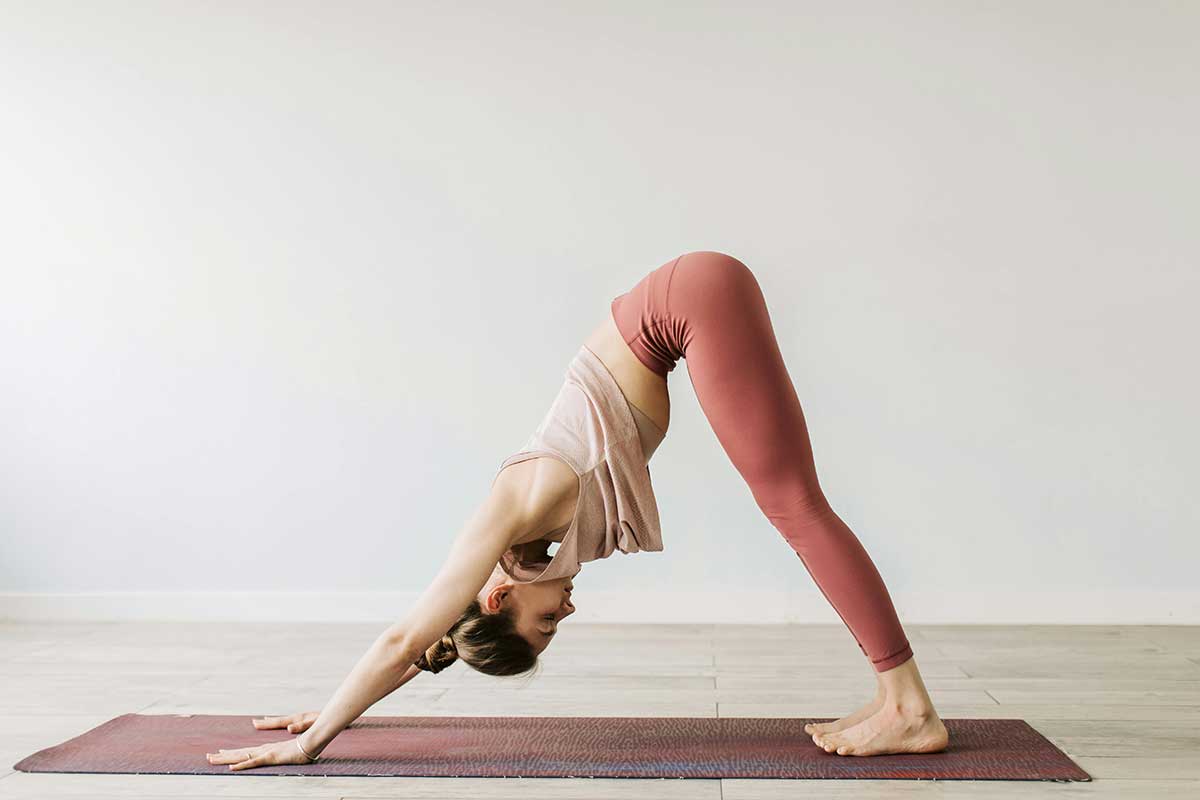
Strength Benefit: Builds strength in your arms and shoulders while lengthening your spine and hamstrings. Your shoulders and arms support much of your body weight here, building endurance in your upper body.
This pose is both a strength builder and a stretch. Don’t worry if your heels don’t touch the floor. That’s normal for beginners. Focus on lengthening your spine.
FORM CHECK: Film yourself once a week to spot alignment issues.
Pose 5: Warrior II (Virabhadrasana II) – Power and Endurance (2 minutes total, 1 minute per side)
Focus: Leg strength, outer hips, core, and shoulders
How-To:
- From standing, step feet wide apart (about 3-4 feet)
- Turn right foot out 90 degrees, toes pointing to front of mat
- Turn left foot in slightly (about 15 degrees)
- Bend right knee to 90 degrees—knee stacks over ankle, not past toes
- Keep your left leg straight and strong
- Extend arms out to sides at shoulder height, palms down
- Keep torso centered between legs (don’t lean forward)
- Gaze over right fingertips
- Sink hips lower while keeping torso upright
- Hold for 1 minute, then switch sides
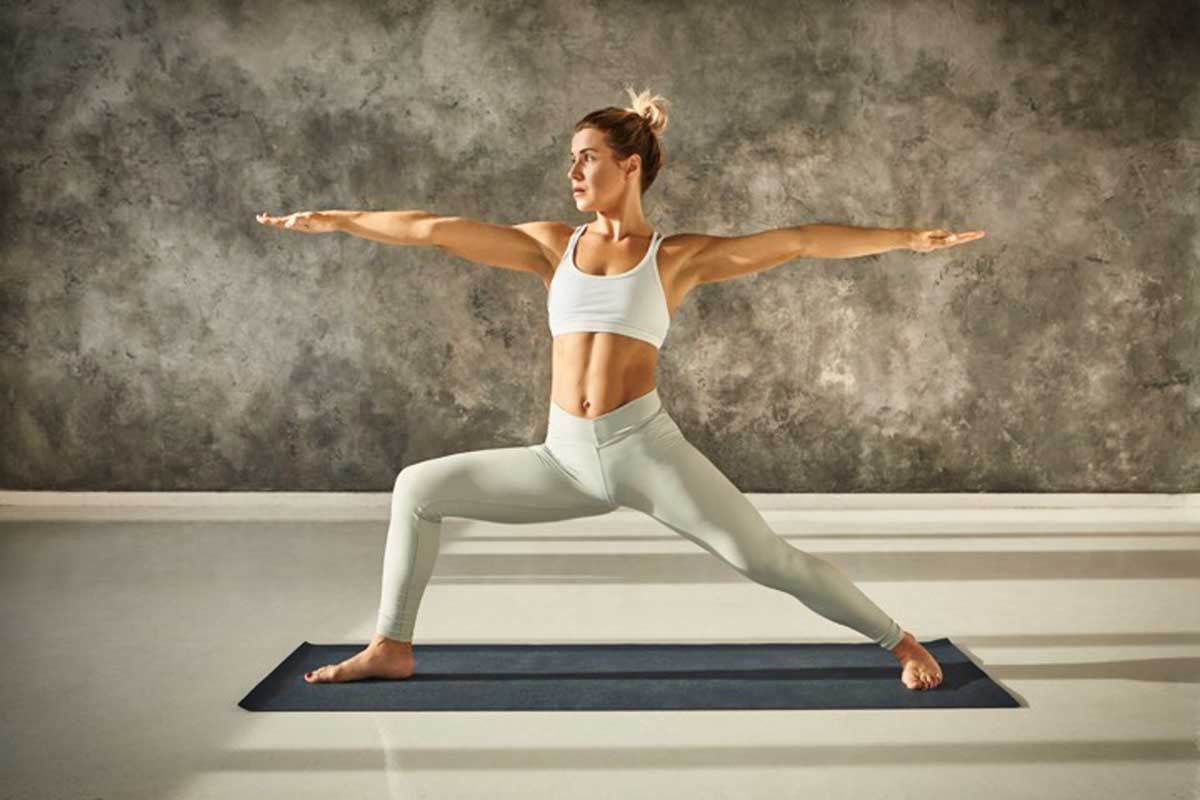
Strength Benefit: Develops stamina and strength in the legs and core while opening the hips and chest. This pose builds the kind of endurance you need for hiking, running, and everyday activities.
Your front thigh does heavy lifting here. Keep breathing even when it gets tough. That burning sensation means your muscles are getting stronger.
Pose 6: Bridge Pose (Setu Bandhasana) – The Posterior Chain Strengthener (1 minute)
Focus: Glutes, hamstrings, and lower back
How-To:
- Lie on your back, knees bent
- Place feet flat on mat, hip-width apart
- Keep feet close to your hips (fingertips should almost touch heels)
- Press arms and palms into the floor alongside your body
- Press into feet and lift hips toward the ceiling
- Keep knees aligned over ankles (don’t let them splay out)
- Clasp hands under your back if comfortable, pressing shoulders down
- Lift chest toward chin
- Hold and breathe
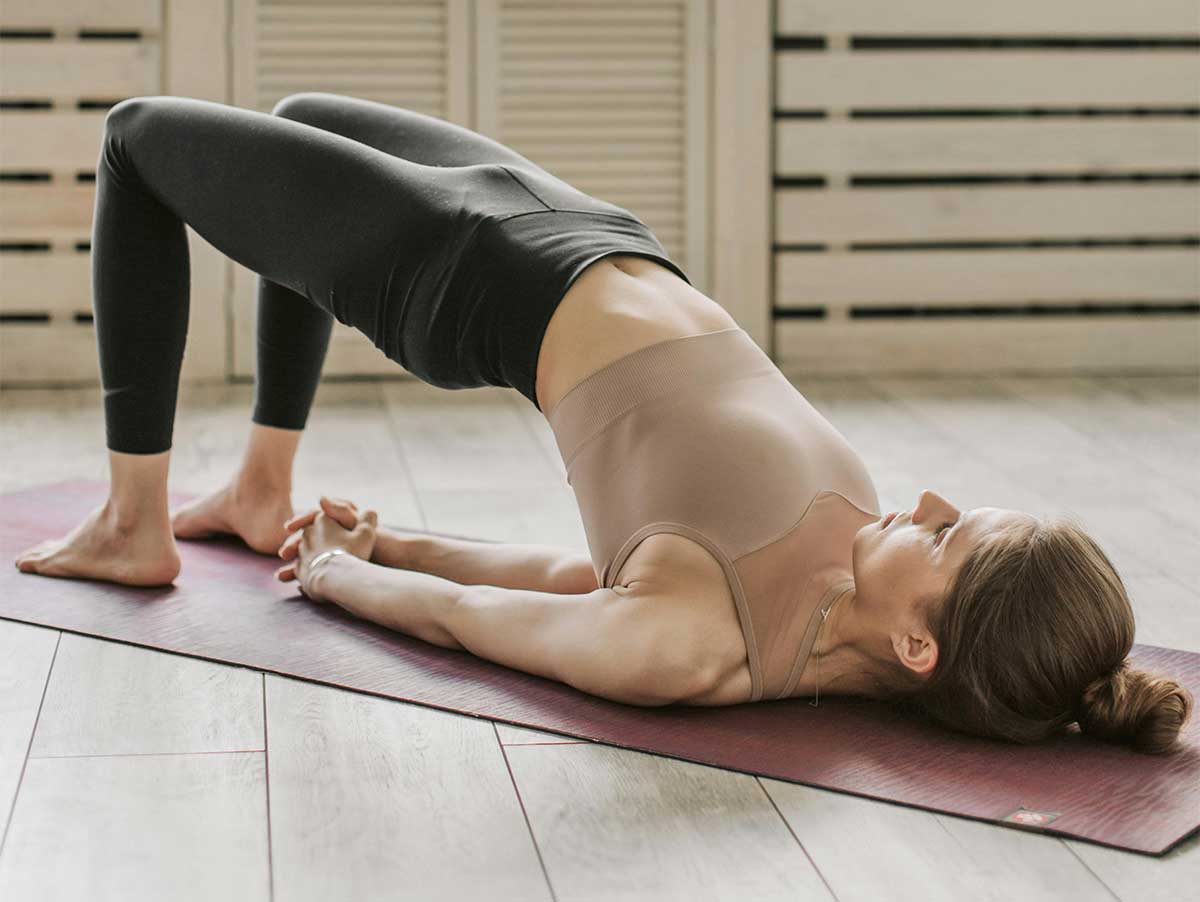
Strength Benefit: Activates and strengthens the entire back of your body. This is key for good posture and preventing lower back pain. Bridge Pose counteracts all the sitting we do daily.
Squeeze your glutes at the top. That’s where the real strength work happens. Your hamstrings and lower back support the movement.
Pose 7: Boat Pose (Navasana) – Deep Core Finisher (1 minute)
Focus: Deep abdominal muscles
How-To:
- Sit on the mat with knees bent, feet flat
- Lean back slightly (about 45 degrees) and lift feet off the floor
- Start with shins parallel to floor
- Extend legs forward if you can maintain a straight spine
- Reach arms forward alongside legs, palms facing each other
- Balance on your sit bones (not your tailbone)
- Keep chest lifted and spine long
- Breathe steadily through the shake
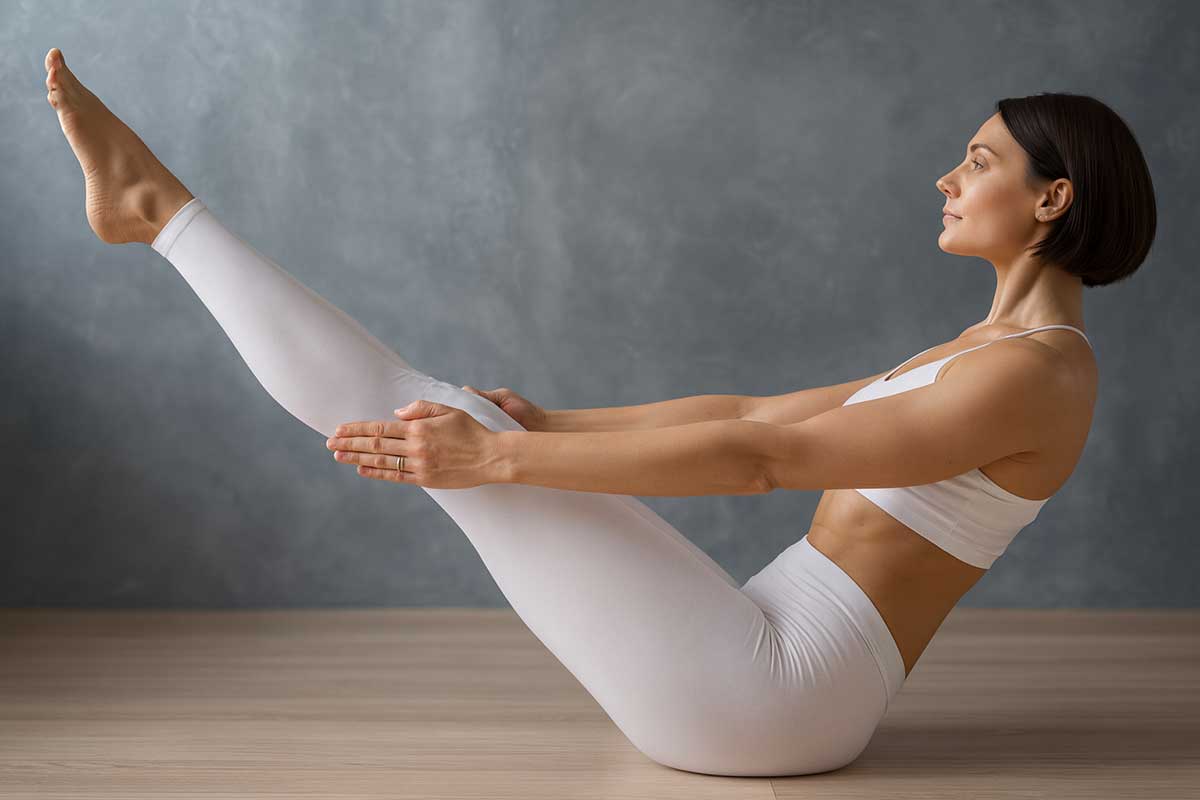
Modification: Keep knees bent and shins parallel to the floor. Or hold the backs of your thighs for support. Both options still work your core effectively.
Strength Benefit: Targets the deep core muscles needed for stability and power in all movements. These muscles support your spine and help with balance in daily life.
This pose finishes strong. Your abs will shake. That’s perfectly fine. It means the muscles are fatigued and adapting. Keep your breath steady.
BEGINNER FRIENDLY: Can’t hold a pose? Take child’s pose (knees down, hips to heels) anytime.
Pose 8: Savasana (Corpse Pose) – Cool-Down (1 minute)
Focus: Recovery and integration
How-To:
- Lie flat on your back
- Let legs fall open naturally
- Rest arms alongside body, palms facing up
- Close your eyes
- Breathe naturally
- Let your body absorb the work you just did
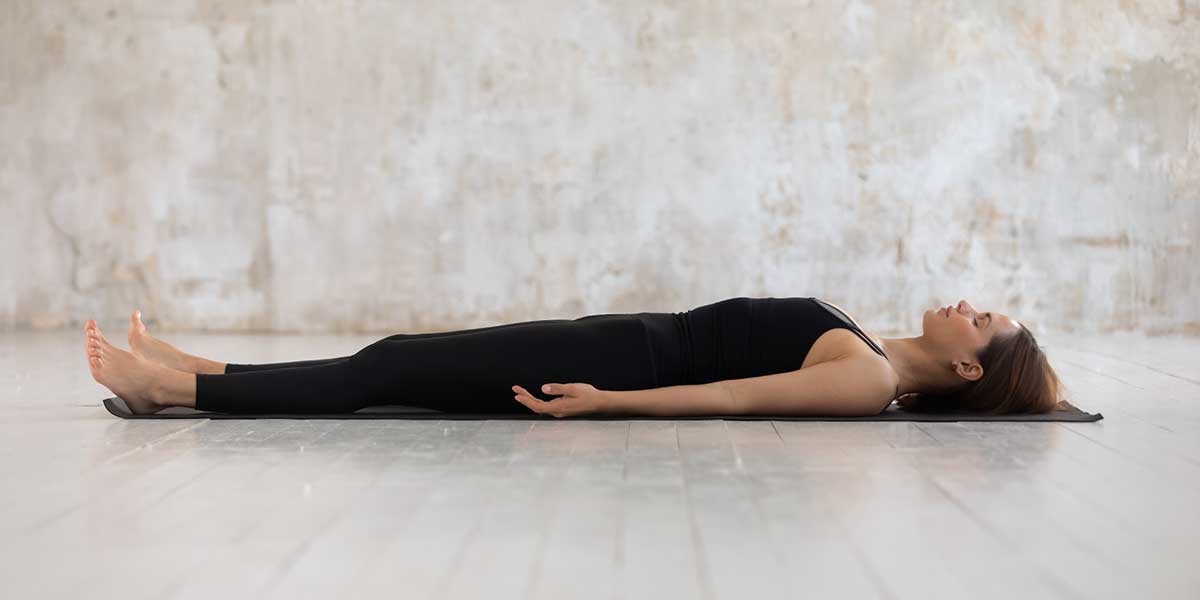
Benefit: This final minute lets your nervous system shift from effort to recovery. Your muscles integrate the strength work. Don’t skip this step.
10-Minute Yoga Strength Routine
Follow along with audio cues
Mountain Pose
Customize Your Practice
Common Mistakes to Avoid
Good form keeps you safe and makes poses more effective. Watch for these common errors:
| Pose | Common Mistake | Fix It |
|---|---|---|
| Mountain Pose | Locking knees | Keep a micro-bend in knees |
| Chair Pose | Knees past toes | Shift weight to heels, sit back more |
| Plank | Sagging hips | Engage core harder, squeeze glutes |
| Plank | Shoulders past wrists | Stack shoulders directly over wrists |
| Downward Dog | Locked elbows | Maintain slight bend in elbows |
| Downward Dog | Rounded spine | Bend knees more, focus on long spine |
| Warrior II | Front knee caving in | Press knee toward pinky toe side |
| Warrior II | Leaning forward | Keep torso centered over hips |
| Bridge | Feet too wide | Keep feet hip-width, parallel |
| Bridge | Knees splaying out | Engage inner thighs, point knees forward |
| Boat | Rounded spine | Lift chest, lengthen spine, bend knees more |
| Boat | Holding breath | Breathe steadily, reduce intensity if needed |
Check your form regularly. A mirror helps. Or film yourself once a week to catch issues.
Safety First: Who Should Modify or Skip
Yoga is generally safe, but some conditions require adjustments. Always listen to your body.
| Condition | Poses to Modify | How to Modify |
|---|---|---|
| Knee issues | Chair, Warrior II | Reduce bend angle to 45 degrees, or less |
| Shoulder injury | Plank, Downward Dog | Try wall plank or skip these poses |
| Lower back pain | Bridge, Boat | Keep knees bent, reduce range of motion |
| High blood pressure | Downward Dog (inversions) | Use puppy pose instead (hips stay high, chest lowers) |
| Pregnancy (2nd/3rd trimester) | Boat, deep core work | Skip core-intensive poses, consult doctor |
| Wrist pain | Plank, Downward Dog | Use forearm plank, or dolphin pose |
| Balance issues | Warrior II, Mountain | Practice near a wall for support |
| Recent surgery | All poses | Get doctor clearance before starting |
When to stop: Sharp pain, dizziness, shortness of breath, or joint instability mean stop right away. Mild muscle fatigue is normal. Pain is not.
Track Your Progress
Strength builds gradually. Track your journey to stay motivated.
Signs you’re getting stronger:
- Holding poses longer without shaking as much
- Less need for modifications
- Better balance in standing poses
- Easier transitions between poses
- More control in challenging positions
- Recovery feels faster
📊 Strength Progress Tracker
Track your yoga journey and watch yourself grow stronger
Record Today's Session
Your Progress History
Your Statistics
Progress Over Time
Your Weekly Practice Schedule
Consistency beats intensity. This schedule builds strength without burnout.
| Day | Focus | Notes |
|---|---|---|
| Monday | Full routine | Start fresh, focus on form |
| Tuesday | Full routine | Notice which poses feel easier |
| Wednesday | Full routine | Hold each pose 10-15 sec longer |
| Thursday | Rest or gentle stretching | Let muscles recover and rebuild |
| Friday | Full routine | Try reducing one modification |
| Saturday | Full routine | Push a bit—increase hold times |
| Sunday | Rest or light practice | Listen to your body, optional routine |
Rest days matter. Your muscles grow stronger during recovery, not during the workout. Take at least one full rest day per week.
Making it a Habit: Consistency is Key
Beyond the 10 Minutes
Doing this 10-minute routine every day beats one long, intense session per week. Consistency builds strength faster than occasional hard workouts.
Pick a time that works for you. Morning yoga energizes your day. Evening yoga helps you unwind. The best time is the time you’ll actually do it.
Tips to build the habit:
- Practice at the same time each day
- Roll out your mat the night before
- Set a daily reminder on your phone
- Don’t judge yourself for bad days
- Even 5 minutes beats skipping entirely
Listen to Your Body
Work within your limits. Never push through sharp pain. Discomfort during effort is normal. Pain is a signal to back off.
Take breaks when needed. Skip a day if you’re sick or injured. This is about building a sustainable practice, not breaking yourself.
The difference between discomfort and pain:
- Discomfort: Muscle burn, shaking, feeling challenged but in control
- Pain: Sharp sensations, joint pain, anything that makes you wince or hold your breath
Always choose discomfort over pain.
Progressive Overload: Getting Stronger Over Time
As you get stronger, challenge yourself more. Small increases lead to big gains.
Week 1-2: Learn the poses, focus on form, use all modifications you need
Week 3-4: Hold poses for the full time, start reducing modifications
Week 5-6: Add 15 seconds to each pose, try full expressions of poses
Week 7-8: Hold poses 30 seconds longer, minimize modifications
Week 9+: Consider doing the routine twice daily, or explore more challenging poses
Your body adapts to stress by getting stronger. Keep challenging it gently but consistently.
Troubleshooting Common Problems
Running into issues? Here are quick fixes.
| Problem | Solution |
|---|---|
| Wrists hurt in Plank or Downward Dog | Try forearm plank or forearm downward dog instead |
| Can’t balance in Warrior II | Stand next to a wall, use it for light touch support |
| Hamstrings too tight in Downward Dog | Bend knees generously, focus on long spine not straight legs |
| Boat Pose feels impossible | Start with feet on floor, just lean back 30 degrees |
| Getting dizzy in Downward Dog | Rise slowly, pause in child’s pose, breathe |
| Routine feels too easy after 4 weeks | Hold each pose 30 seconds longer, reduce all modifications |
| Lower back hurts in Chair Pose | Don’t sink as deep, engage core more, lean torso forward slightly |
| Neck tension in any pose | Relax shoulders away from ears, keep neck long and neutral |
| Out of breath during routine | You’re working too hard, reduce intensity, rest more |
| Bored with the routine | Add music, practice outside, invite a friend to join |
Most problems have simple solutions. Don’t give up—adjust and keep going.
Combine Yoga With Other Activities
Yoga pairs well with almost any fitness routine. Here’s how to blend it in:
| Activity | How Yoga Helps | When to Practice |
|---|---|---|
| Running | Strengthens stabilizer muscles, protects knees, opens hips | After runs as cool-down |
| Cycling | Opens tight hips, strengthens core for better posture | Rest days or after rides |
| Swimming | Improves breathing control, adds dry-land strength | Morning before swim practice |
| Weightlifting | Improves flexibility, aids recovery, builds functional strength | Off days or as warm-up |
| Desk work | Counteracts sitting, improves posture, reduces tension | Lunch break or evening |
| Team sports | Builds body awareness, improves balance, prevents injury | Off-season or pre-game warm-up |
| Walking | Adds strength component, improves stability and balance | Any time, they complement each other |
You don’t need to choose between yoga and other workouts. They work better together.
After Your First Week: What’s Next?
You’ve completed your first week. Great work. Here’s what to focus on now.
Week 2 Focus: Refine Your Form
- Notice which poses feel easier
- Check alignment in each position
- Film yourself to spot issues
- Try holding poses 10 seconds longer
Week 3-4 Focus: Build Endurance
- Reduce modifications where you can
- Focus on steady breathing throughout
- Notice how recovery time decreases
- Add a second short practice if time allows
Week 5-8 Focus: Increase Intensity
- Hold poses 30 seconds longer
- Try full expressions of modified poses
- Add tiny pulses or movements in static holds
- Consider adding more challenging poses
Beyond Week 8: Expand Your Practice
- Explore other yoga styles: Power Yoga, Vinyasa, Ashtanga
- Take a local class or try online tutorials
- Add balance-focused poses like Tree or Eagle
- Build up to a 20 or 30-minute practice
Strength builds gradually. Trust the process. Keep showing up.
Conclusion
You’ve learned 7 poses that build full-body strength in just 10 minutes a day. Mountain Pose grounds you. Chair Pose fires up your legs. Plank builds your core. Downward Dog strengthens your upper body. Warrior II develops power and endurance. Bridge Pose activates your back body. Boat Pose finishes with deep core work.
This routine gives you everything you need to start. No gym. No equipment. No excuses.
The research proves it works. A 12-week study showed 31% improvement in push-up strength and 57% improvement in curl-up performance. Multiple analyses confirm that yoga builds real muscle strength, especially in the lower body. The gains match traditional strengthening exercises.
You have the routine. You have the modifications. You have the troubleshooting guide. You know what muscles you’re working and why each pose matters.
Your Action Plan
Today: Read through the routine again. Watch videos of each pose if you want extra guidance. Gather your mat and space.
Tomorrow: Try each pose individually for 15-30 seconds. Learn what they feel like in your body.
Day 3: Do the full 10-minute routine. Don’t worry about perfection. Just move through it.
Week 2: Assess your progress using the tracking table. Adjust modifications as needed.
Week 4: Increase hold times by 15 seconds per pose. Notice how much stronger you feel.
Week 8: You’ll be holding poses longer, using fewer modifications, and feeling confident in your practice.
Strength is available to everyone. You don’t need to be flexible or fit to begin. You just need to show up, breathe, and move.
Your 10-minute routine starts now. Unroll your mat. Take the first step. Your stronger self is waiting.
FAQs
Can yoga really build muscle like weightlifting?
Yoga builds lean muscle and functional strength. While it won’t bulk you up like heavy weightlifting, studies show it’s equally effective for functional fitness and moderate muscle gains. The 12-week study mentioned earlier showed a 31% improvement in push-up performance, proving yoga creates real strength gains.
How long before I see results?
Most people notice improved strength and stability within 2-3 weeks of daily practice. You’ll feel steadier in poses and less shaky. Visible muscle tone typically appears after 6-8 weeks of consistent practice. But you’ll feel different before you look different.
Should I do this routine before or after cardio?
Either works well. Yoga before cardio warms you up and prepares your muscles for activity. Yoga after cardio helps with recovery and flexibility while your muscles are warm. Try both and see what feels better for your body.
Can I do this routine every day?
Yes. These poses are safe for daily practice. Your muscles can handle this level of work with 24 hours of recovery. Take rest days if you feel overly fatigued, sick, or if specific muscles feel strained.
I can’t hold poses for the full time. What should I do?
Start with whatever you can hold, even if it’s just 15 seconds. Rest for a few breaths. Try the pose again. Build up gradually. You’ll add 5-10 seconds each week. Within a month, you’ll hit the full times. Progress isn’t linear—some days you’ll do better than others.
Do I need to be flexible to start?
No. Strength often comes before flexibility. Many strong people start yoga with tight muscles. You’ll gain both strength and flexibility over time. The two develop together. Don’t let tight hamstrings stop you from starting.
What if I have an injury?
Check with your doctor or physical therapist before starting any new exercise program. Most injuries have modifications that allow you to practice safely. The modifications listed in this article cover common issues. But when in doubt, ask a healthcare professional.
Will this help me lose weight?
This routine burns calories and builds muscle, which increases your metabolism. But weight loss depends mostly on your nutrition. Think of this routine as a strength-building practice that supports weight loss efforts when combined with healthy eating. Studies show that regular yoga practice helps with weight management, but it works best as part of a complete approach.


